


BACKGROUND
Welcome to the case study for Cisco's IX5000 Telepresence unit. Cisco is the leader in life-size, life-like, Teleconference Systems but declining interest and high cost was making the segment unprofitable.
Cisco wanted to revise their flagship product and to fix the cost and installation time overruns. This top of the line system was also going to bring a new holistic approach to Cisco’s ID design.
THE CHALLENGE
Cisco was riddled with diverging internal verticals, each with their own design consultants, that was taking the communications juggernaut in the wrong direction. WIth the recent buyout of Tandberg, internal forces created additional friction to design adoption.
As the Senior Creative Lead, I'll walk you through how we gained support by understanding the consumer and by working hand-in-hand with technical parties from all disciplines to get sign off on corporate changing, branded design solutions.
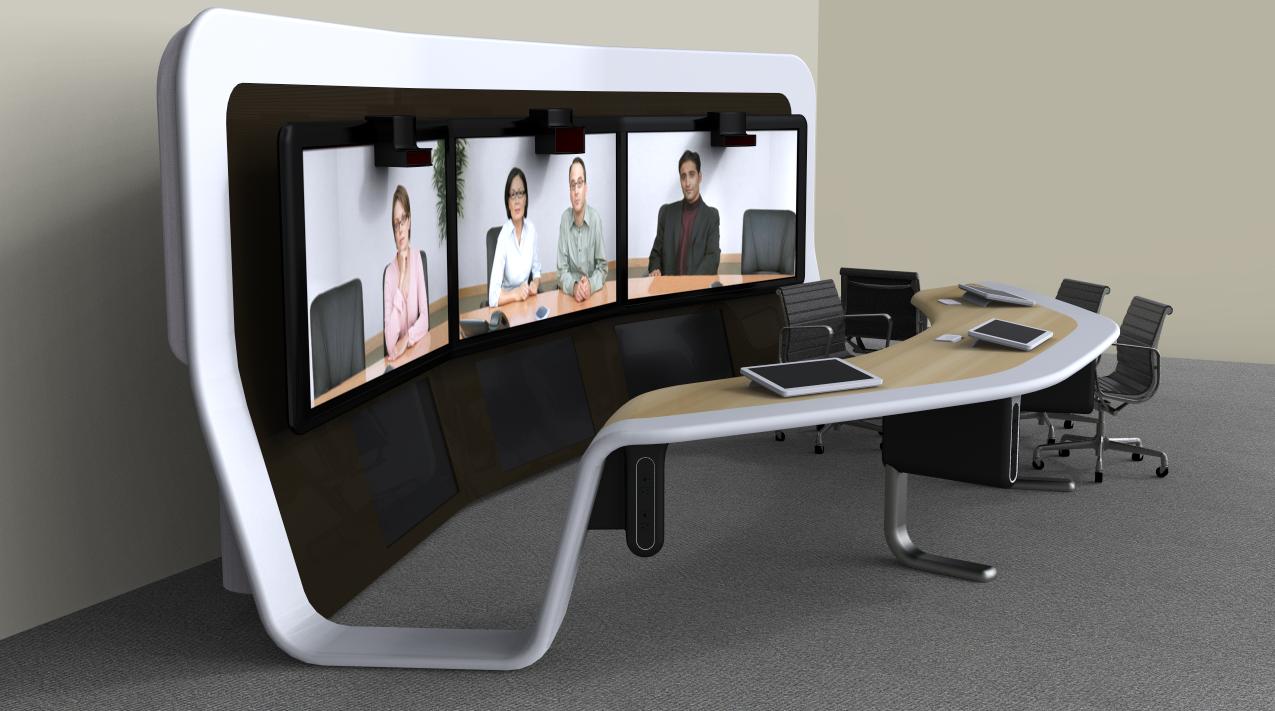
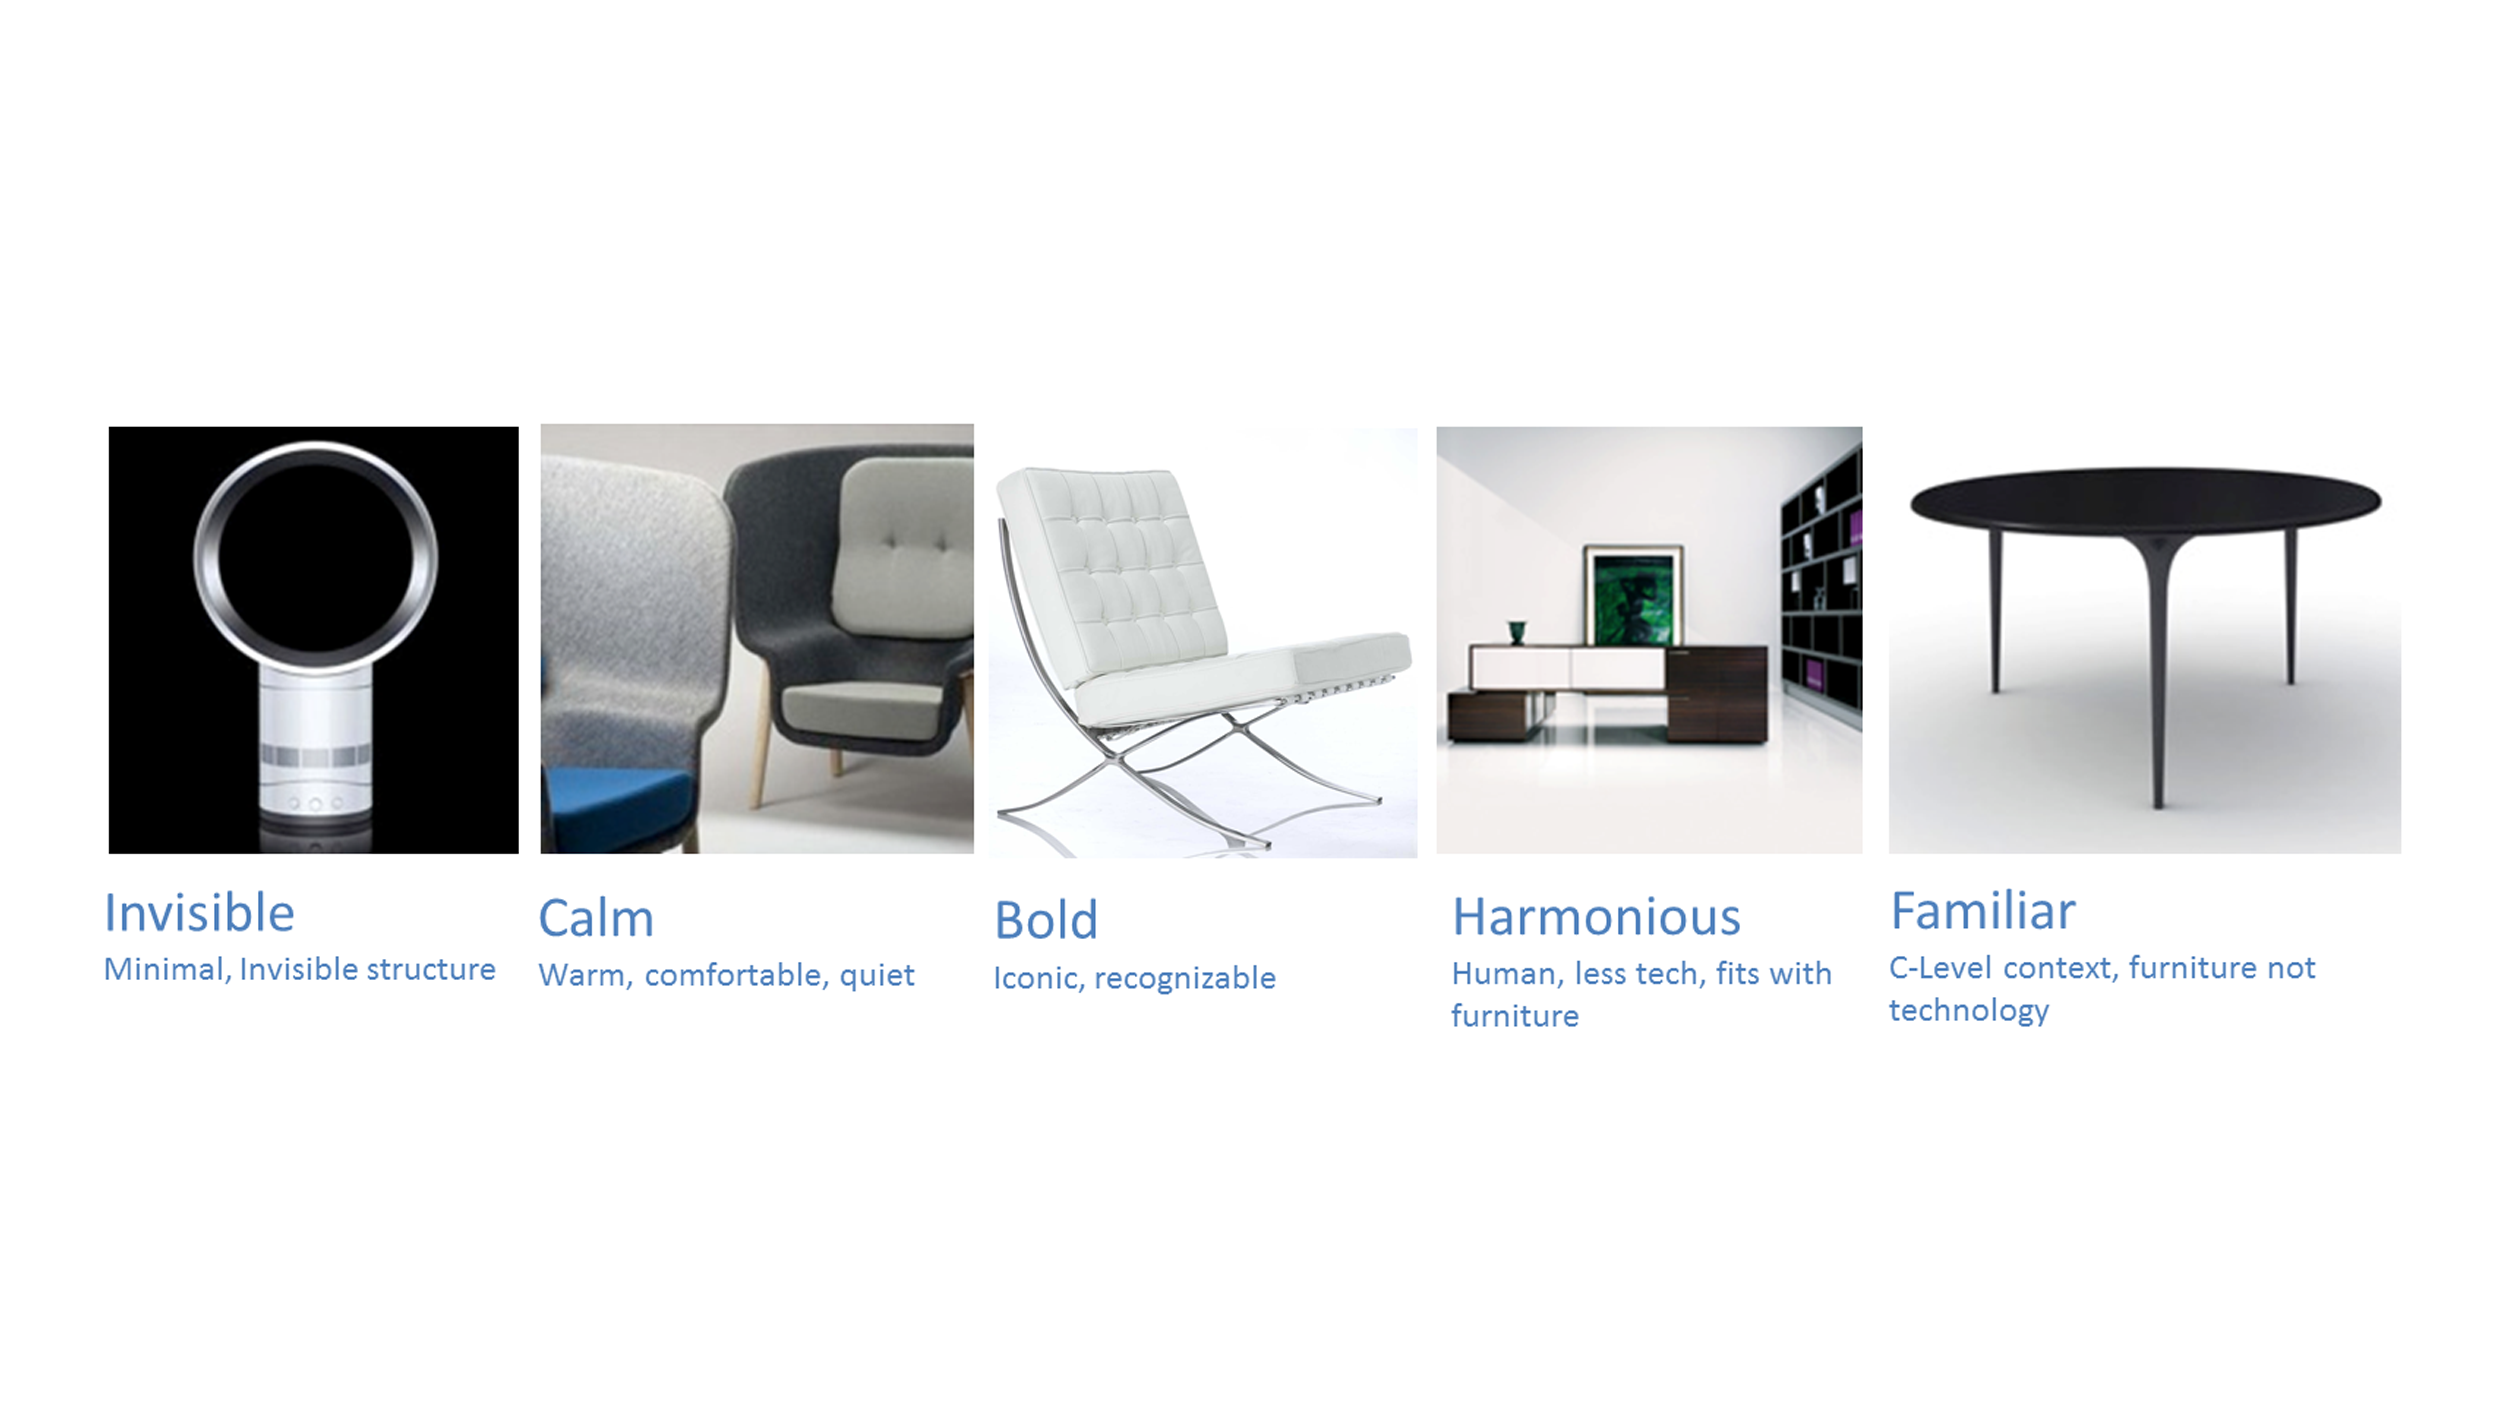
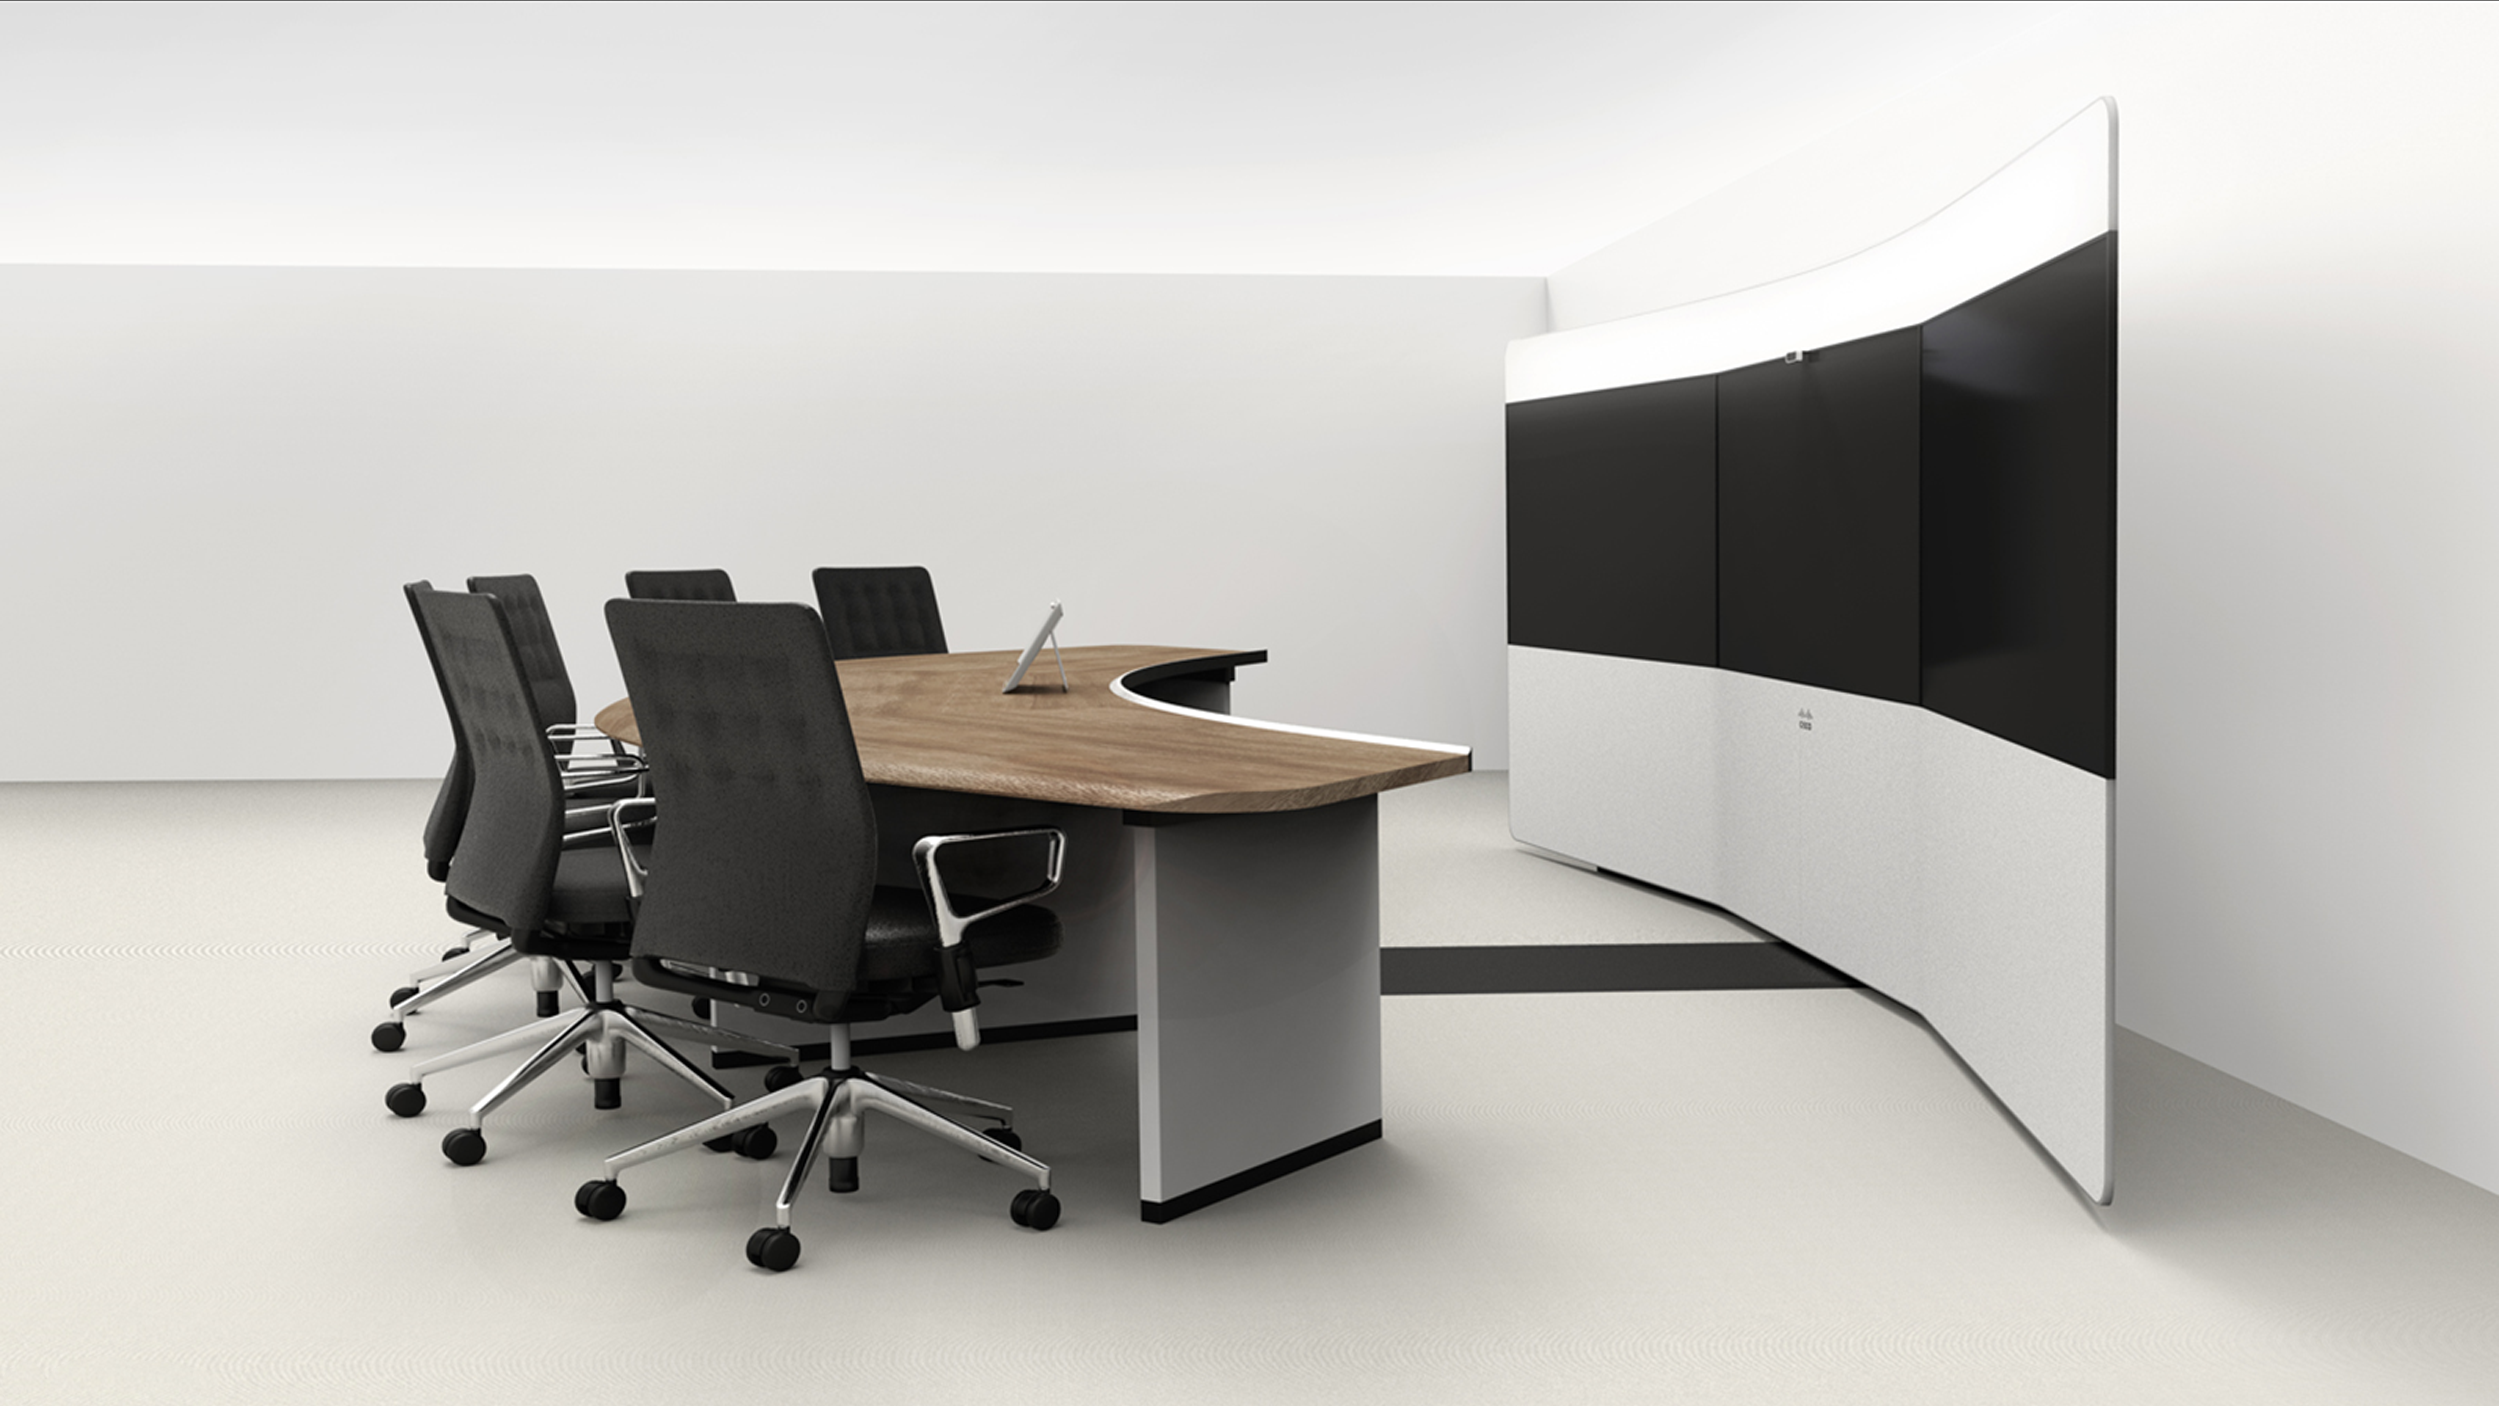
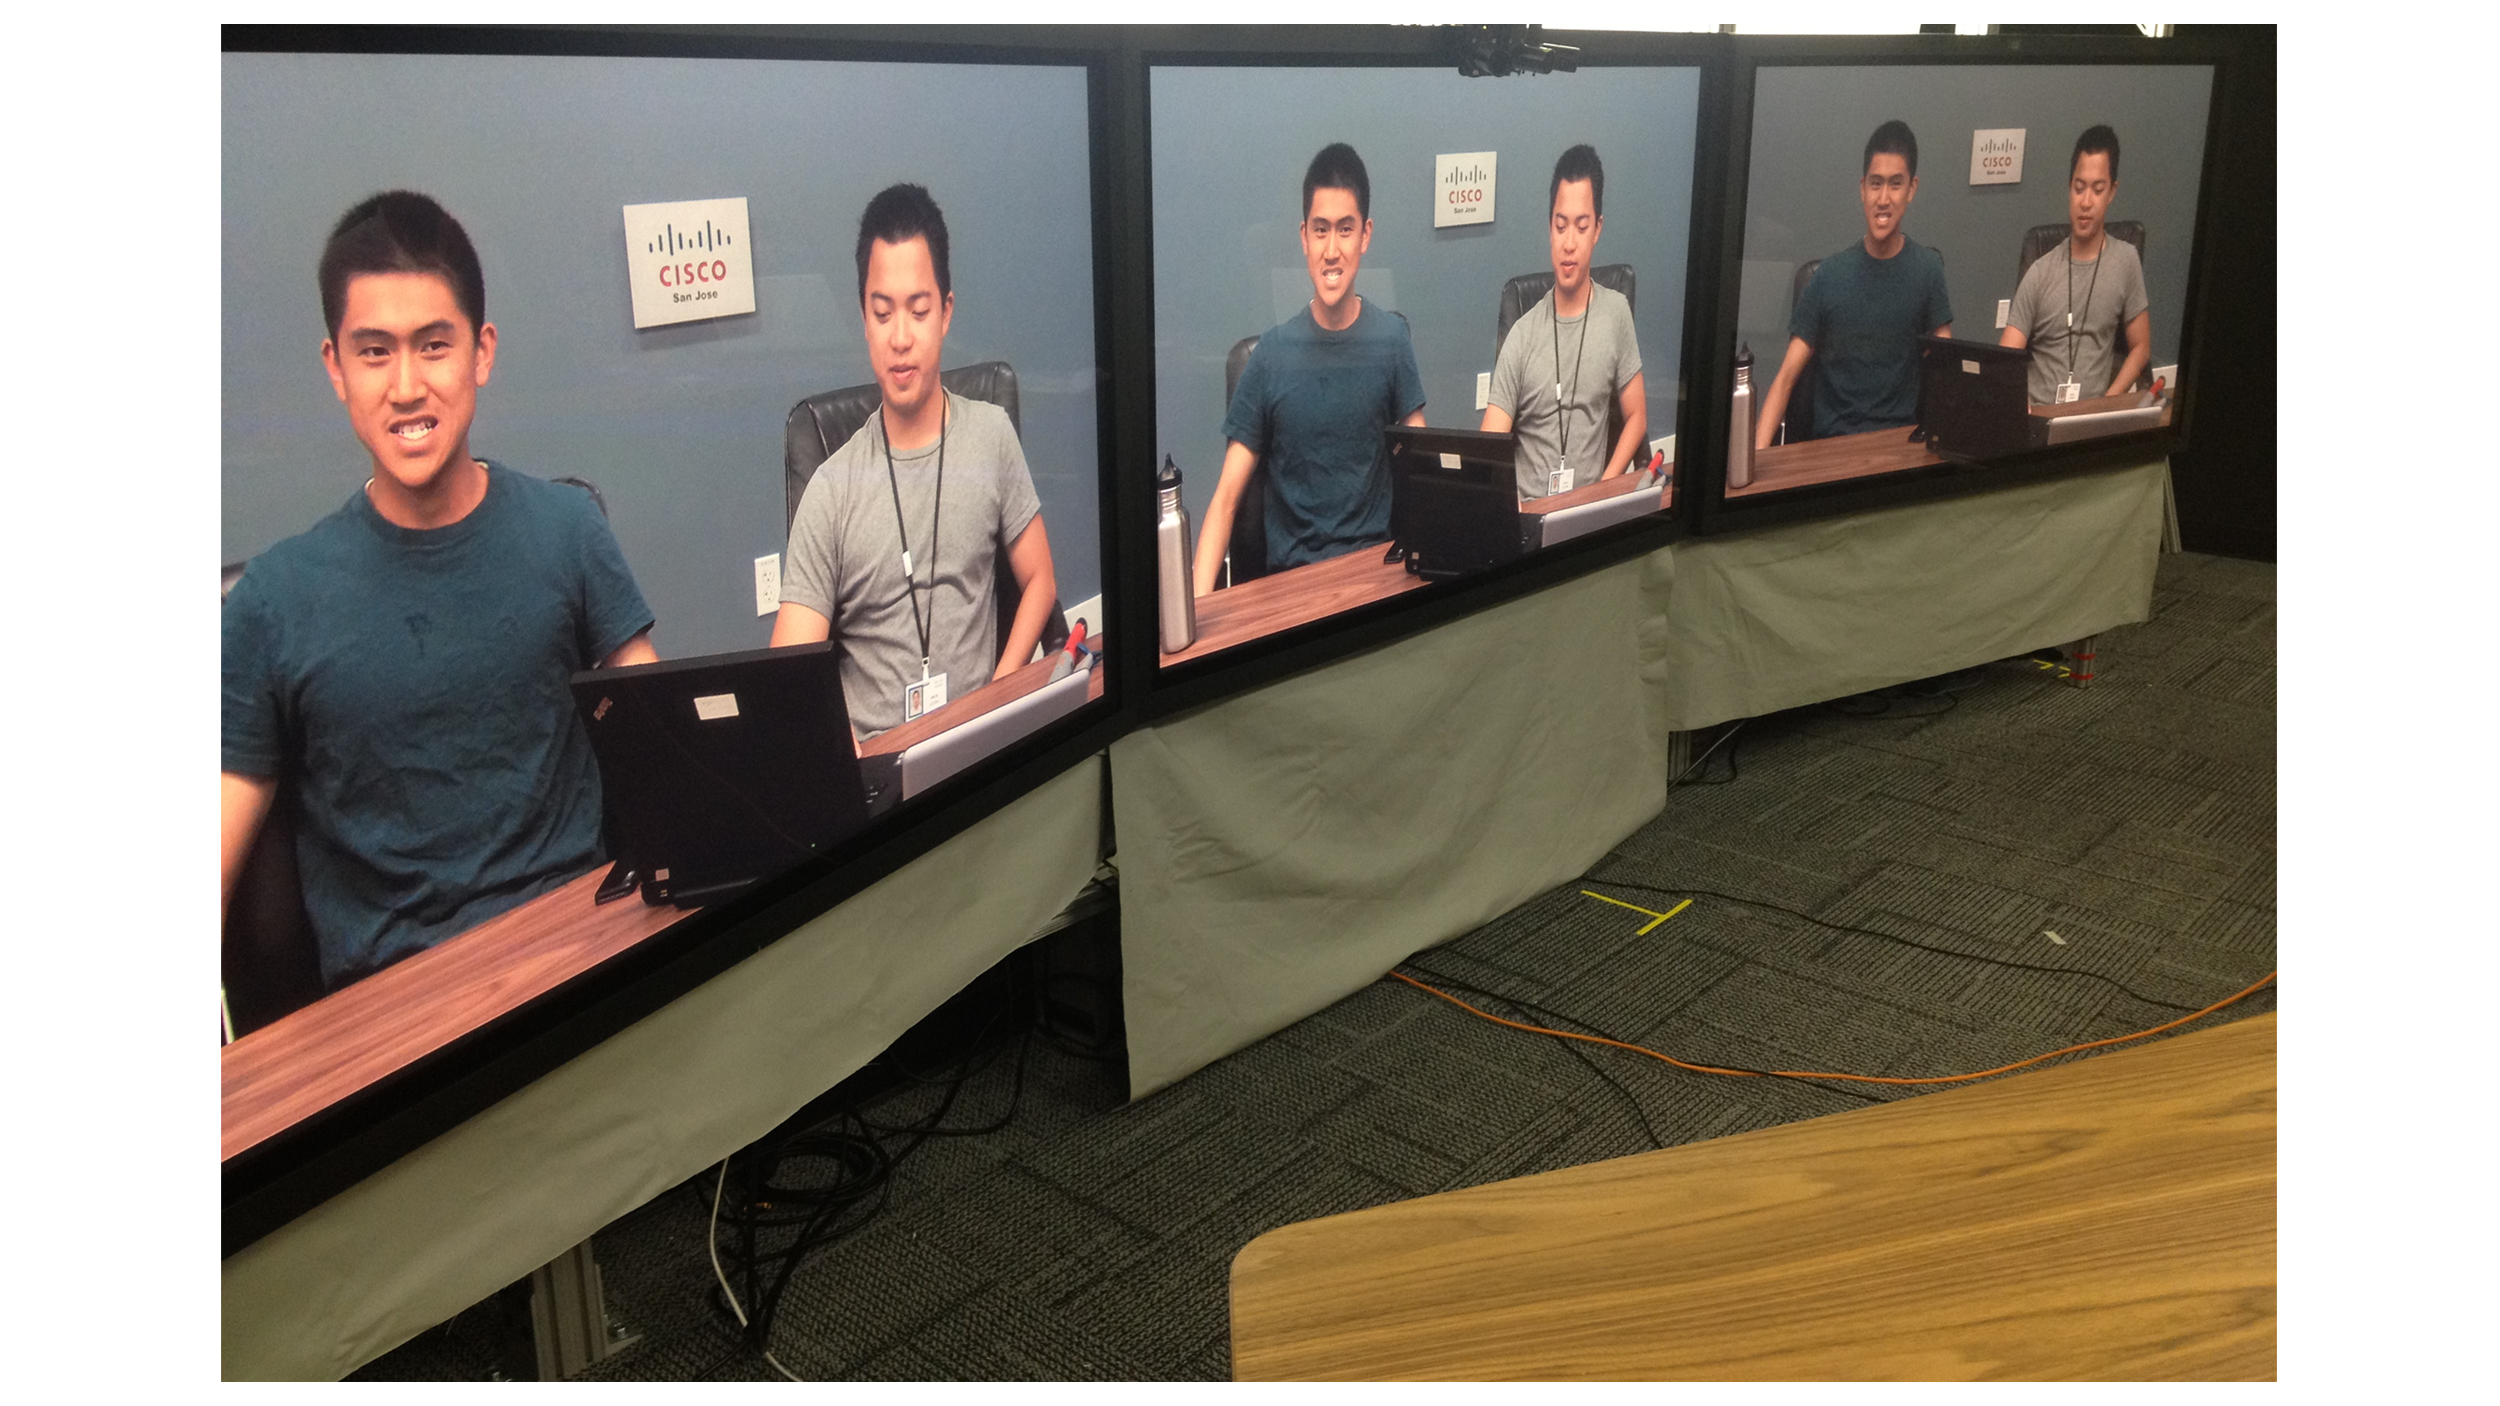
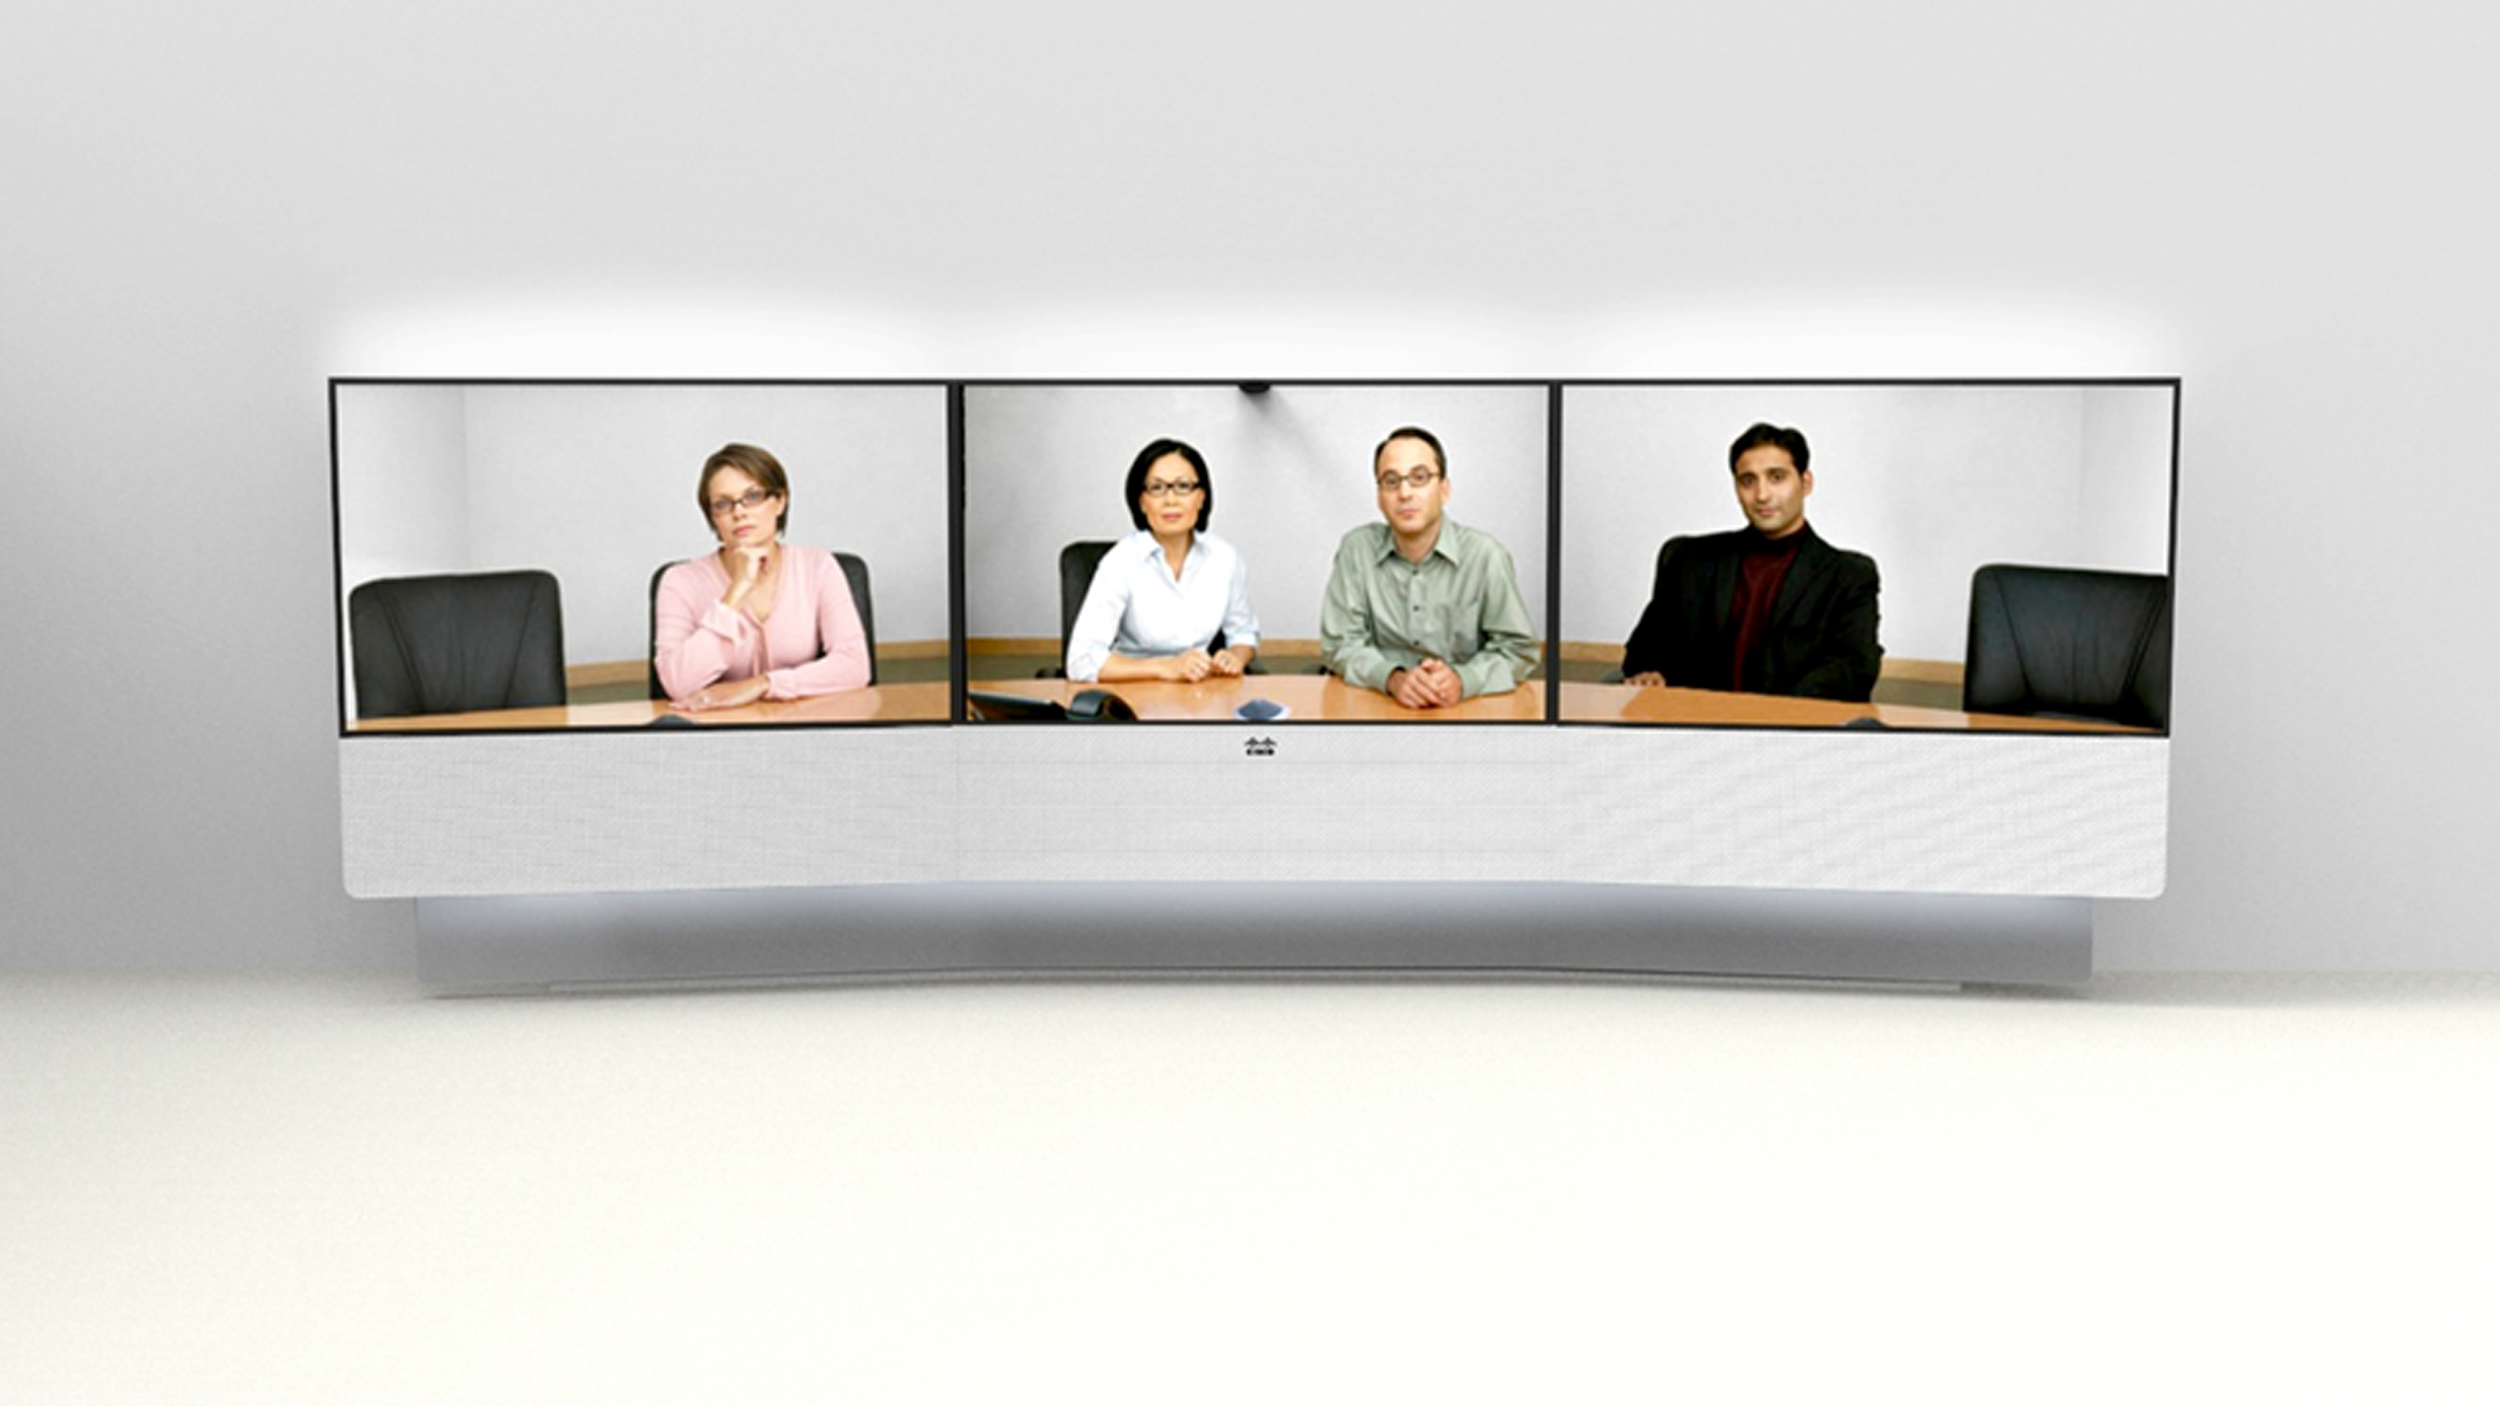
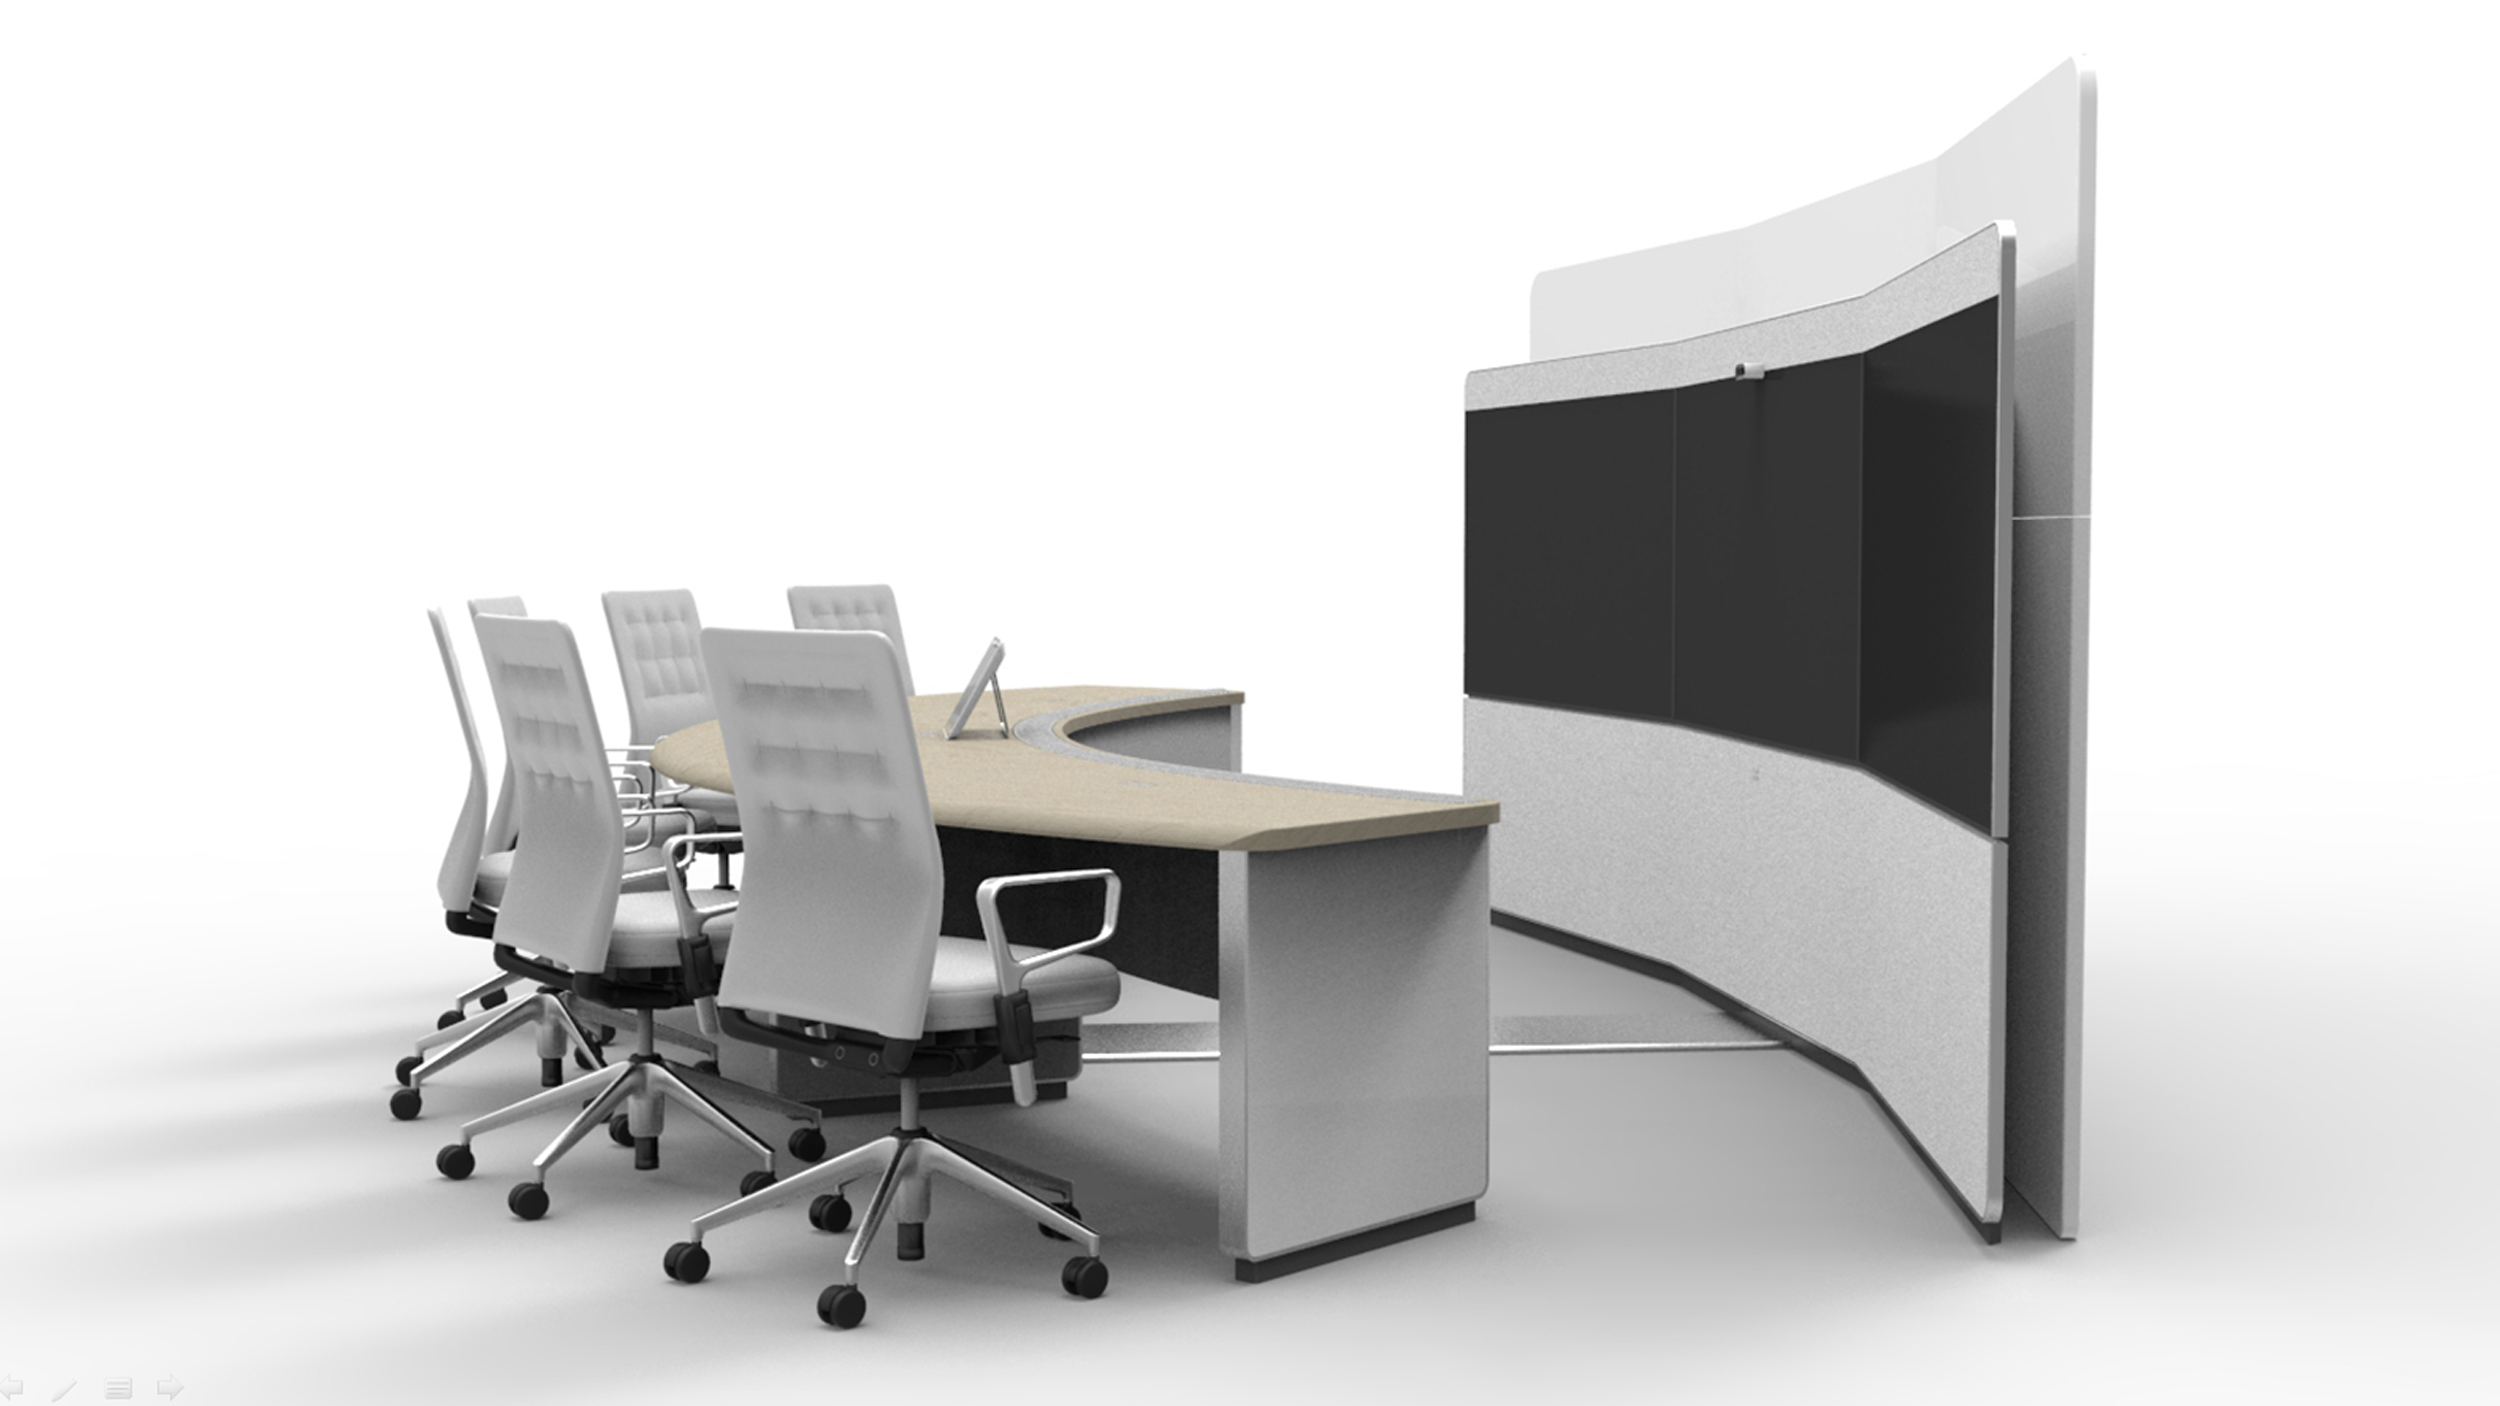
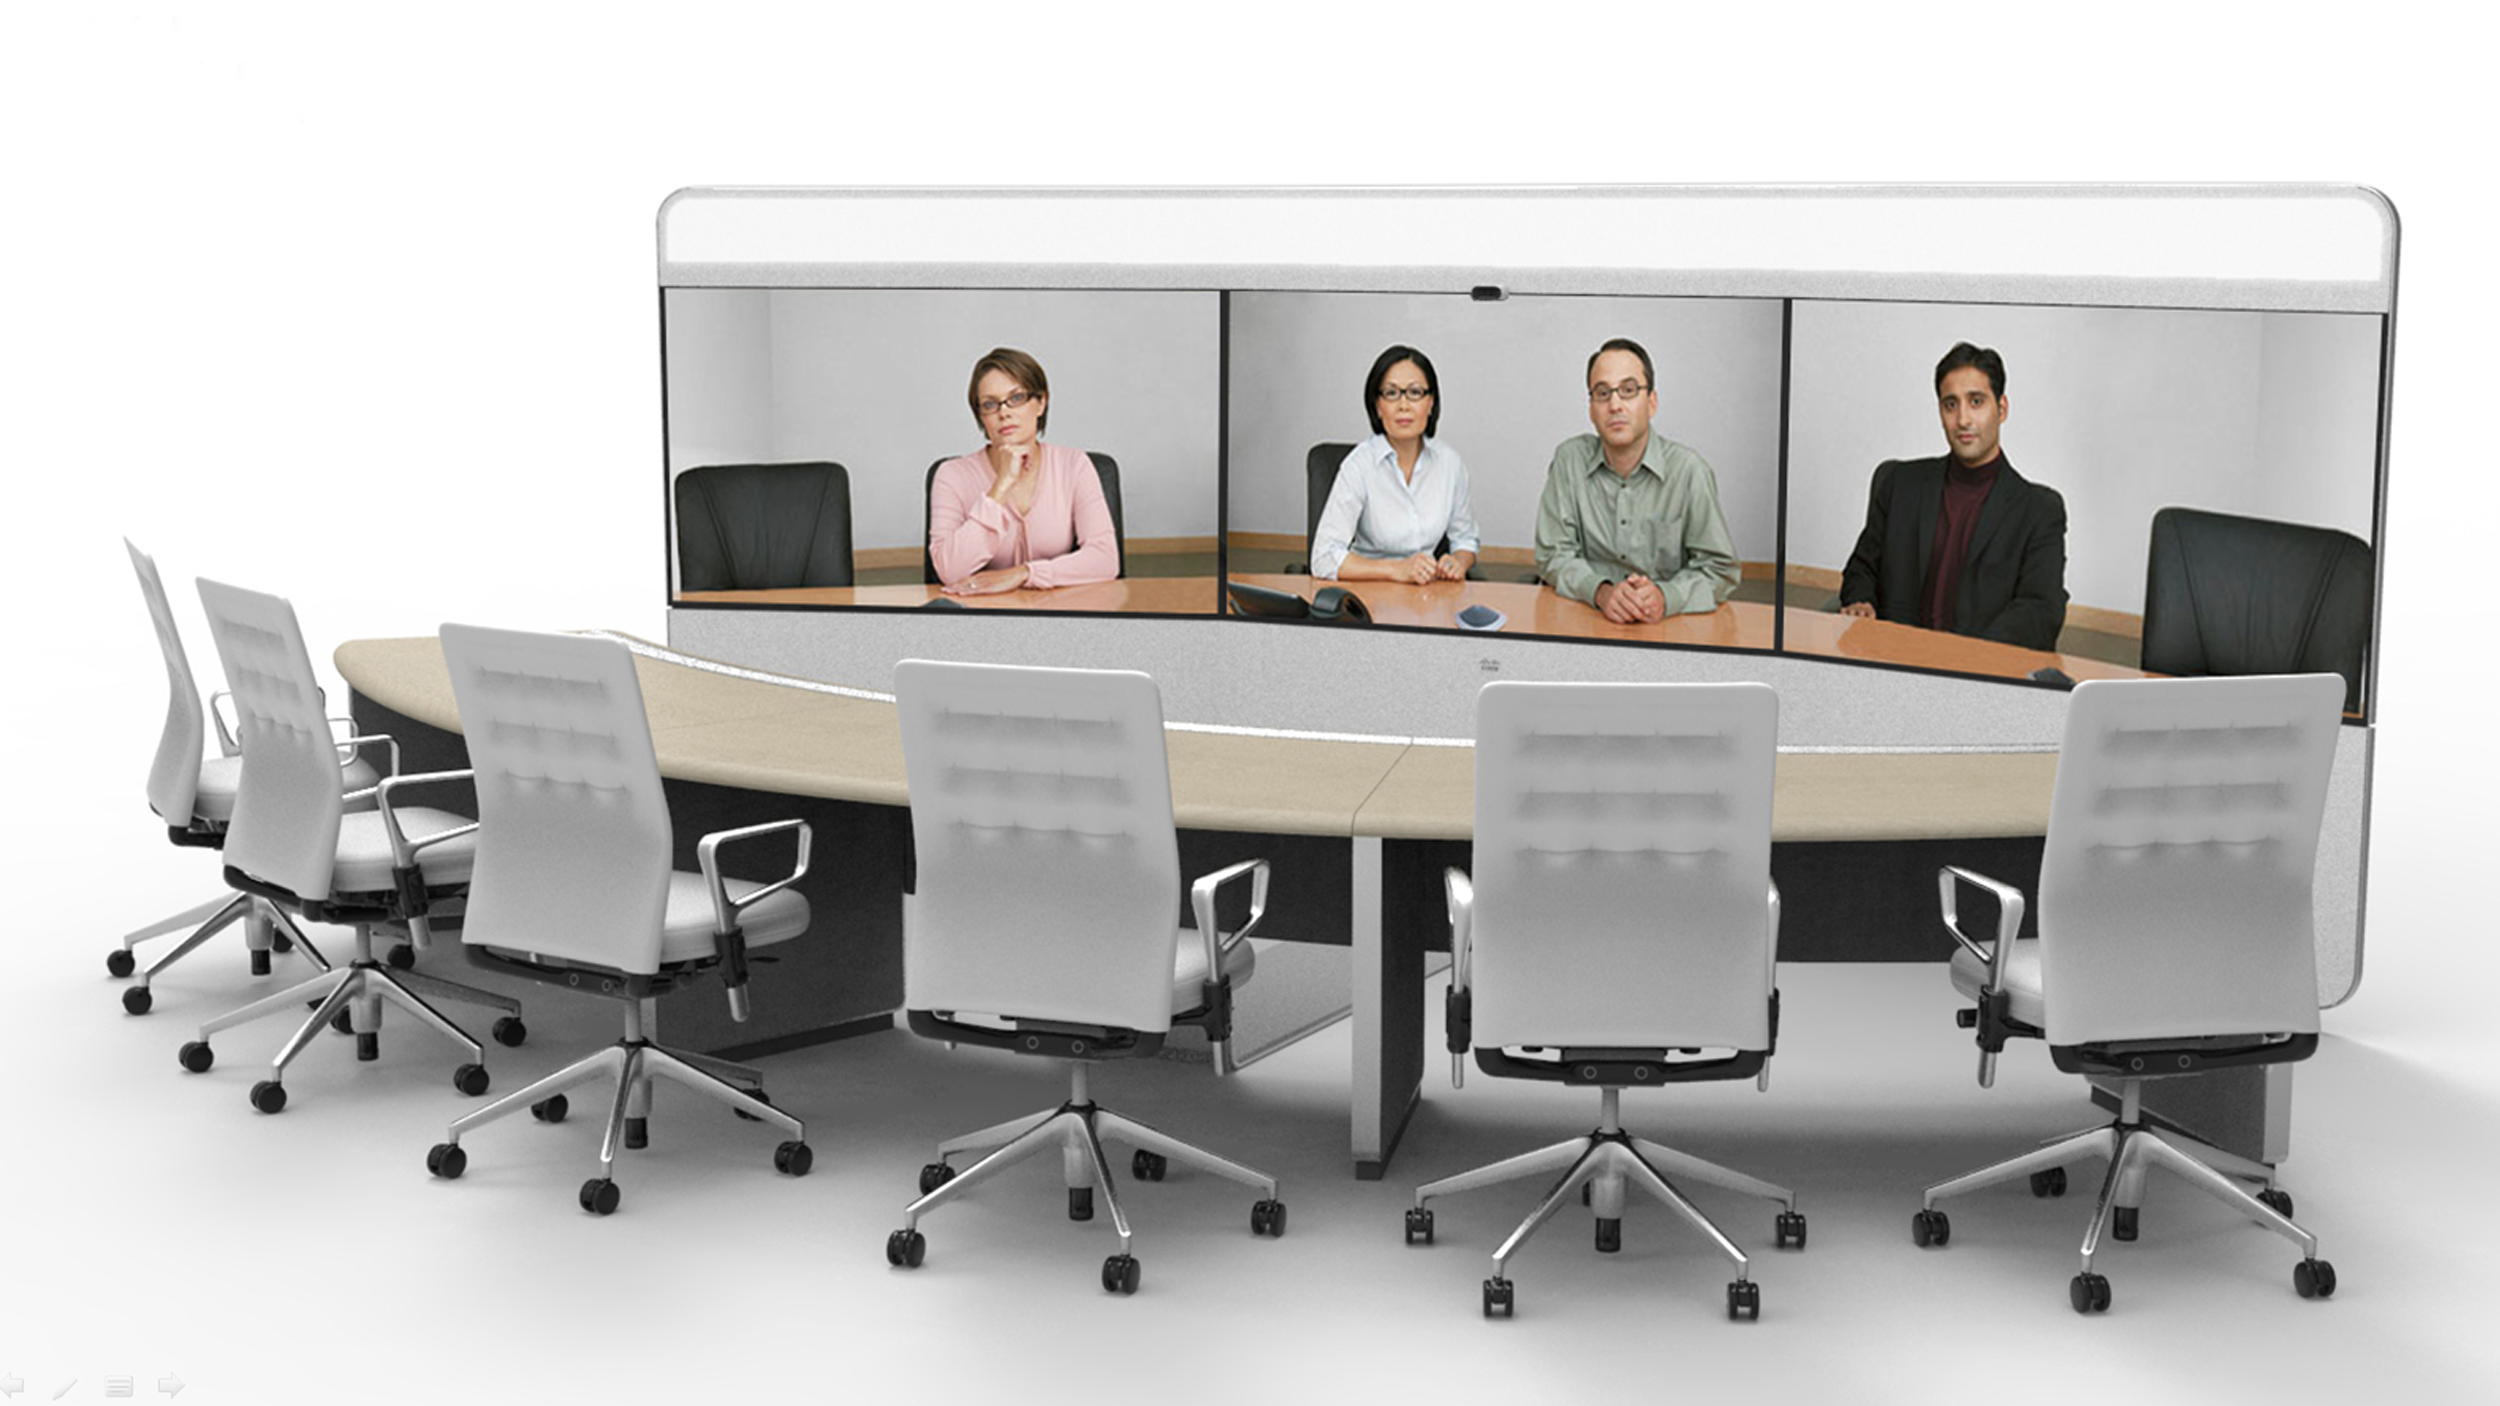
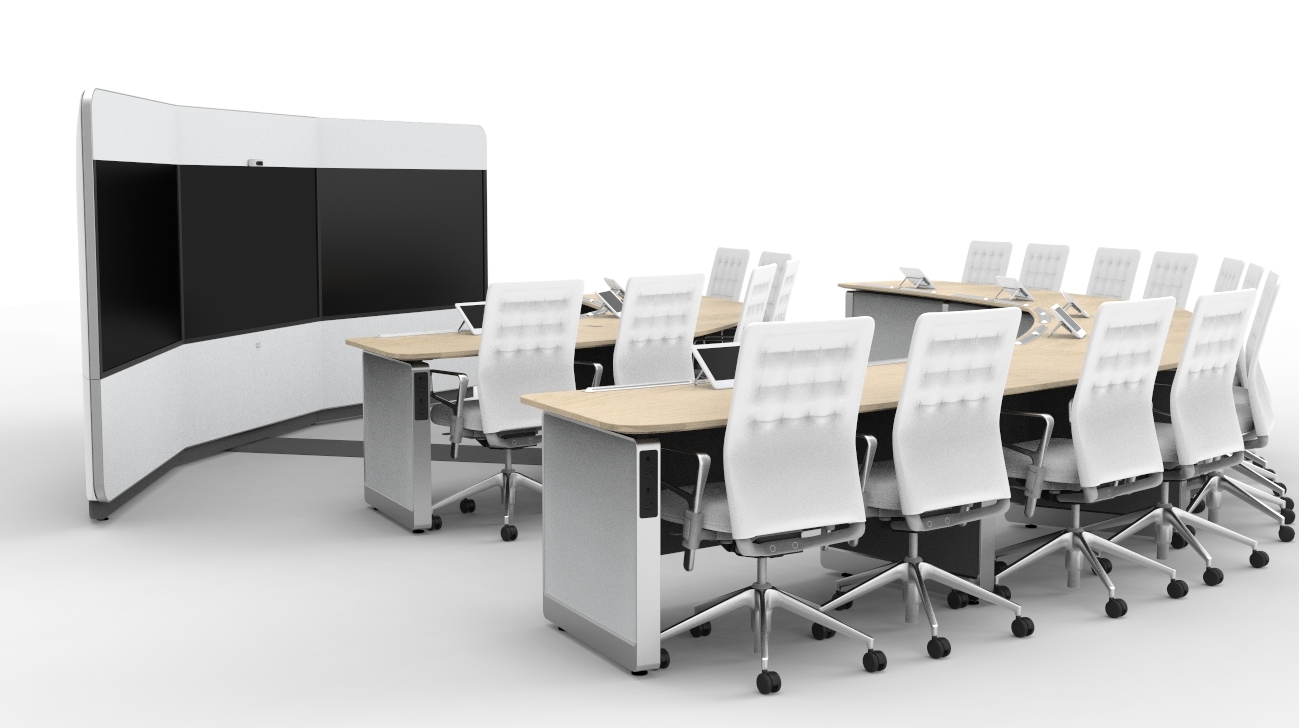
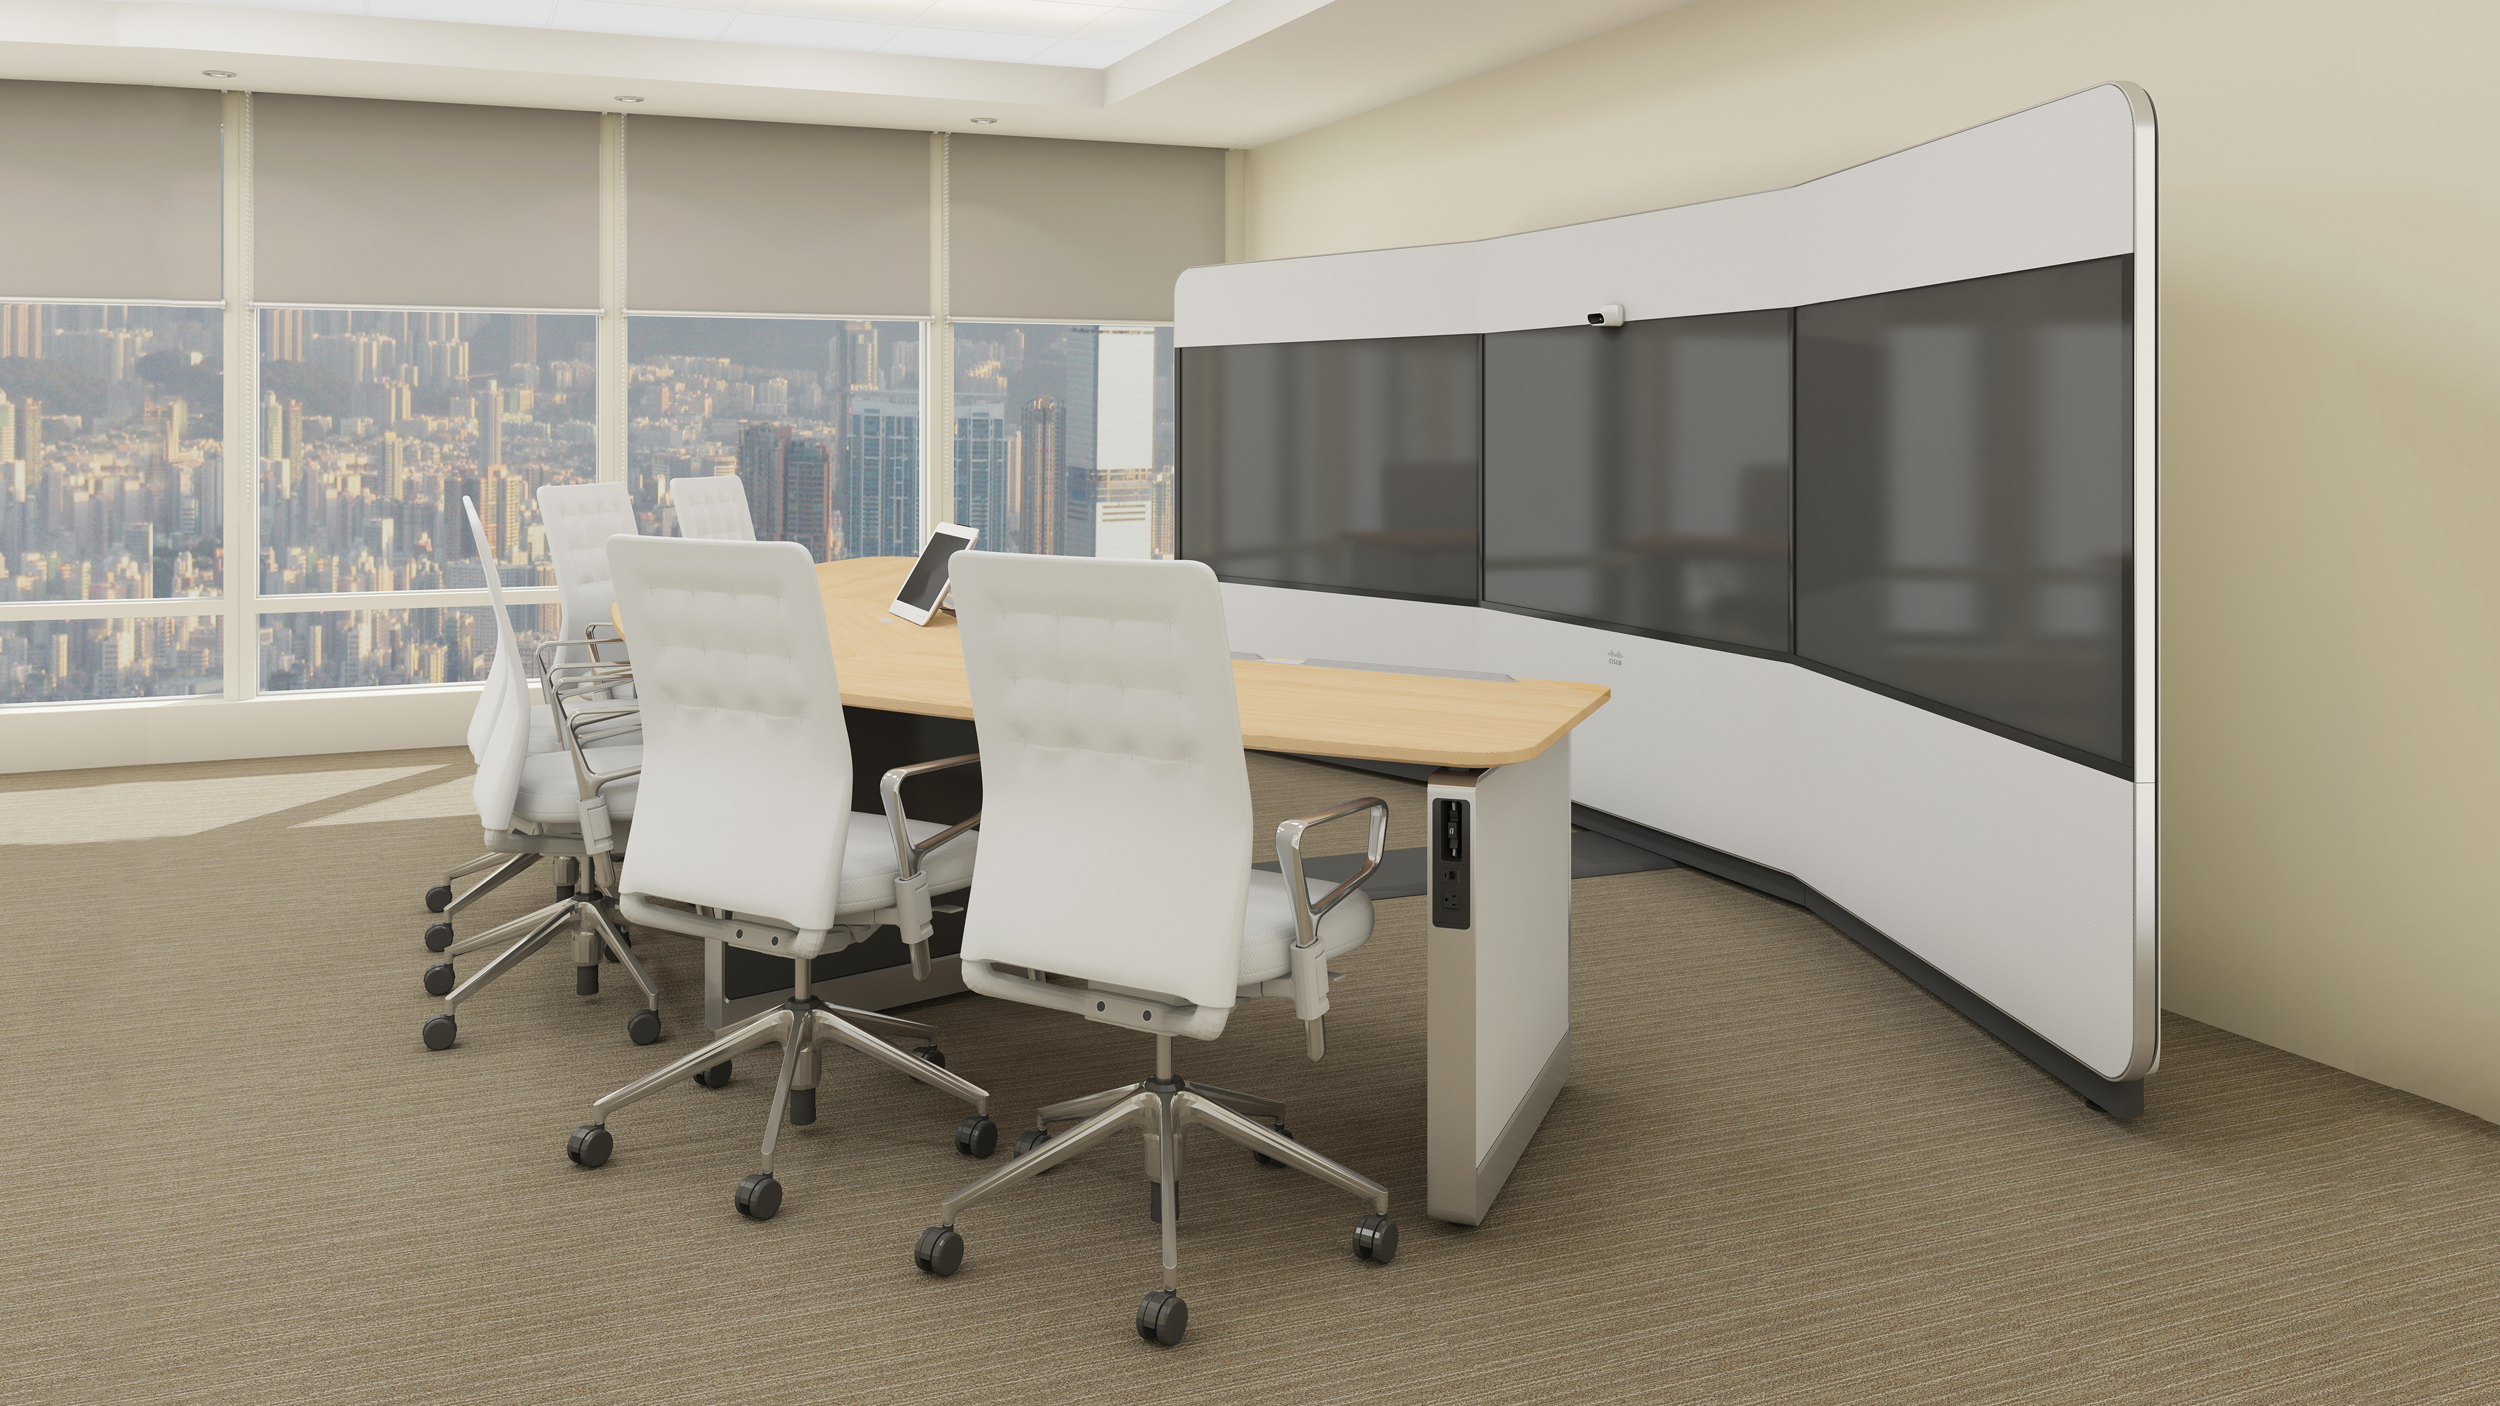
The IX5000 is an immersive video and data communications device with three screens that addresses the challenges of collaborative work. Our primary objective was to create a unit that reflects the importance of round table discussions with data, all while unifying the design language of the Collaboration Technology Group.
A request to lower COGs and set up time would not have been possible without experience from two prior programs. Taking past engineering and design experience allowed the team to push innovation and design for nearly every component in this release.
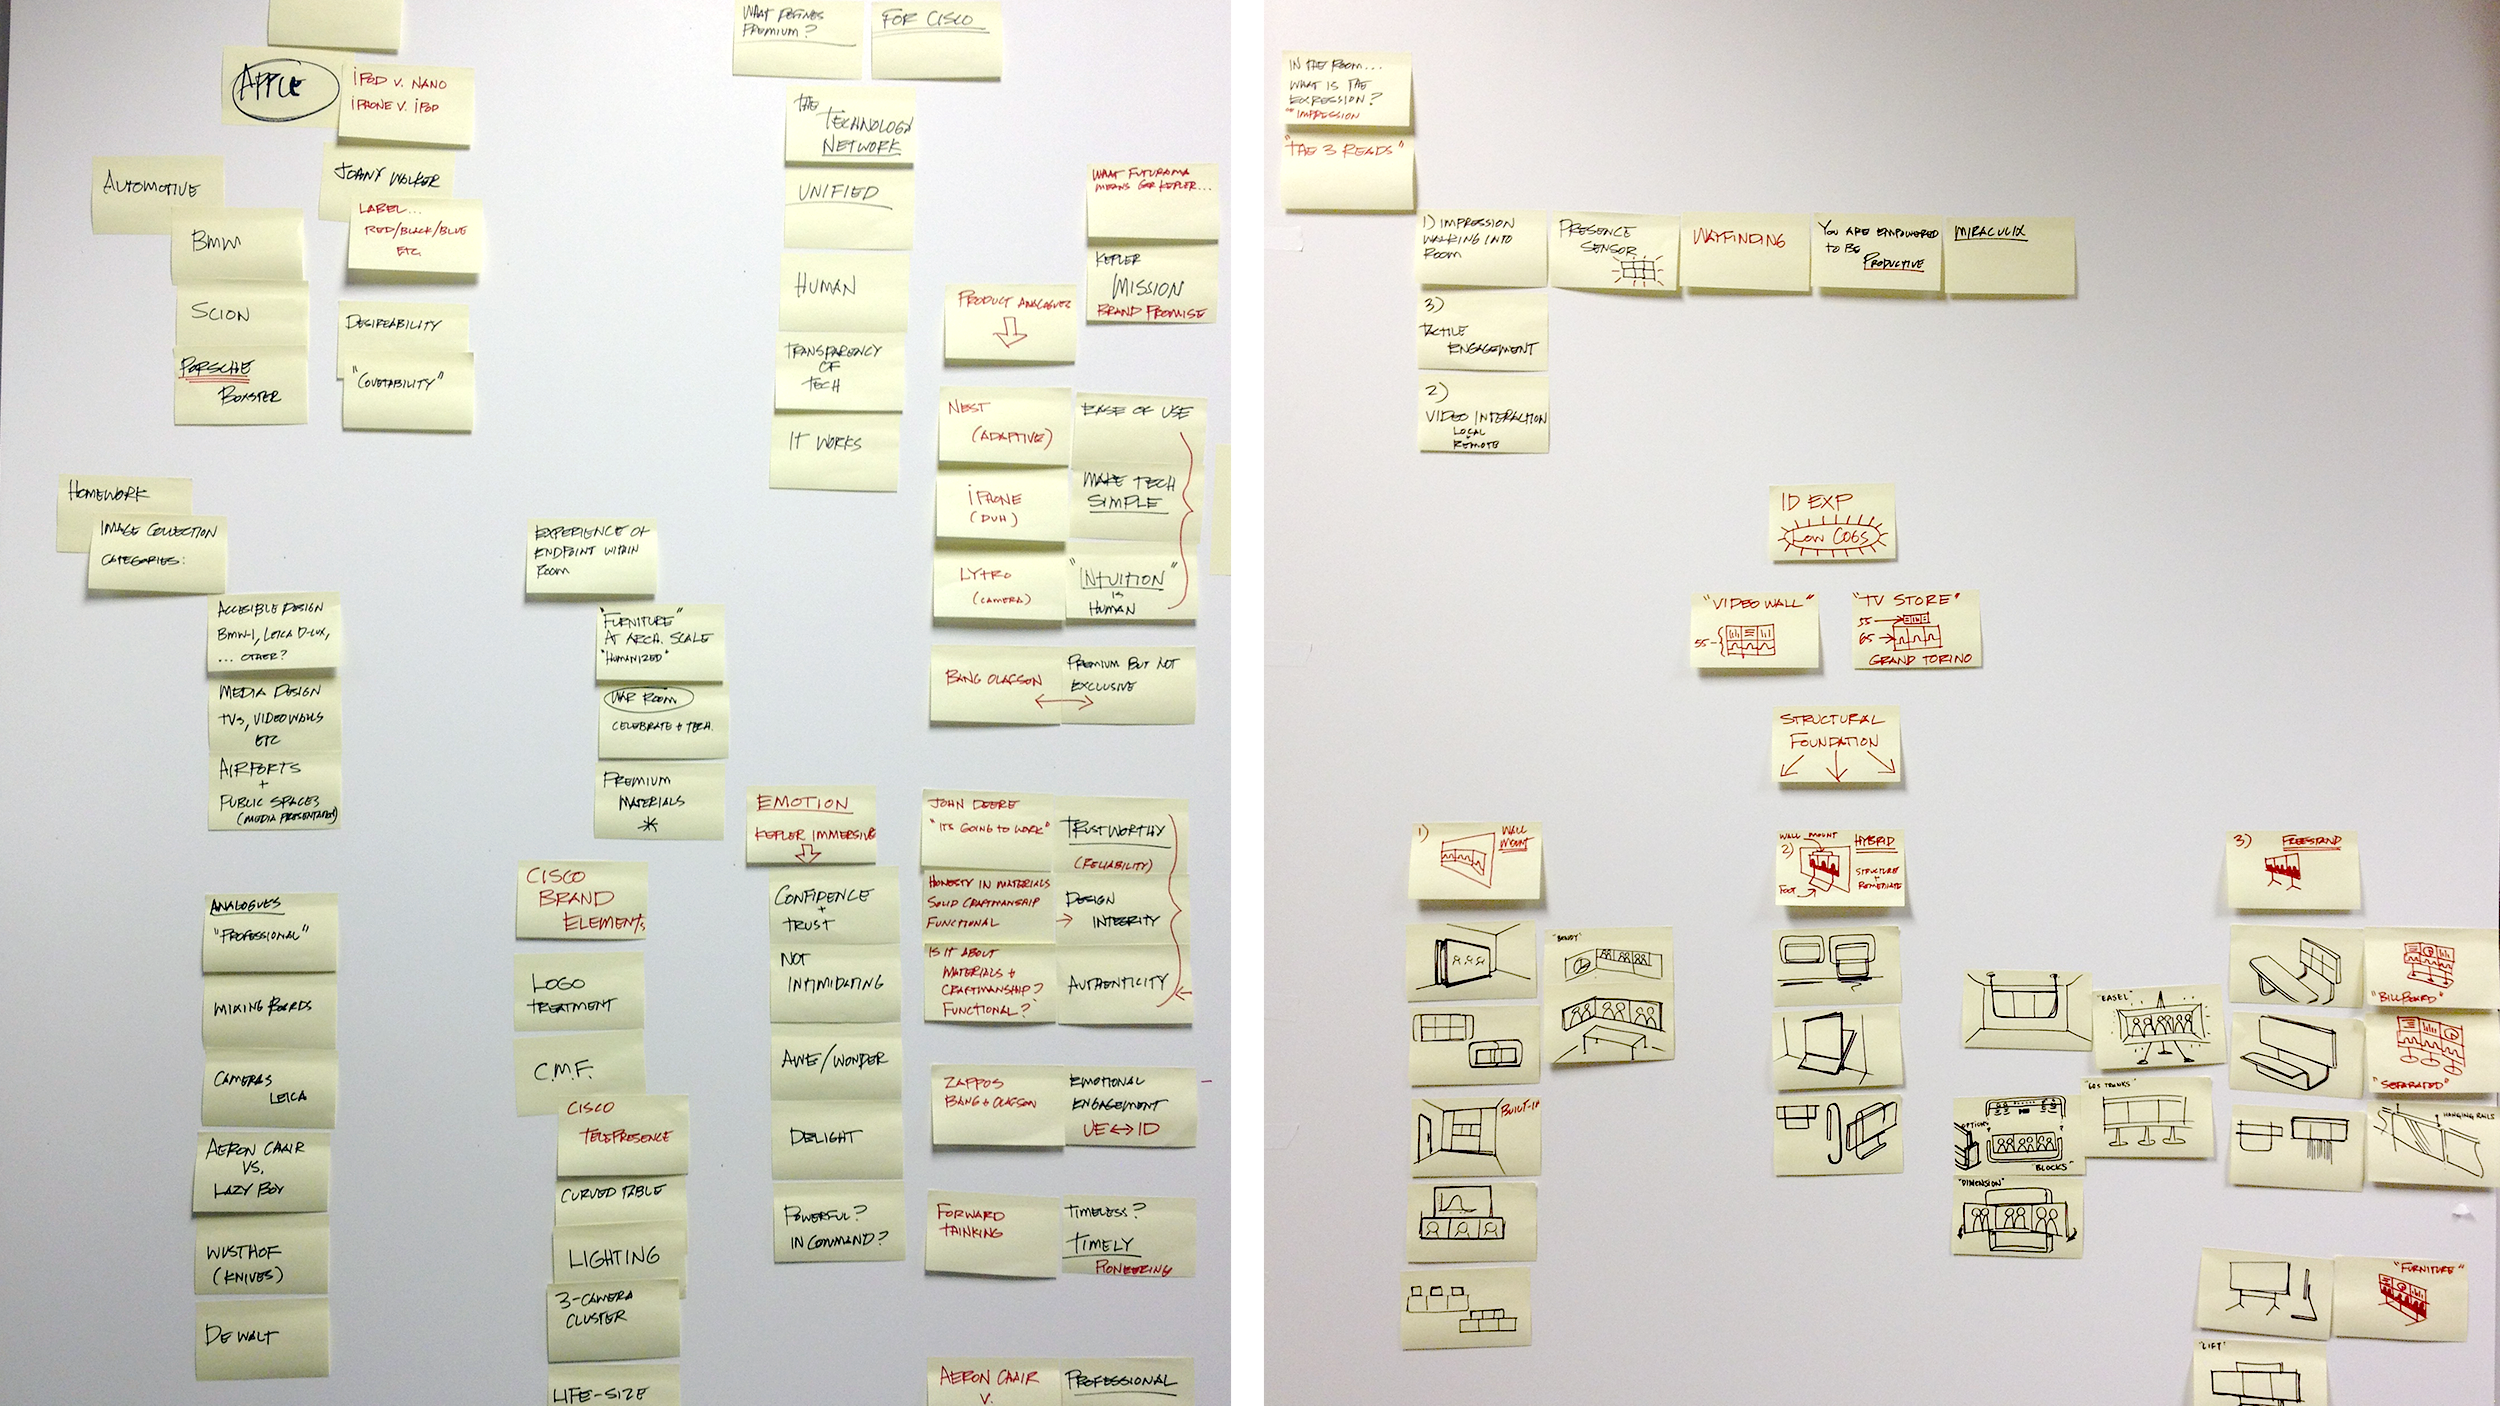
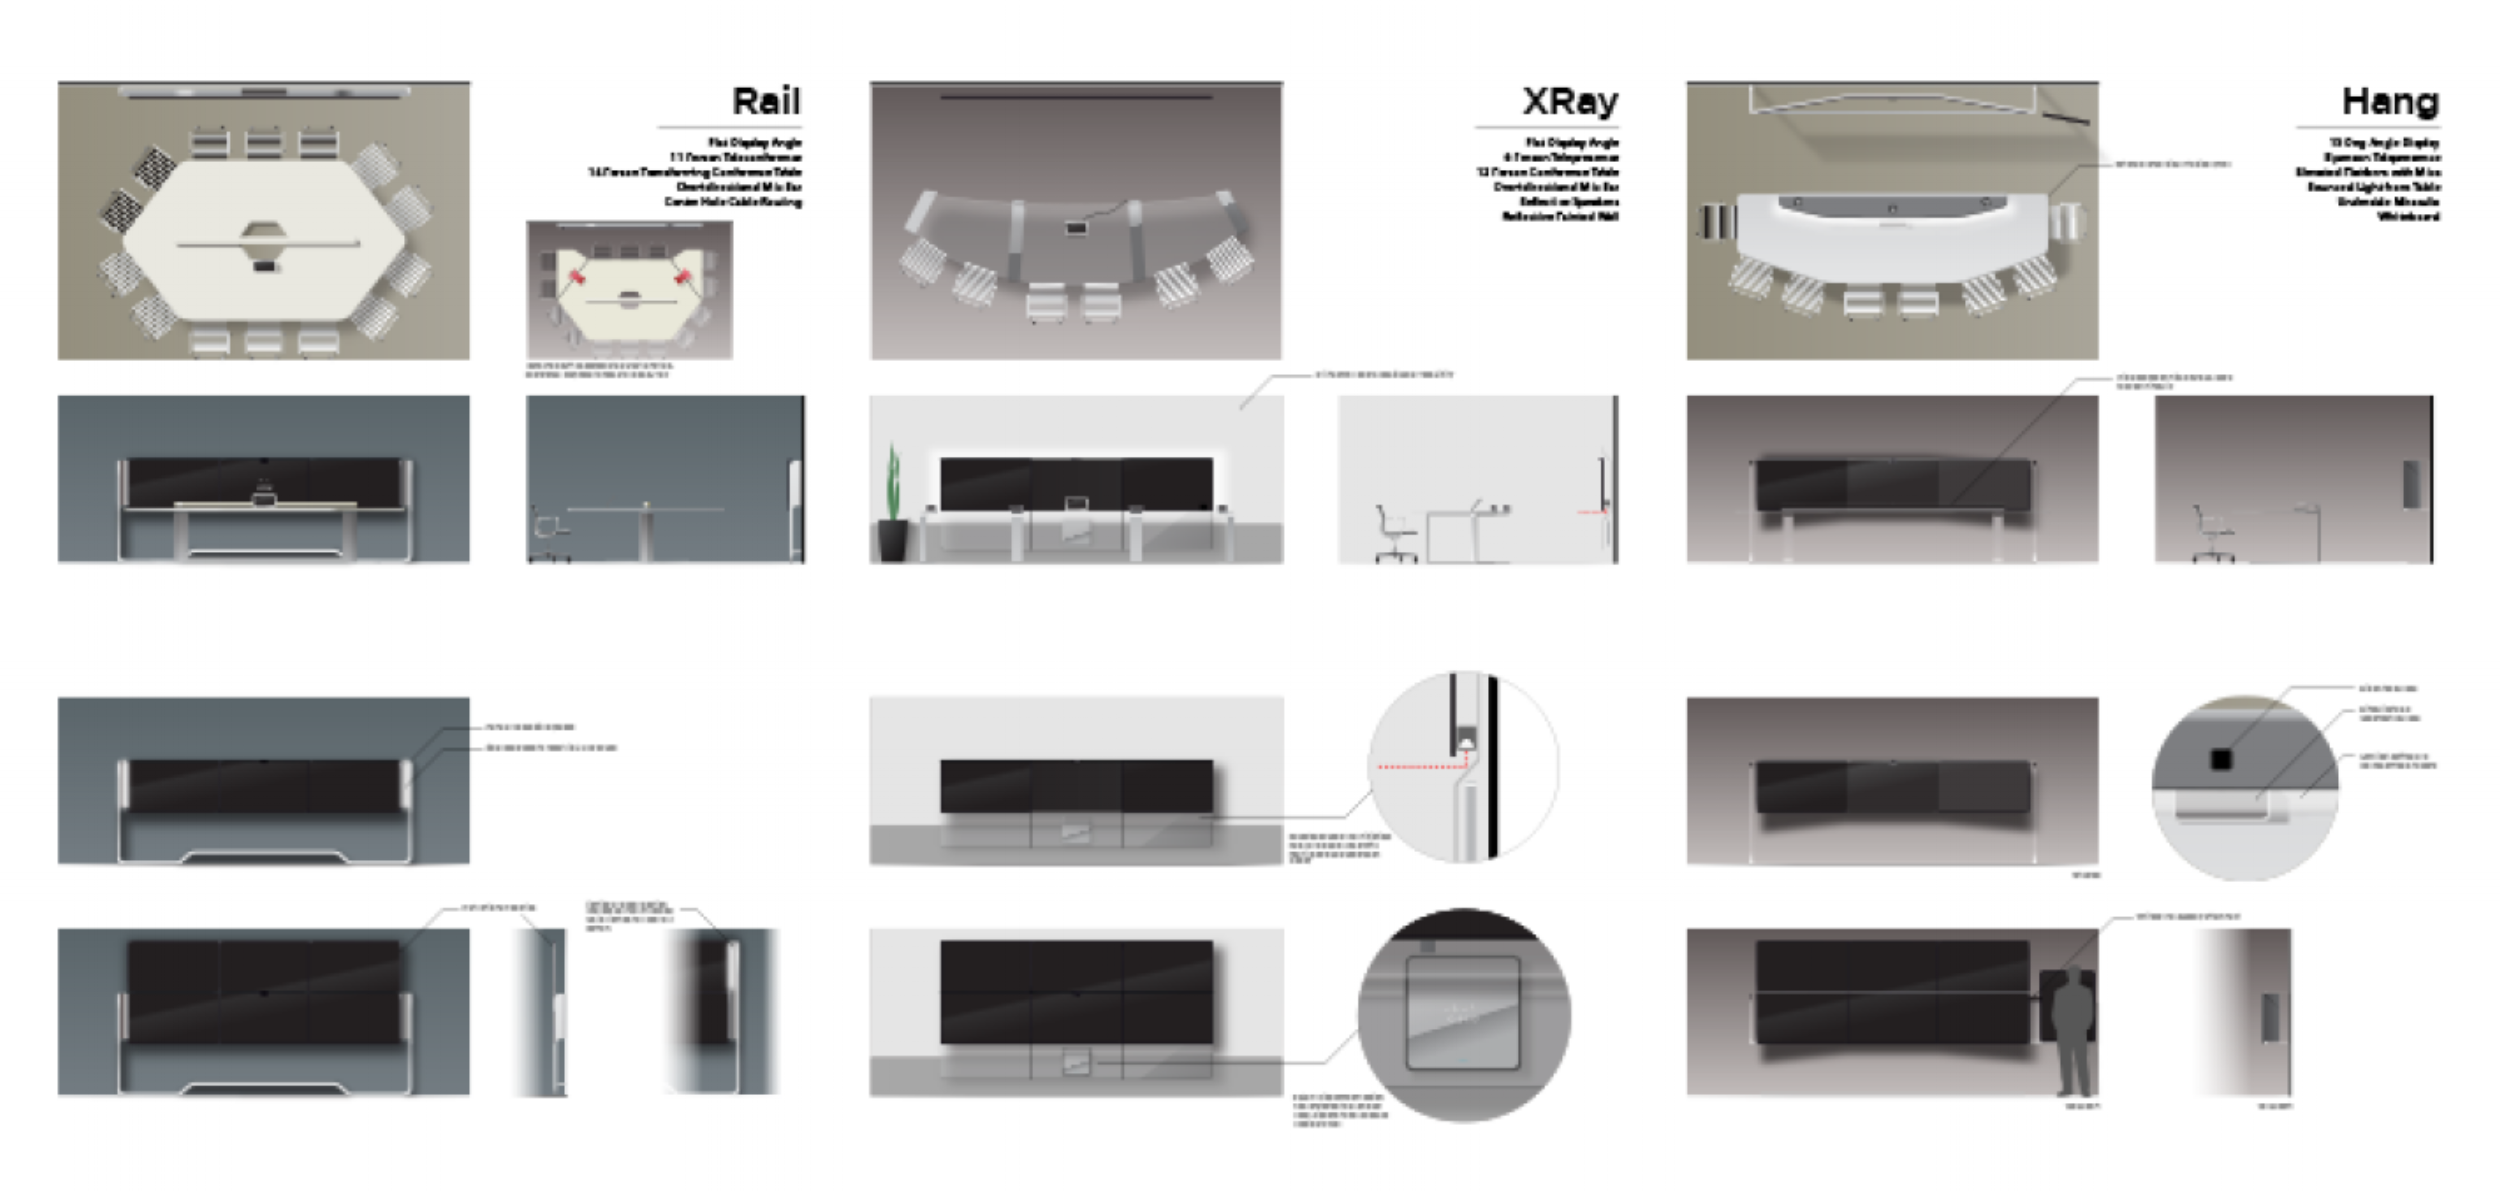
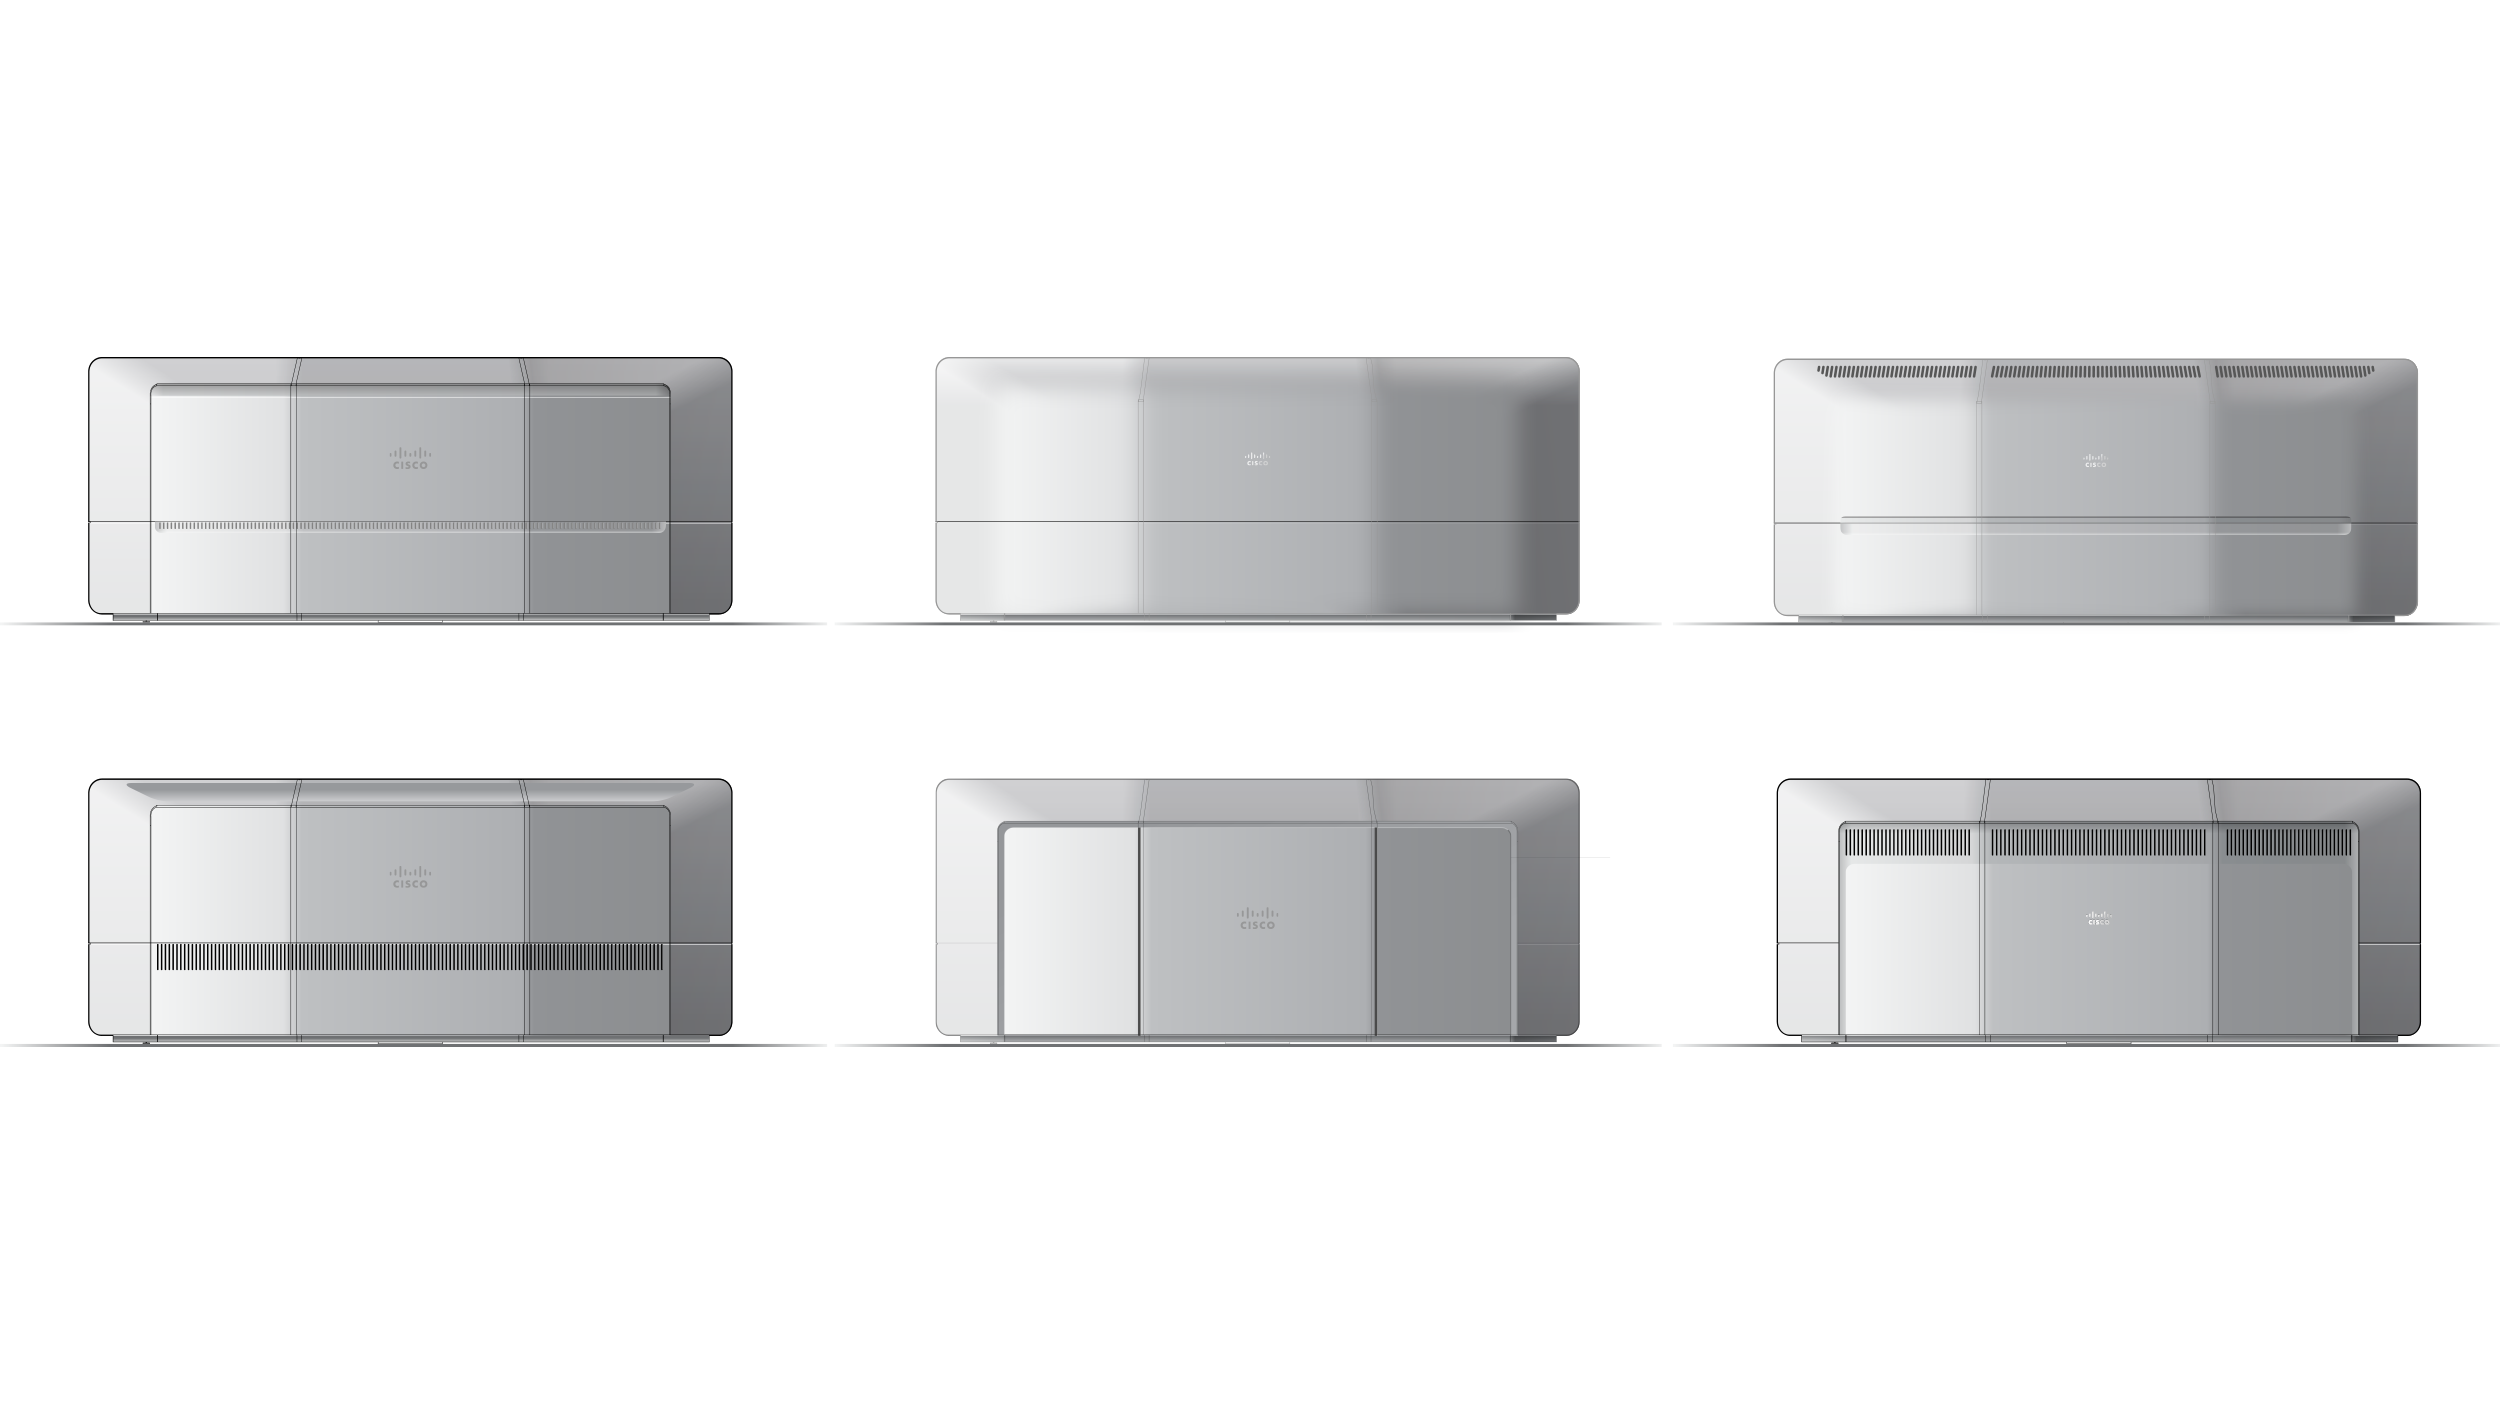
After listening to the client's concerns, we distilled the ideas, formed an approach for social perception, and explored configuration studies to propose general form packages.
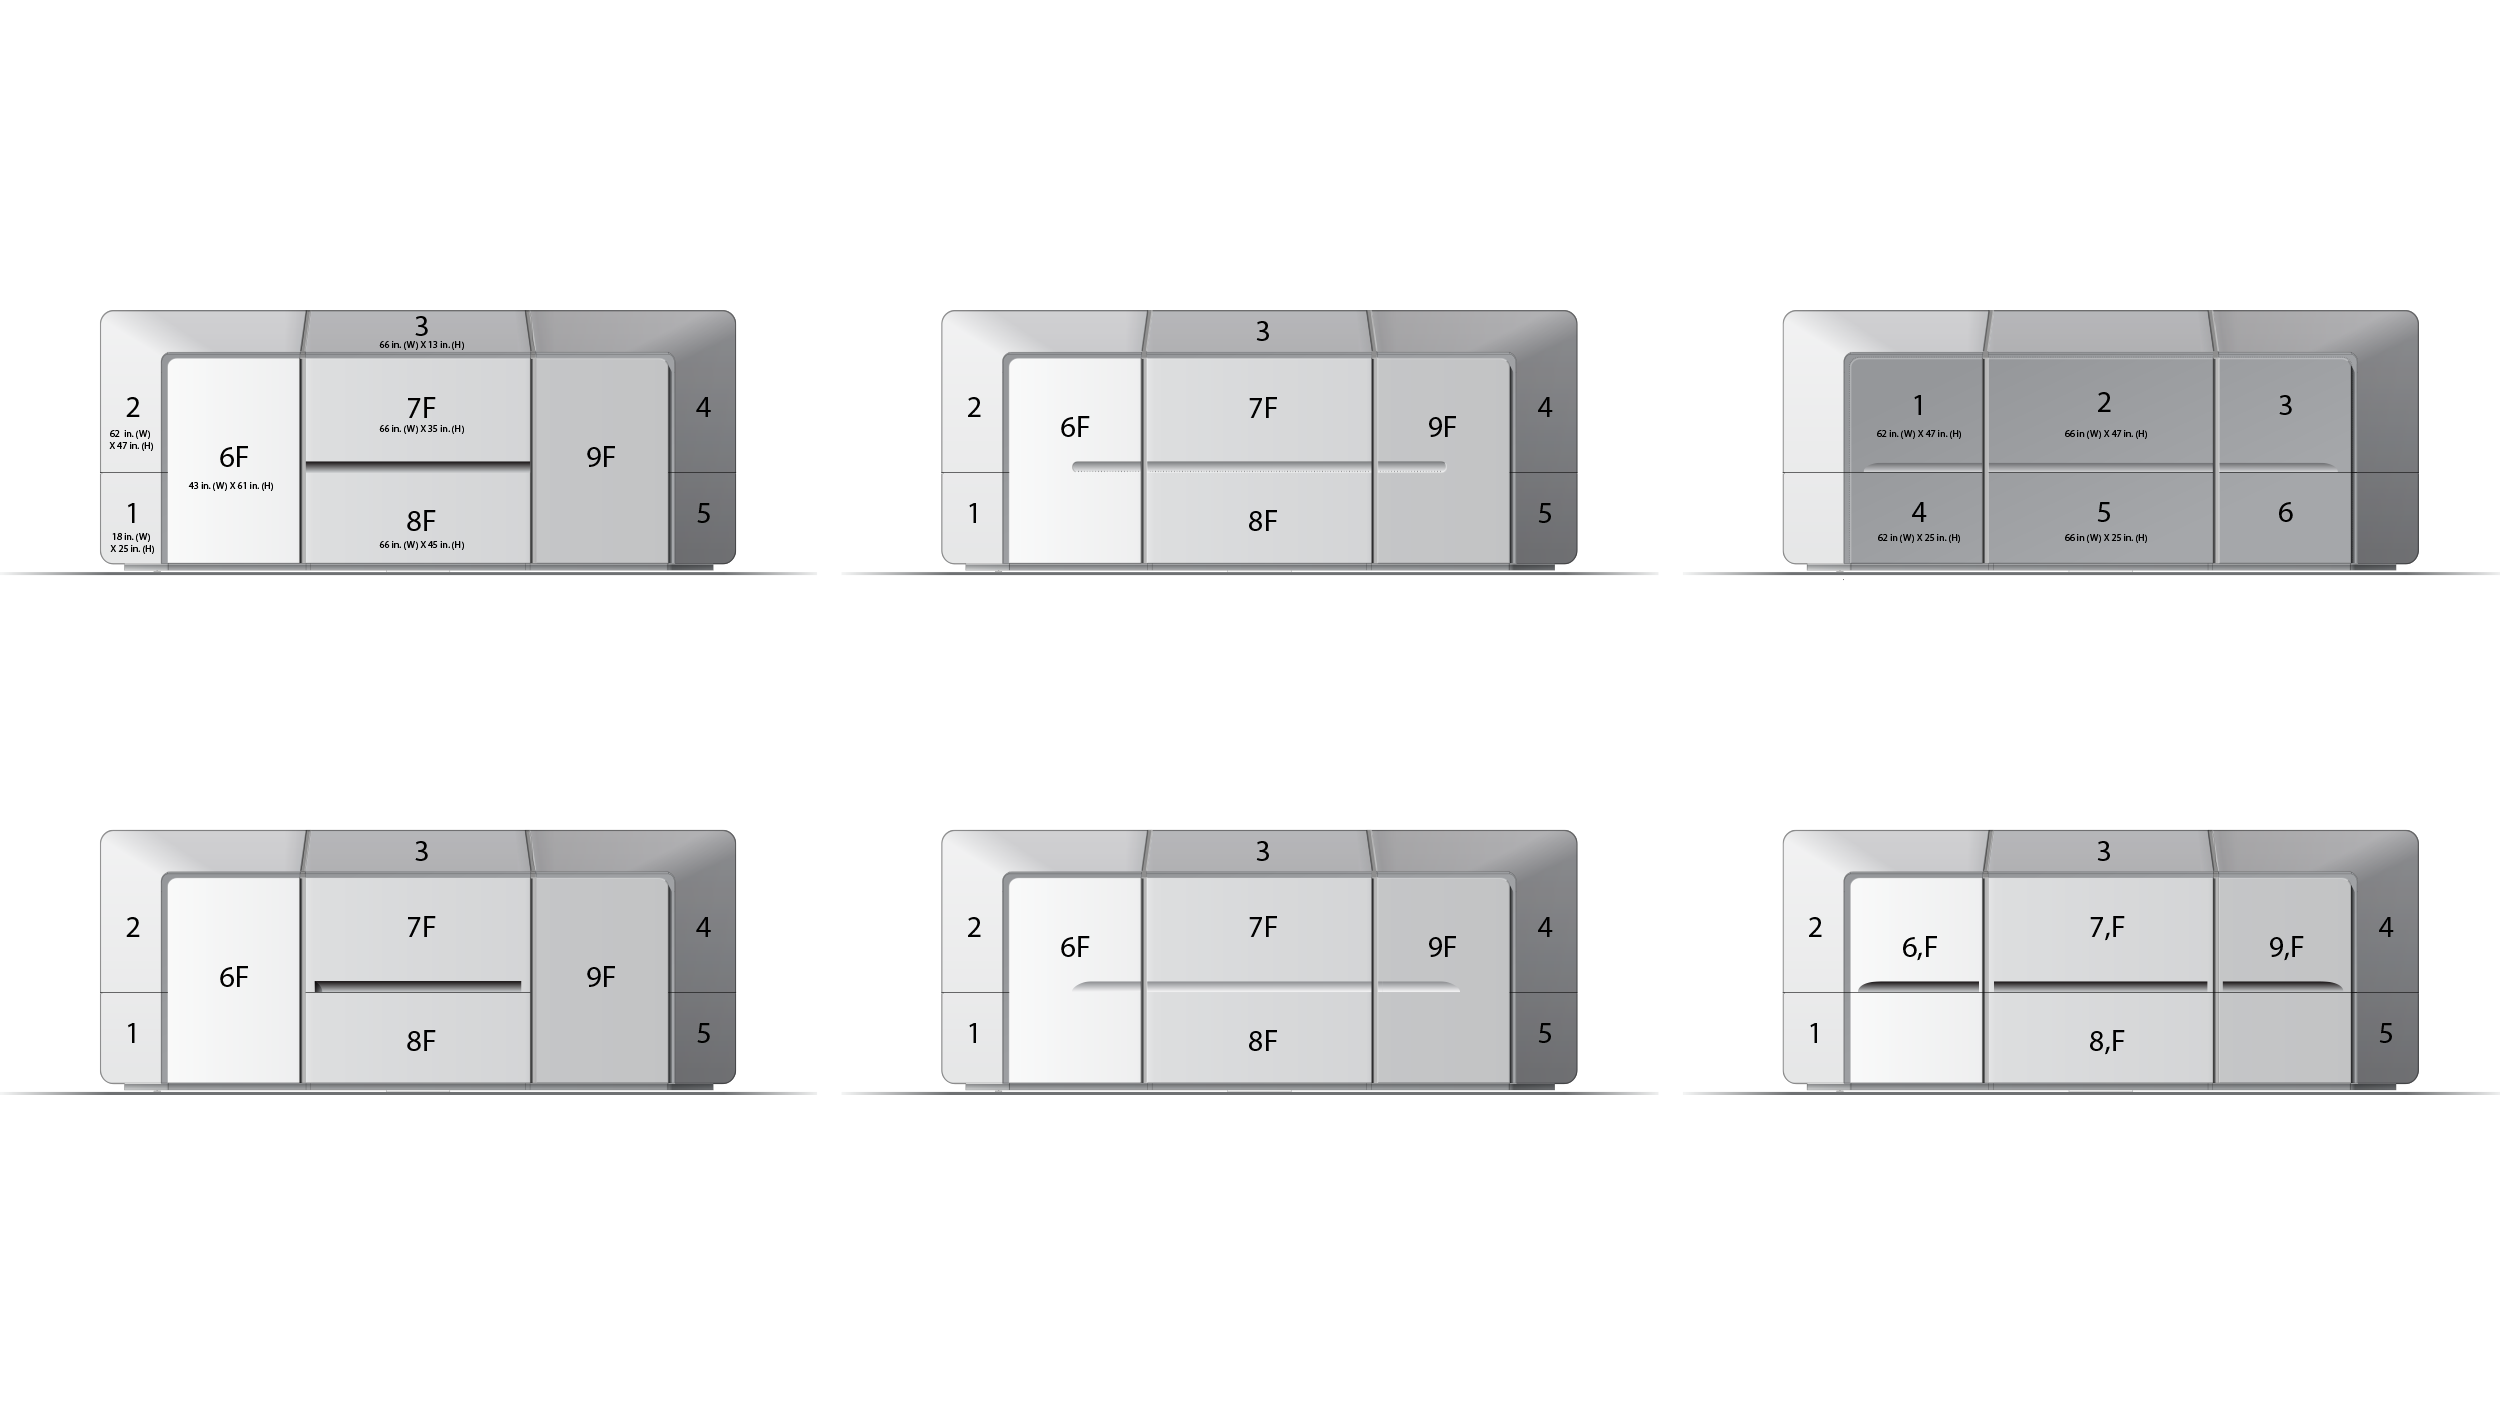
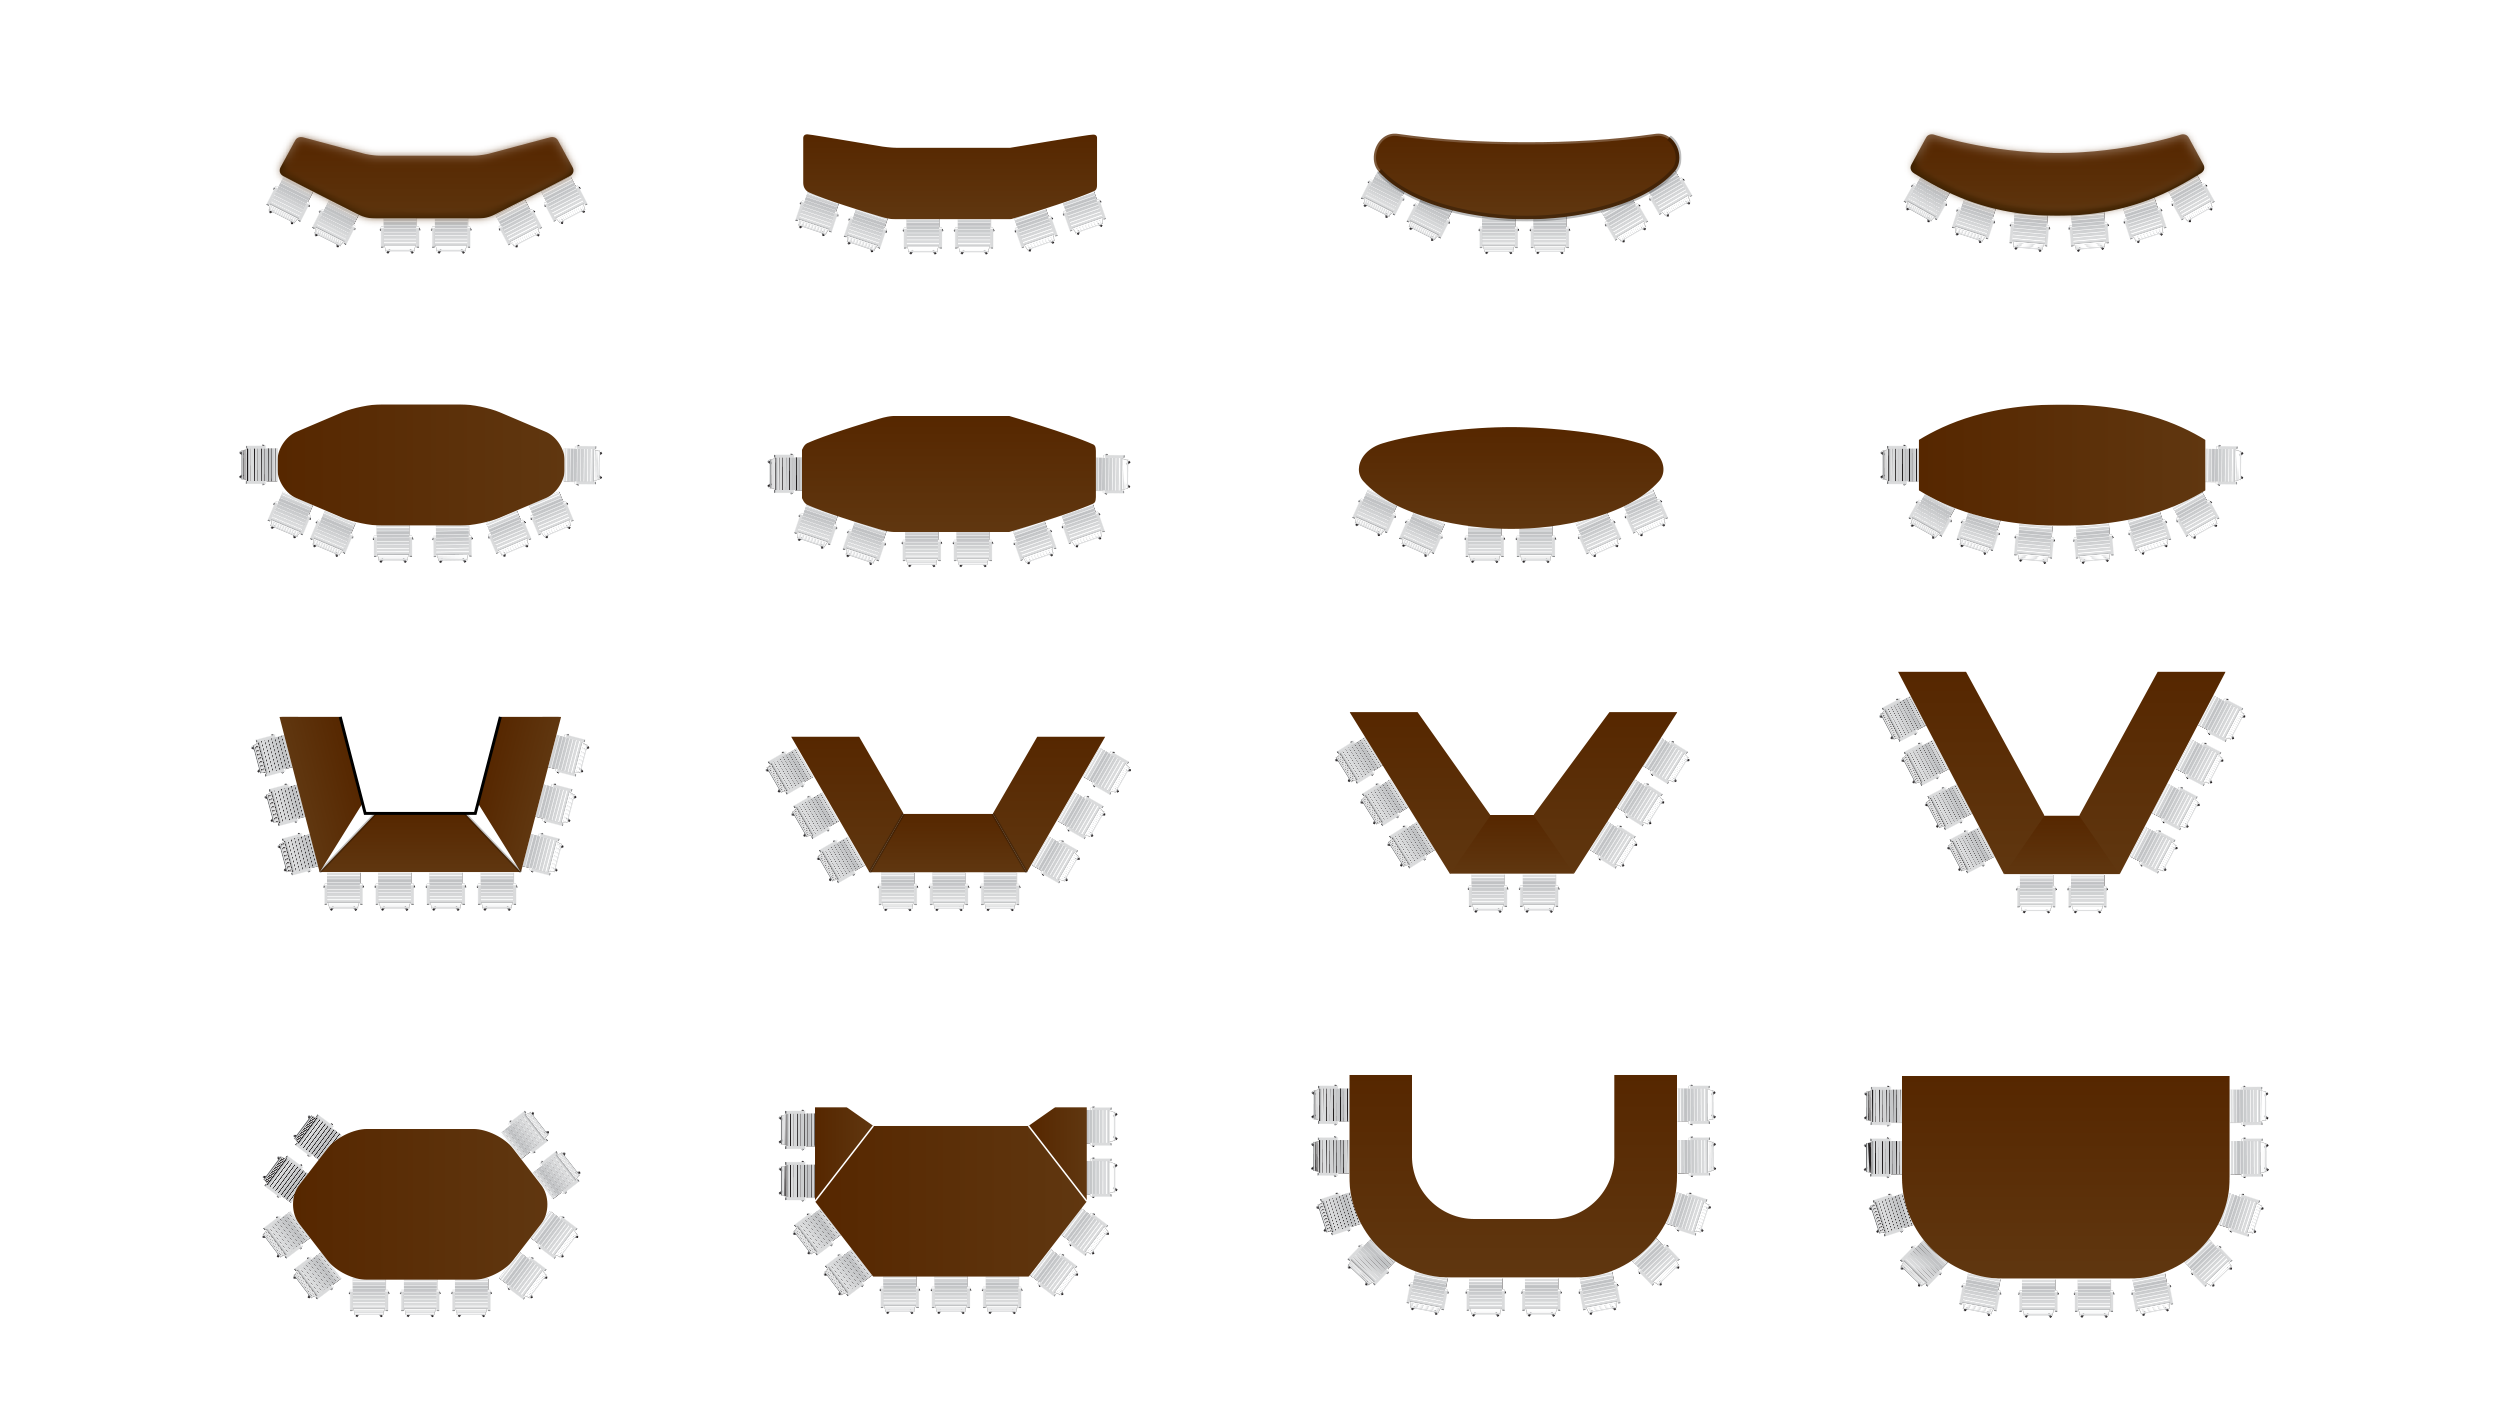
We did a number of studies for form, inspiration and concept. Multiple configurations of the table were captured to determine the best use of space, shape and construction. This work lasted many phases, as every component was treated with the utmost care, discussing usability, ergonomics, intrusion and accessibility.
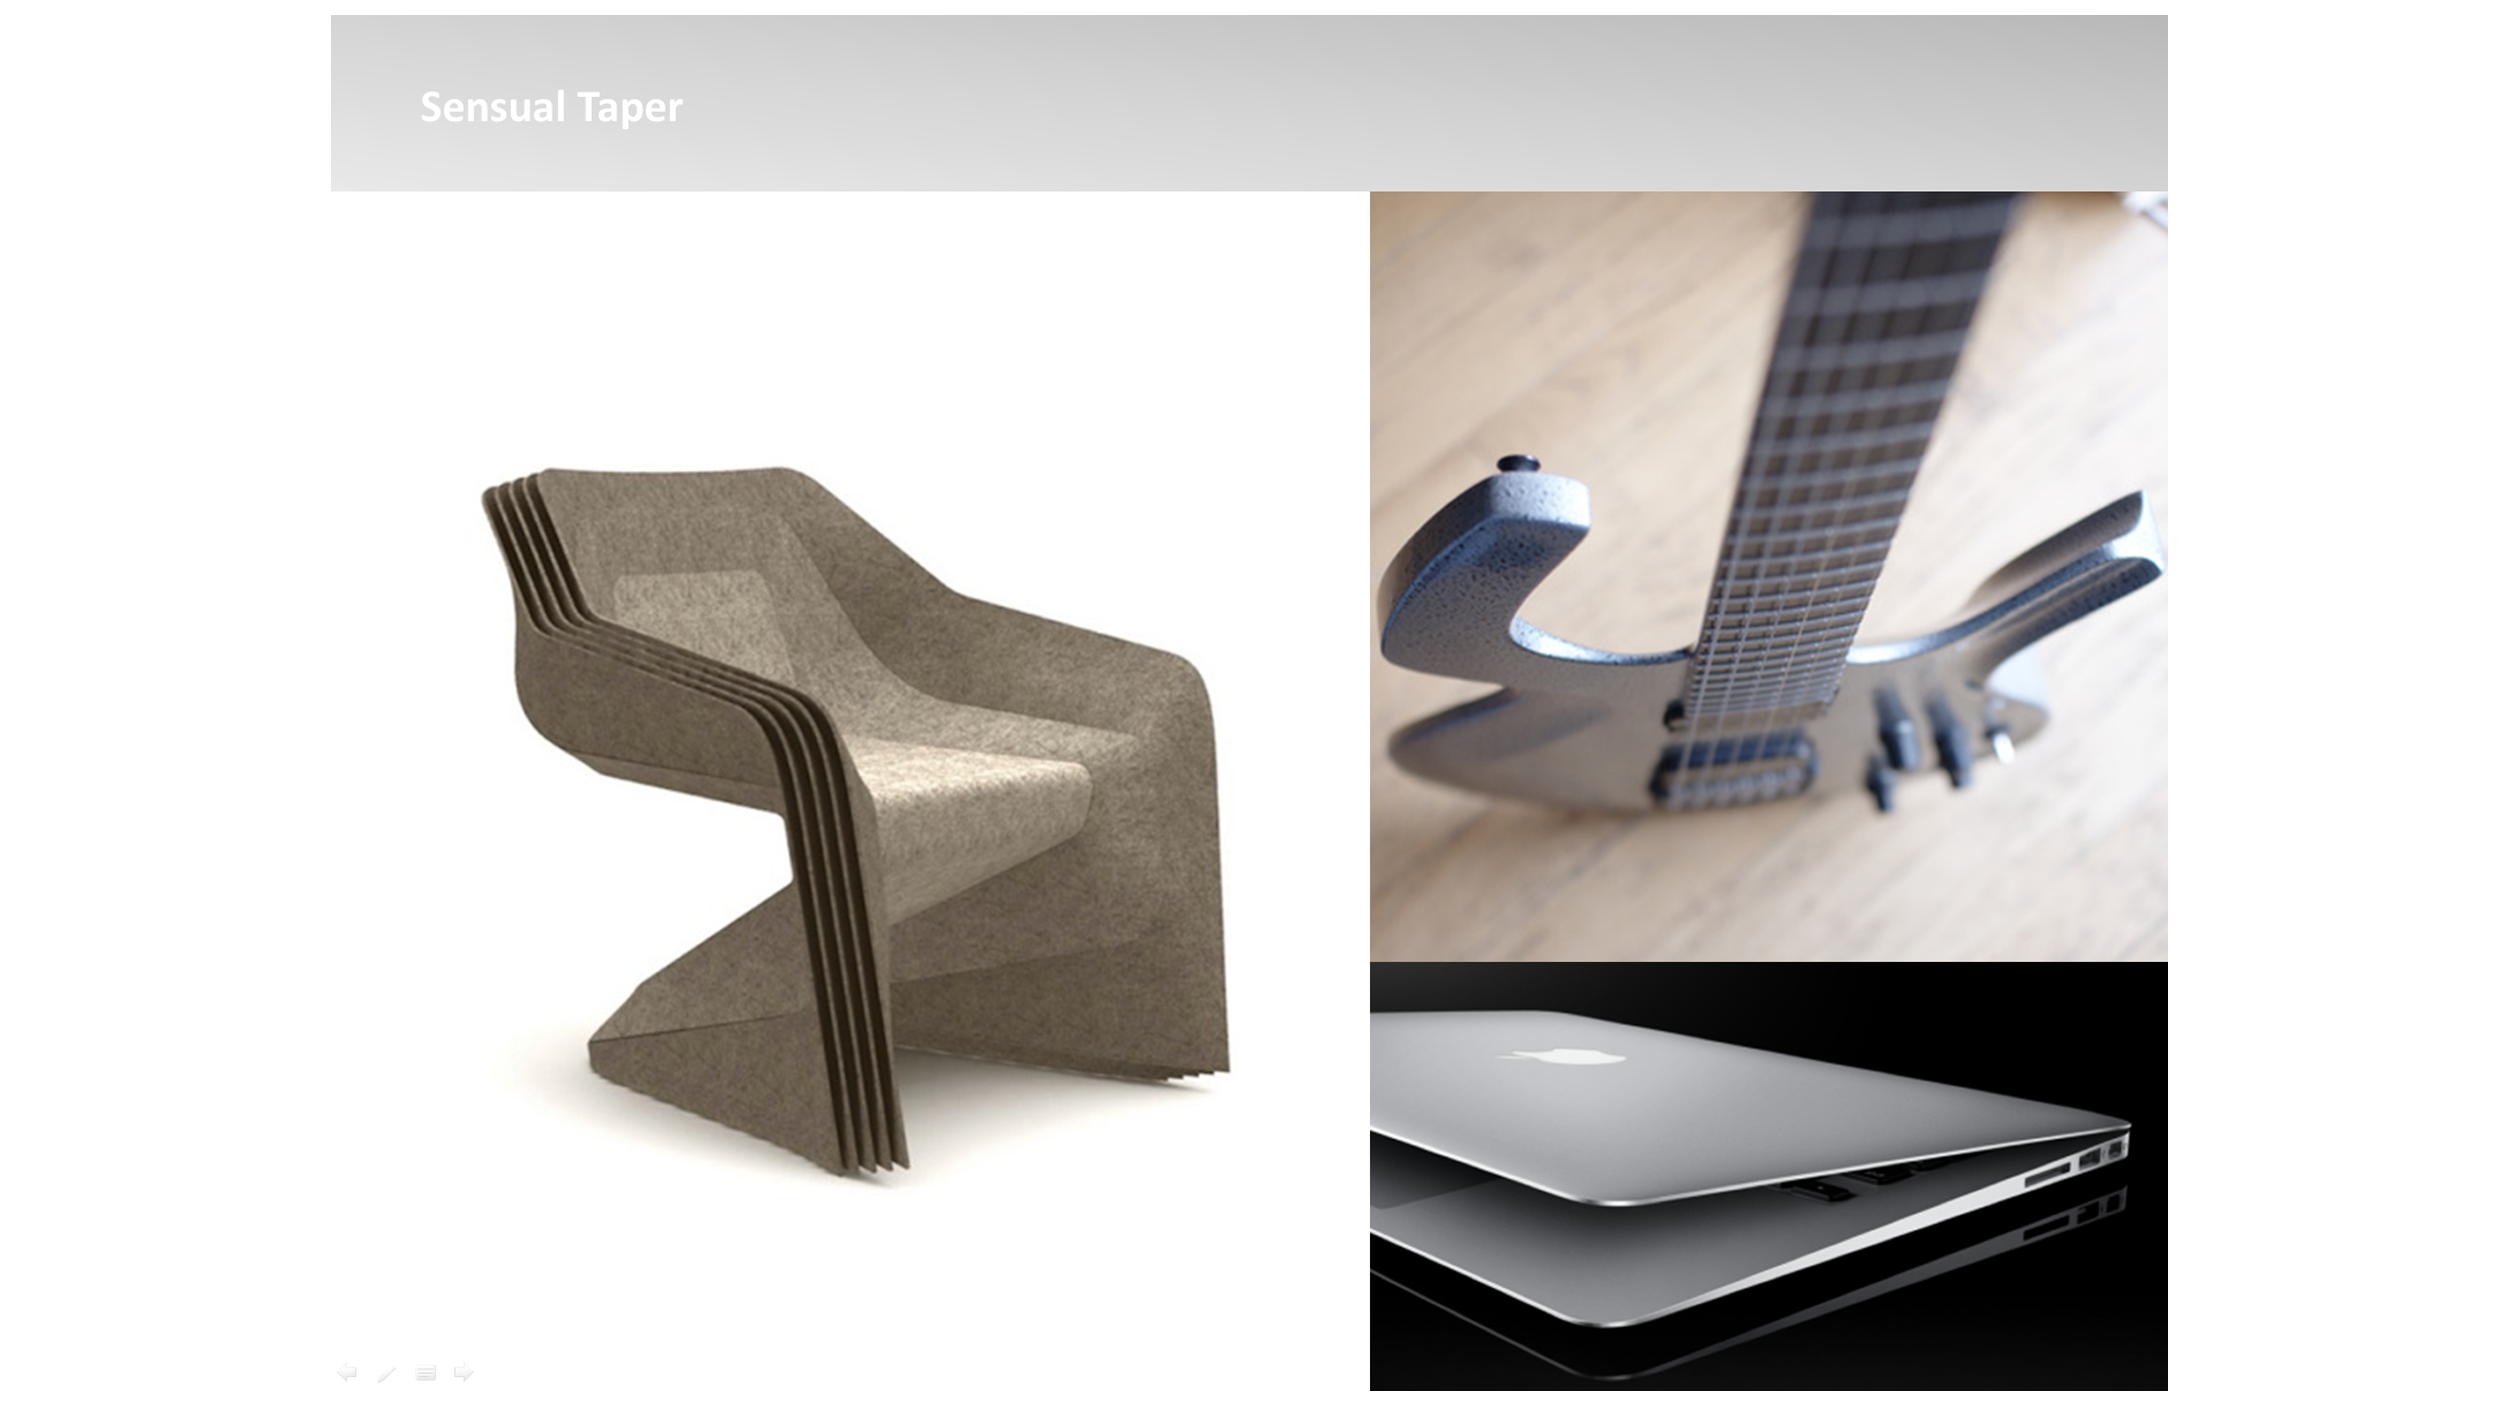
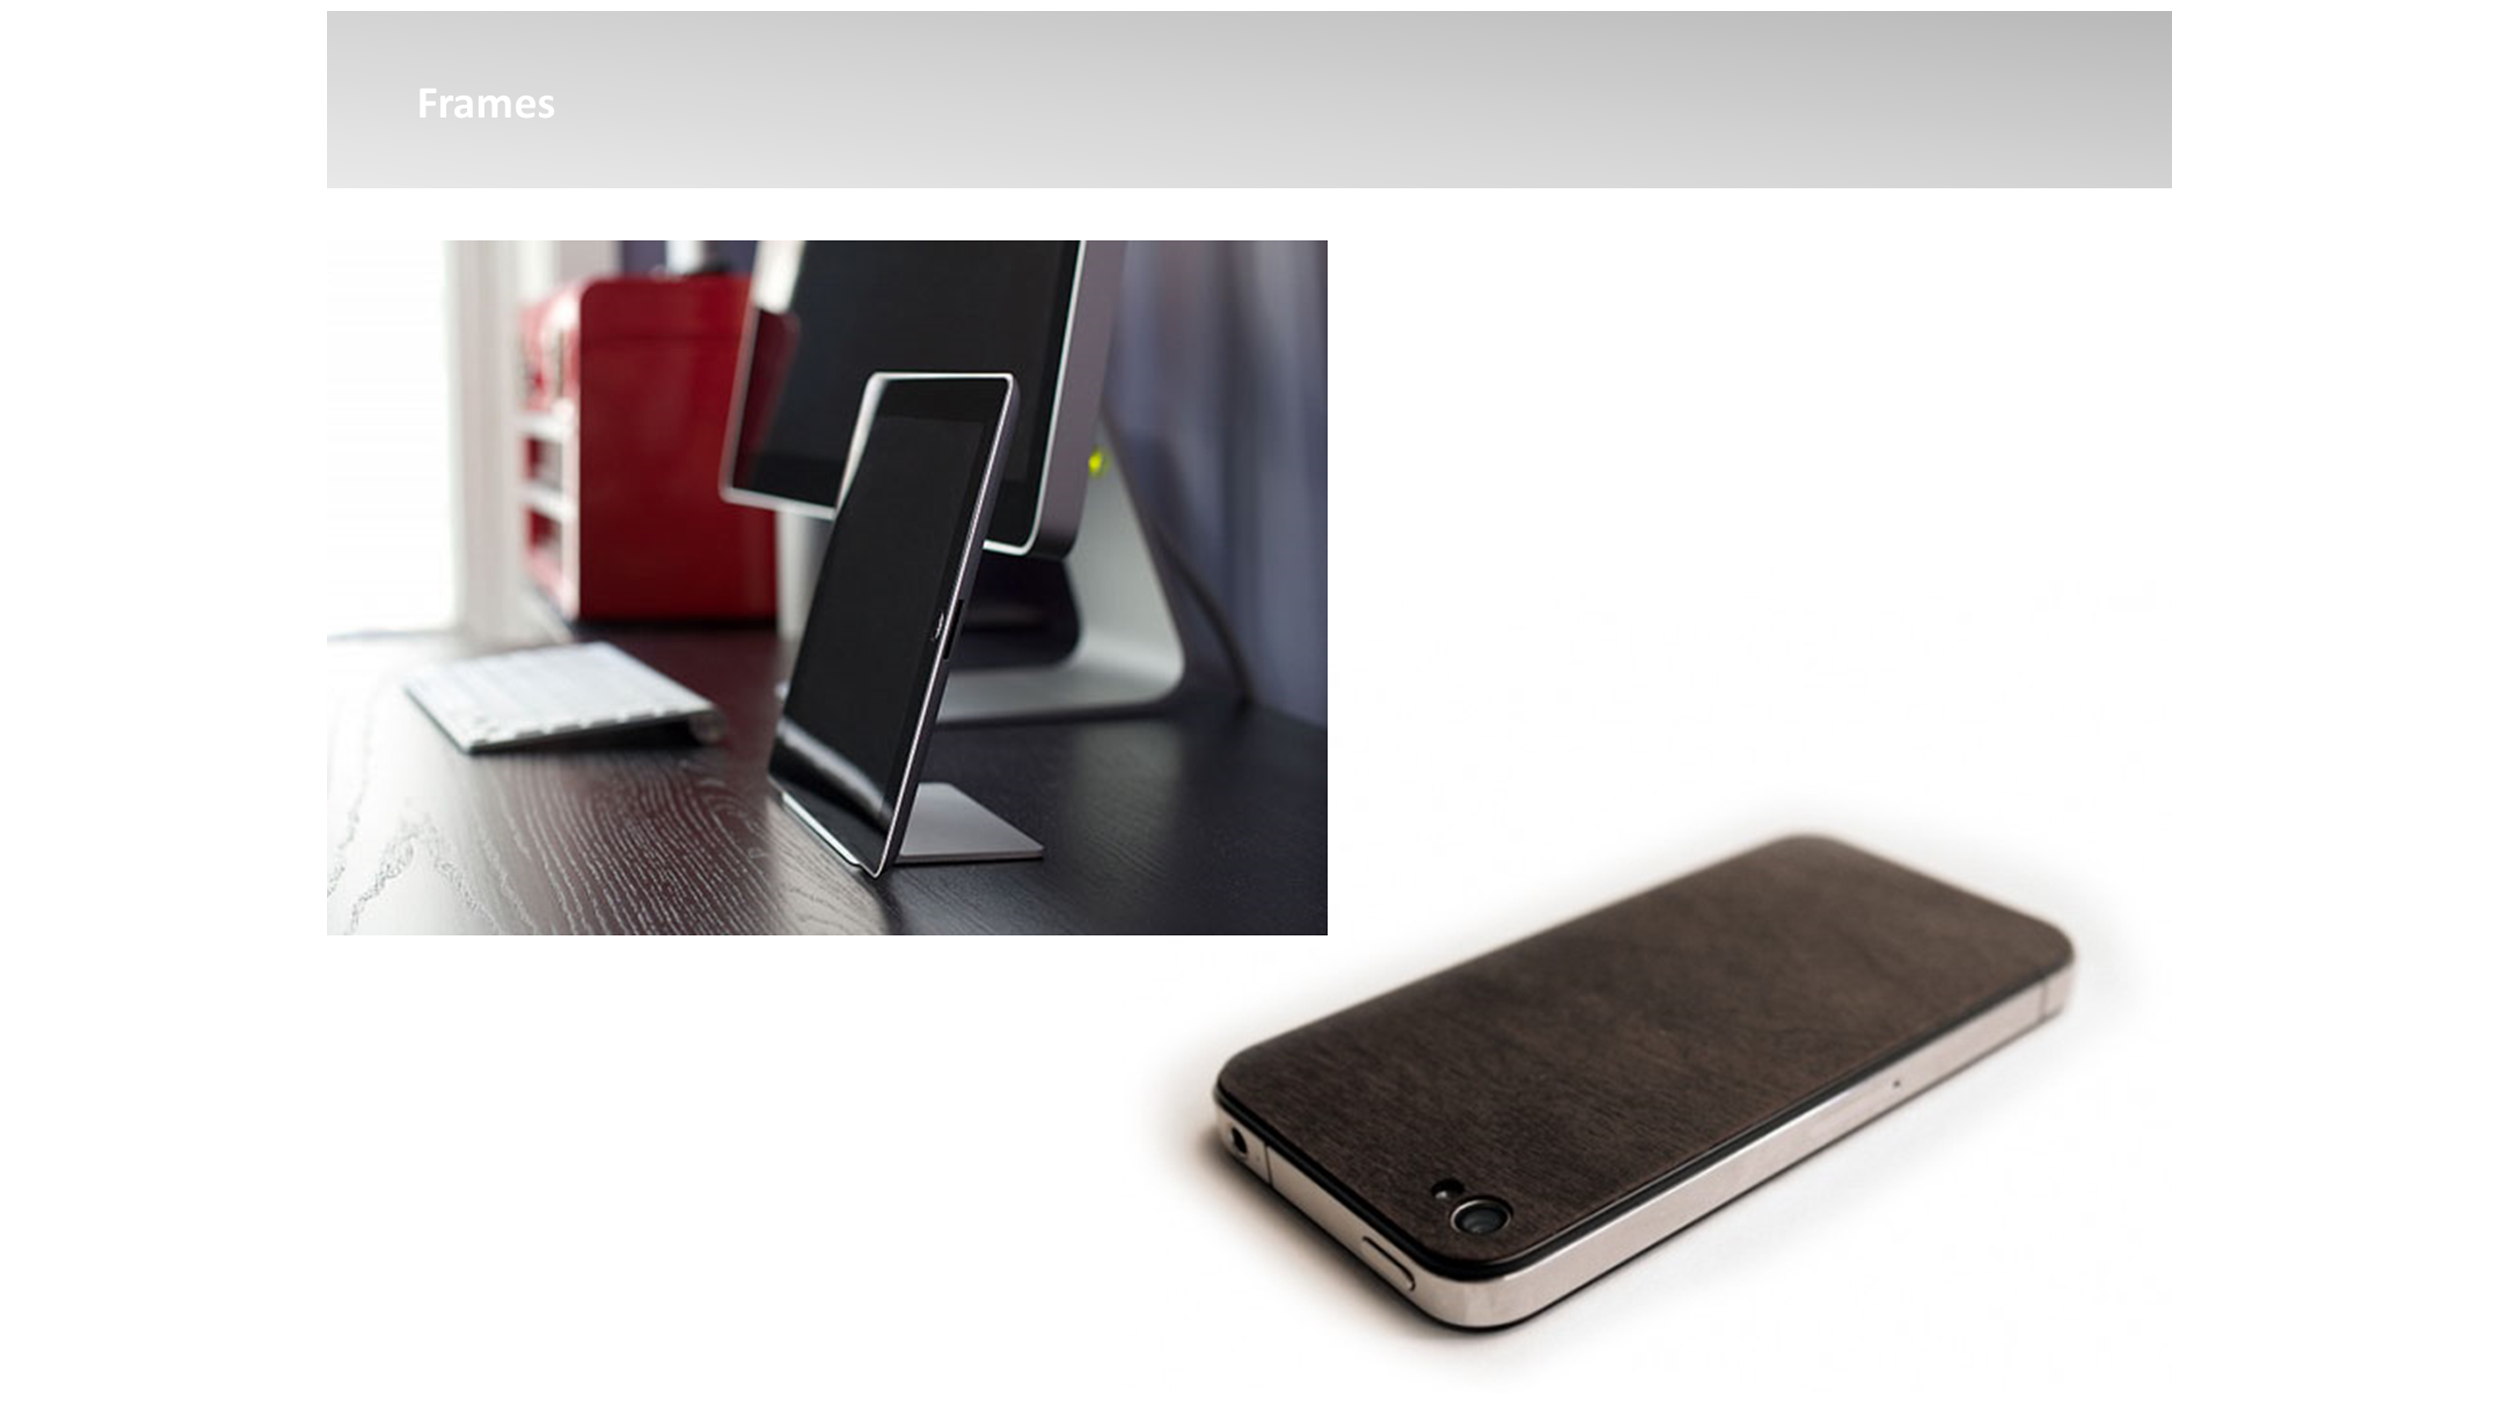
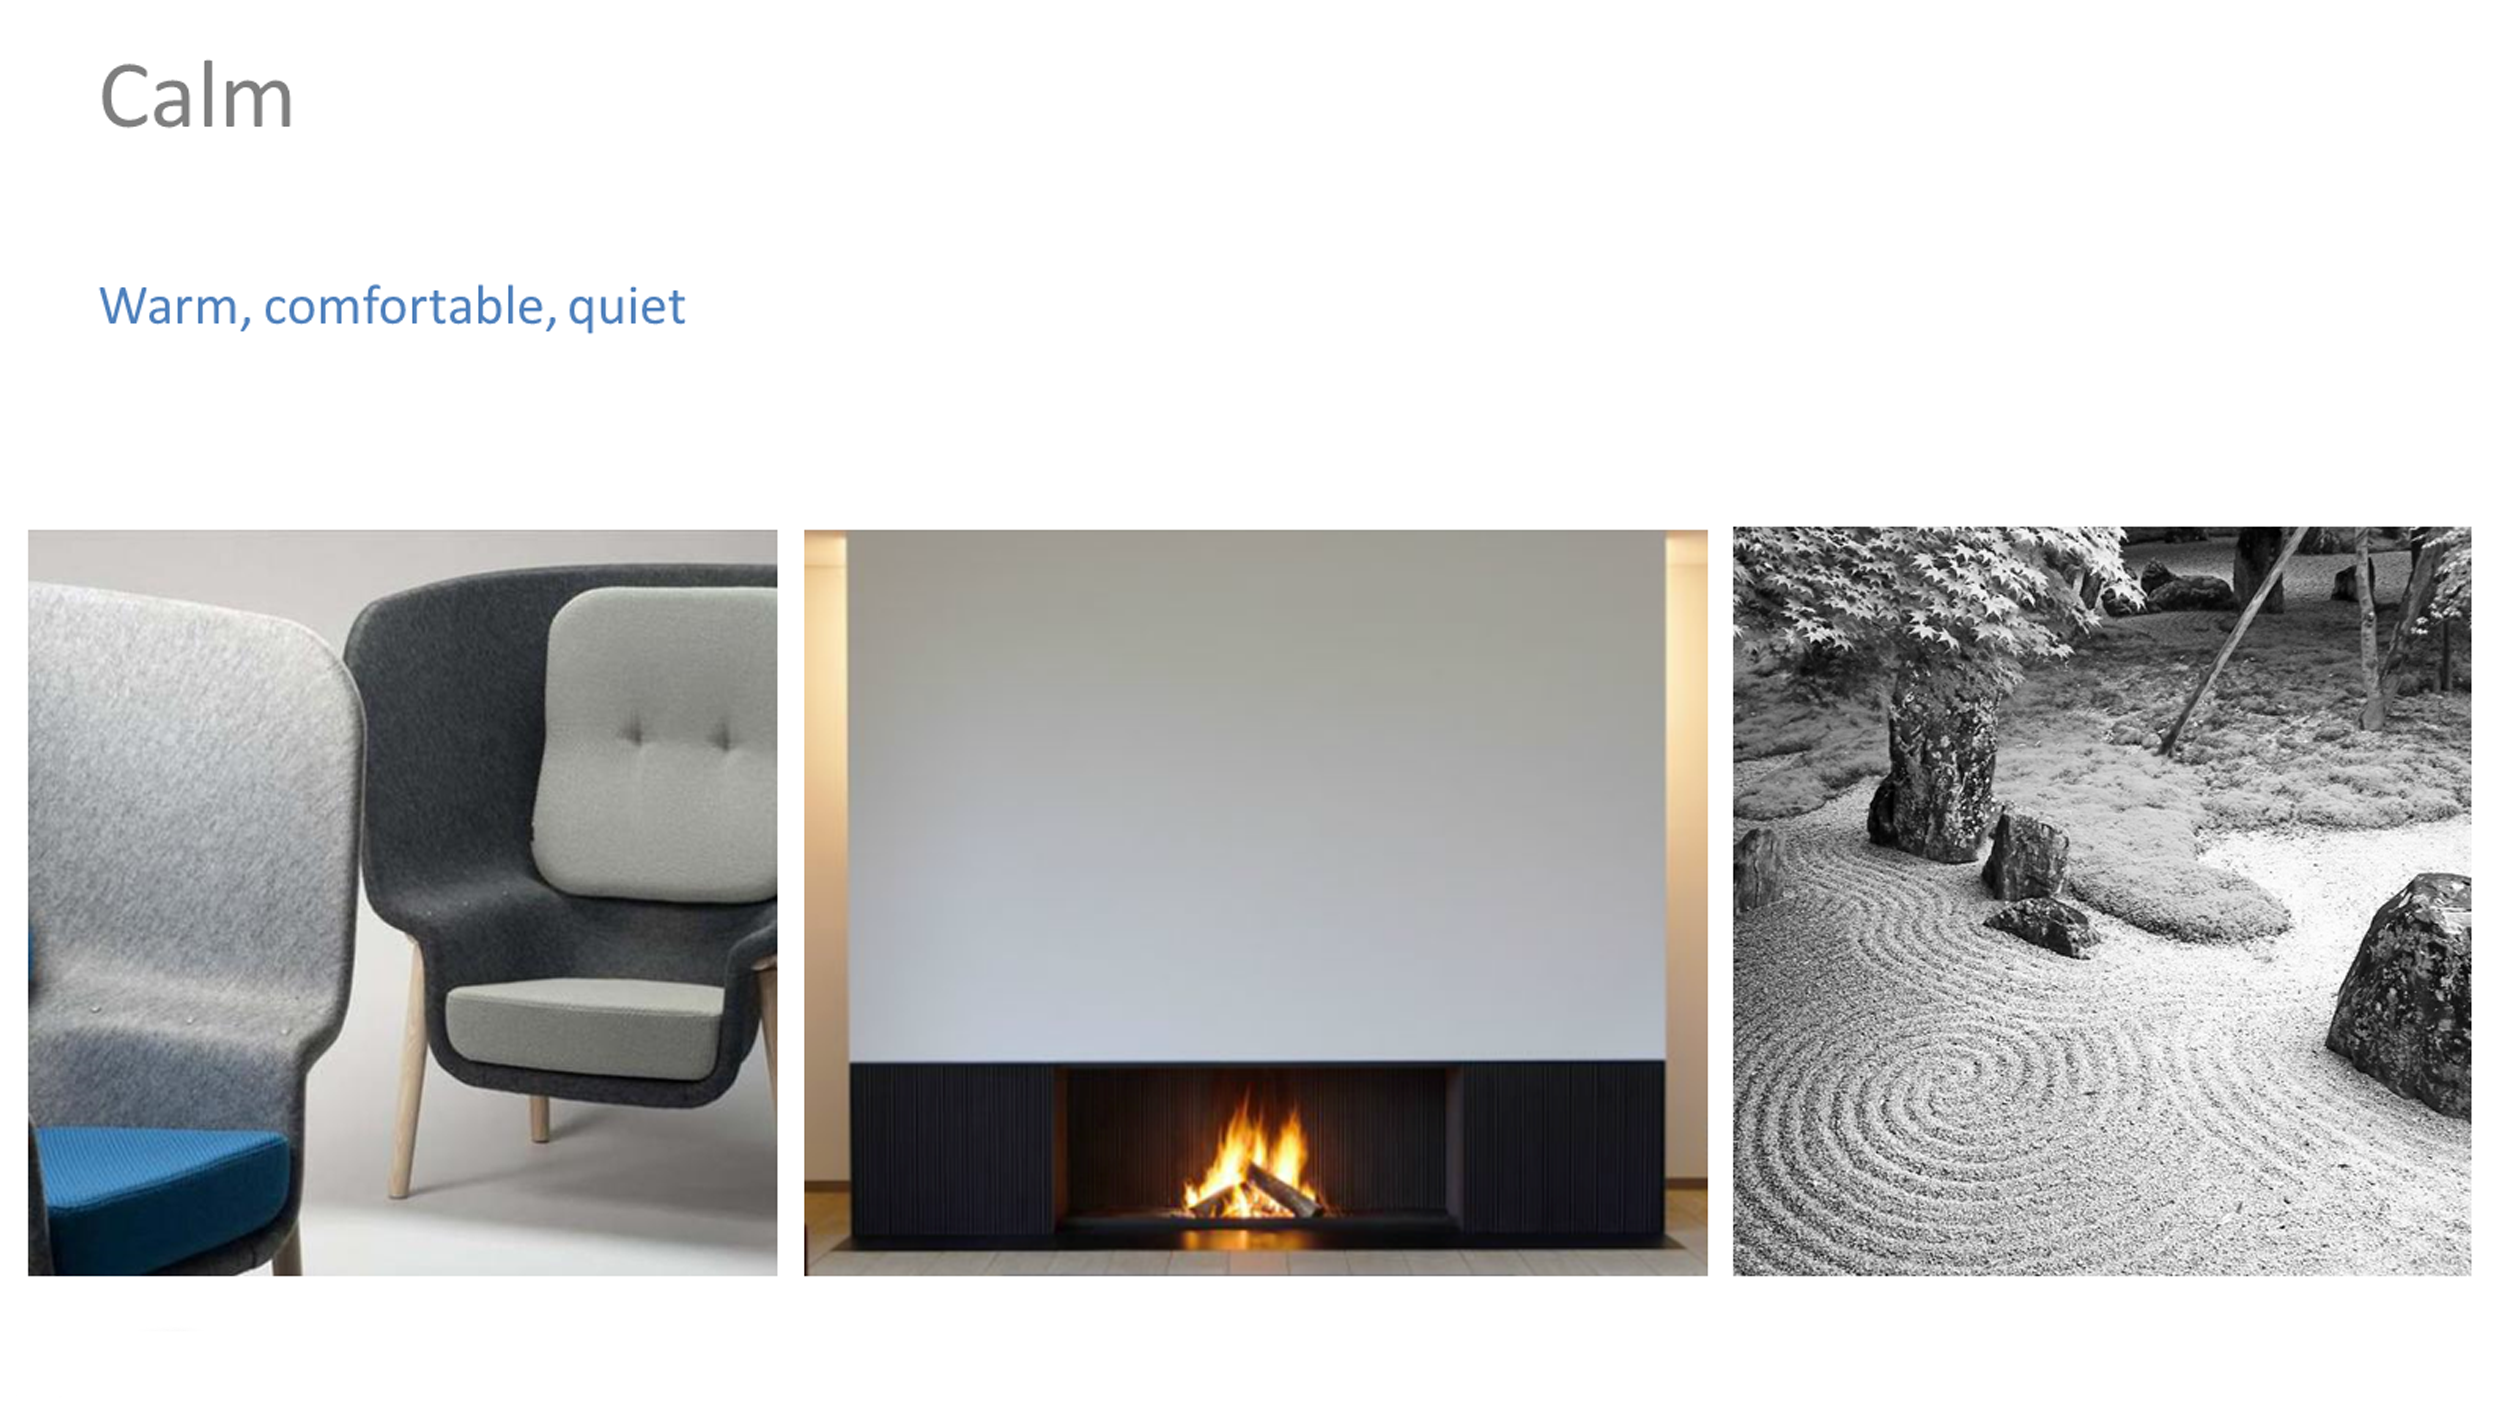
Overarching themes helped to frame the general direction and storytelling.
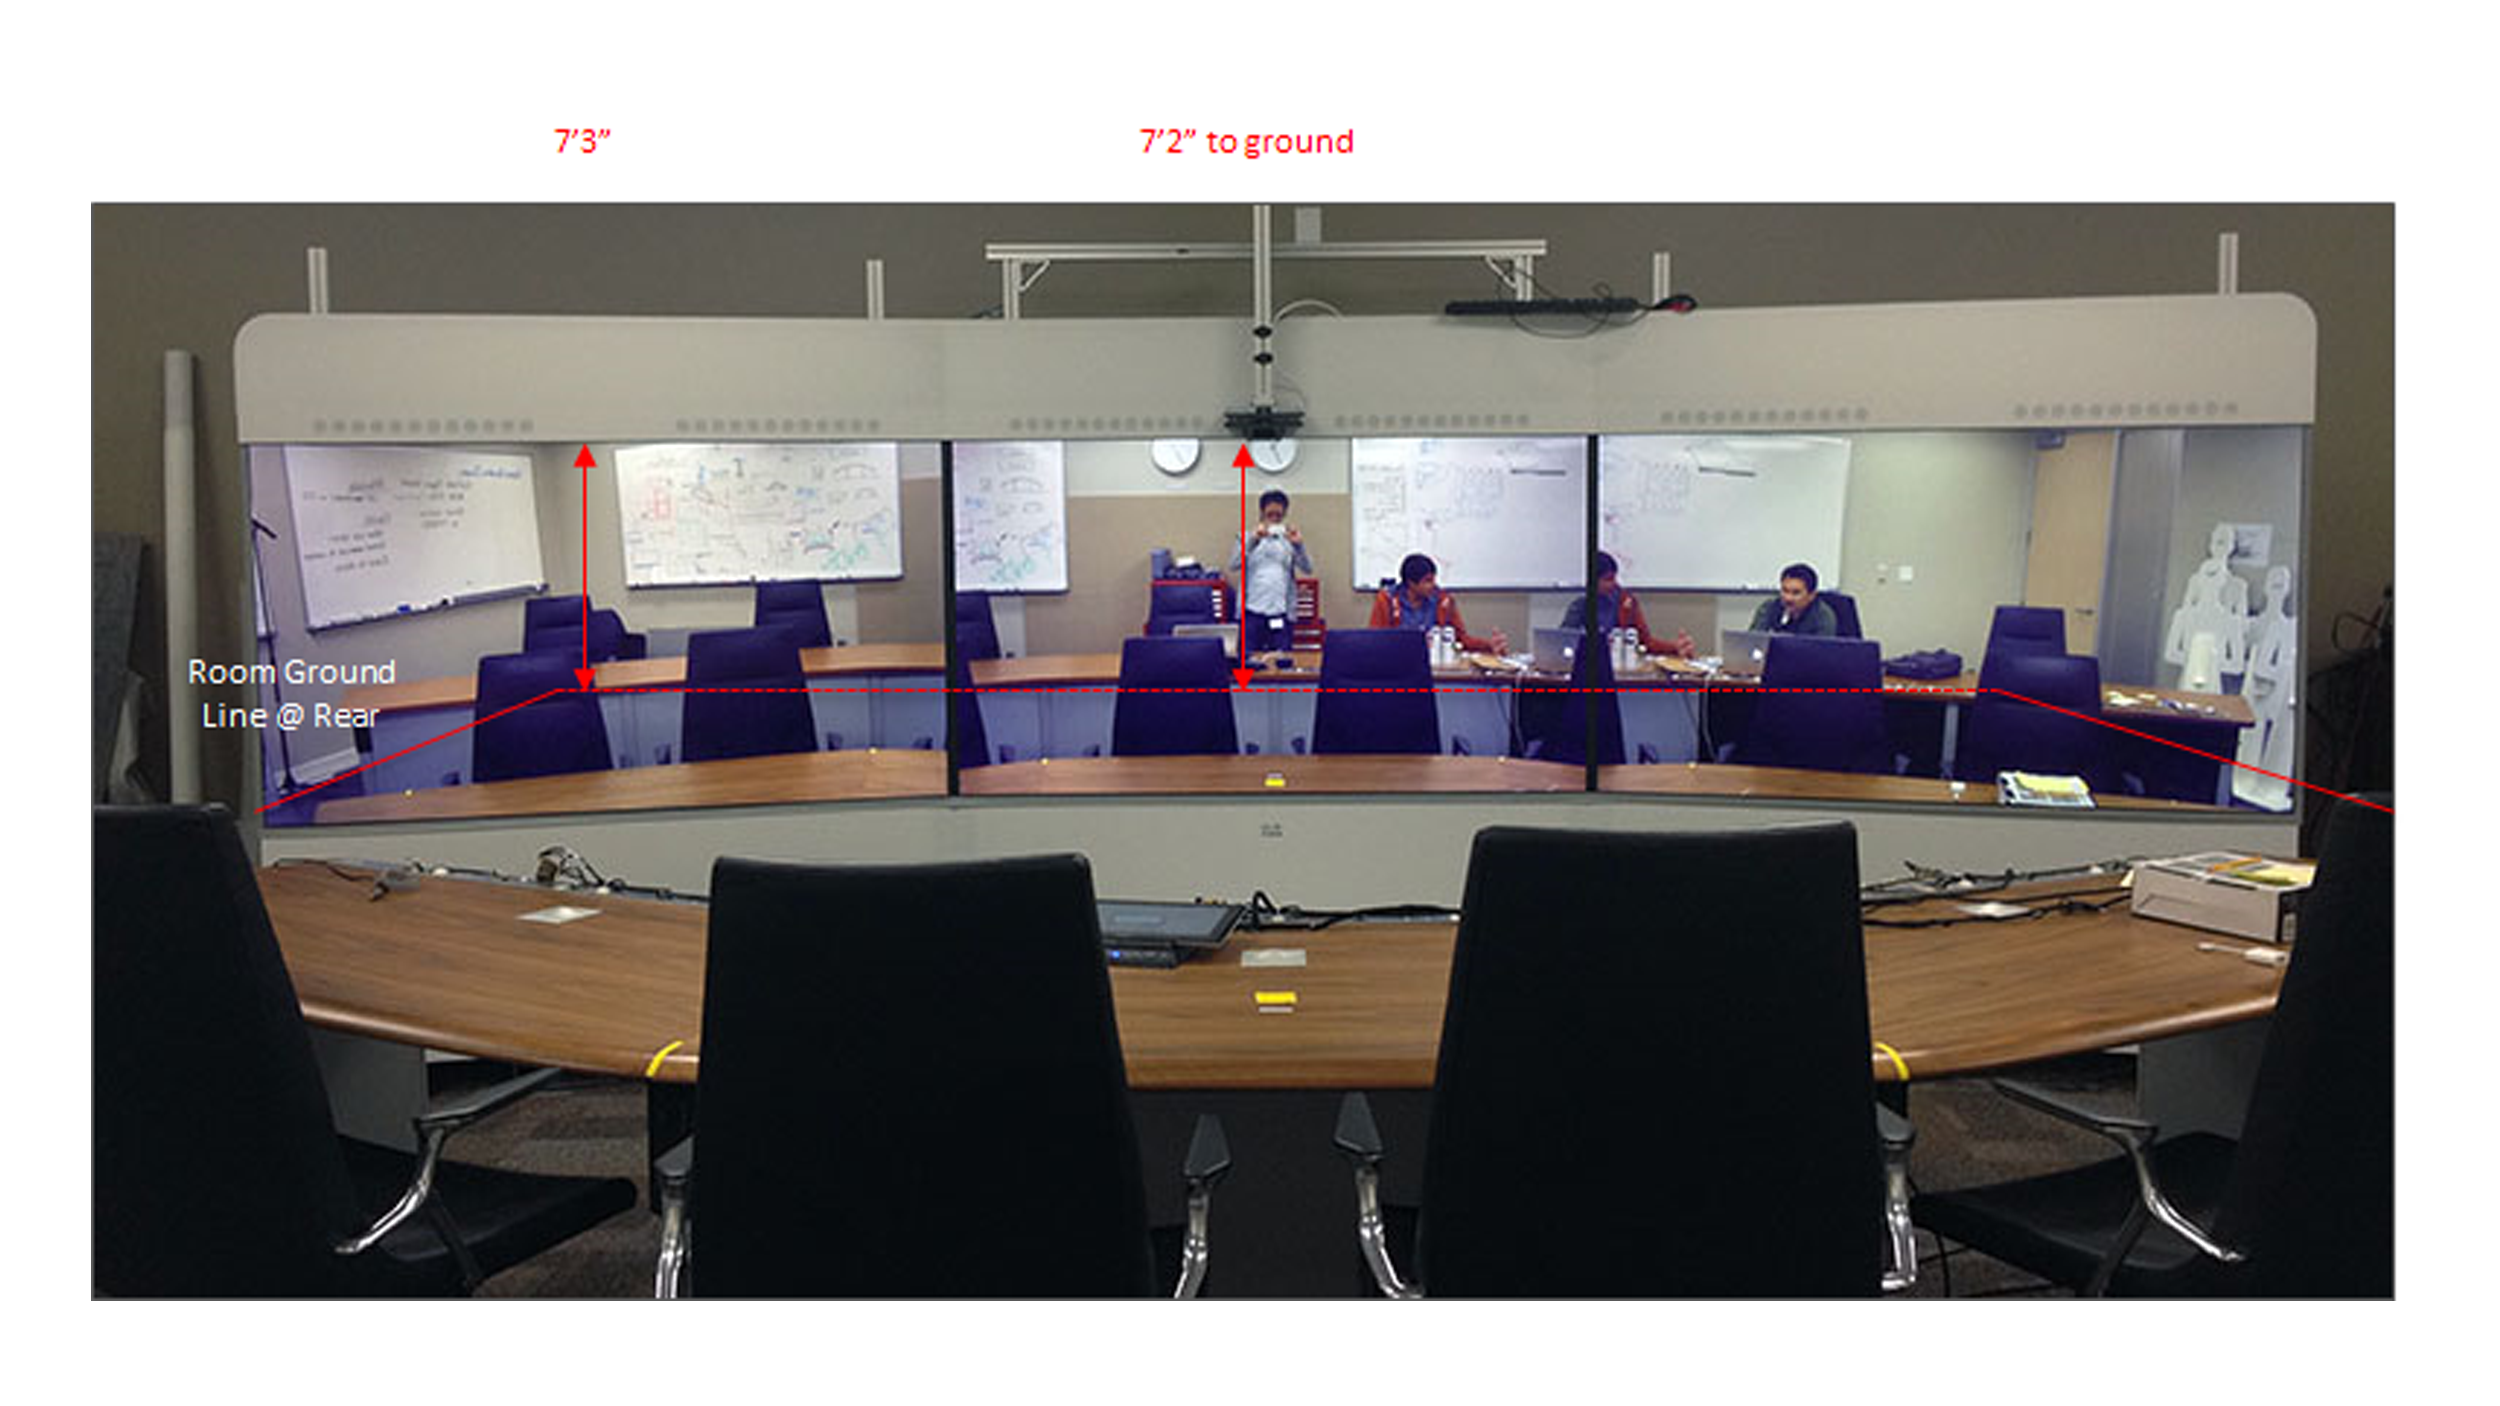
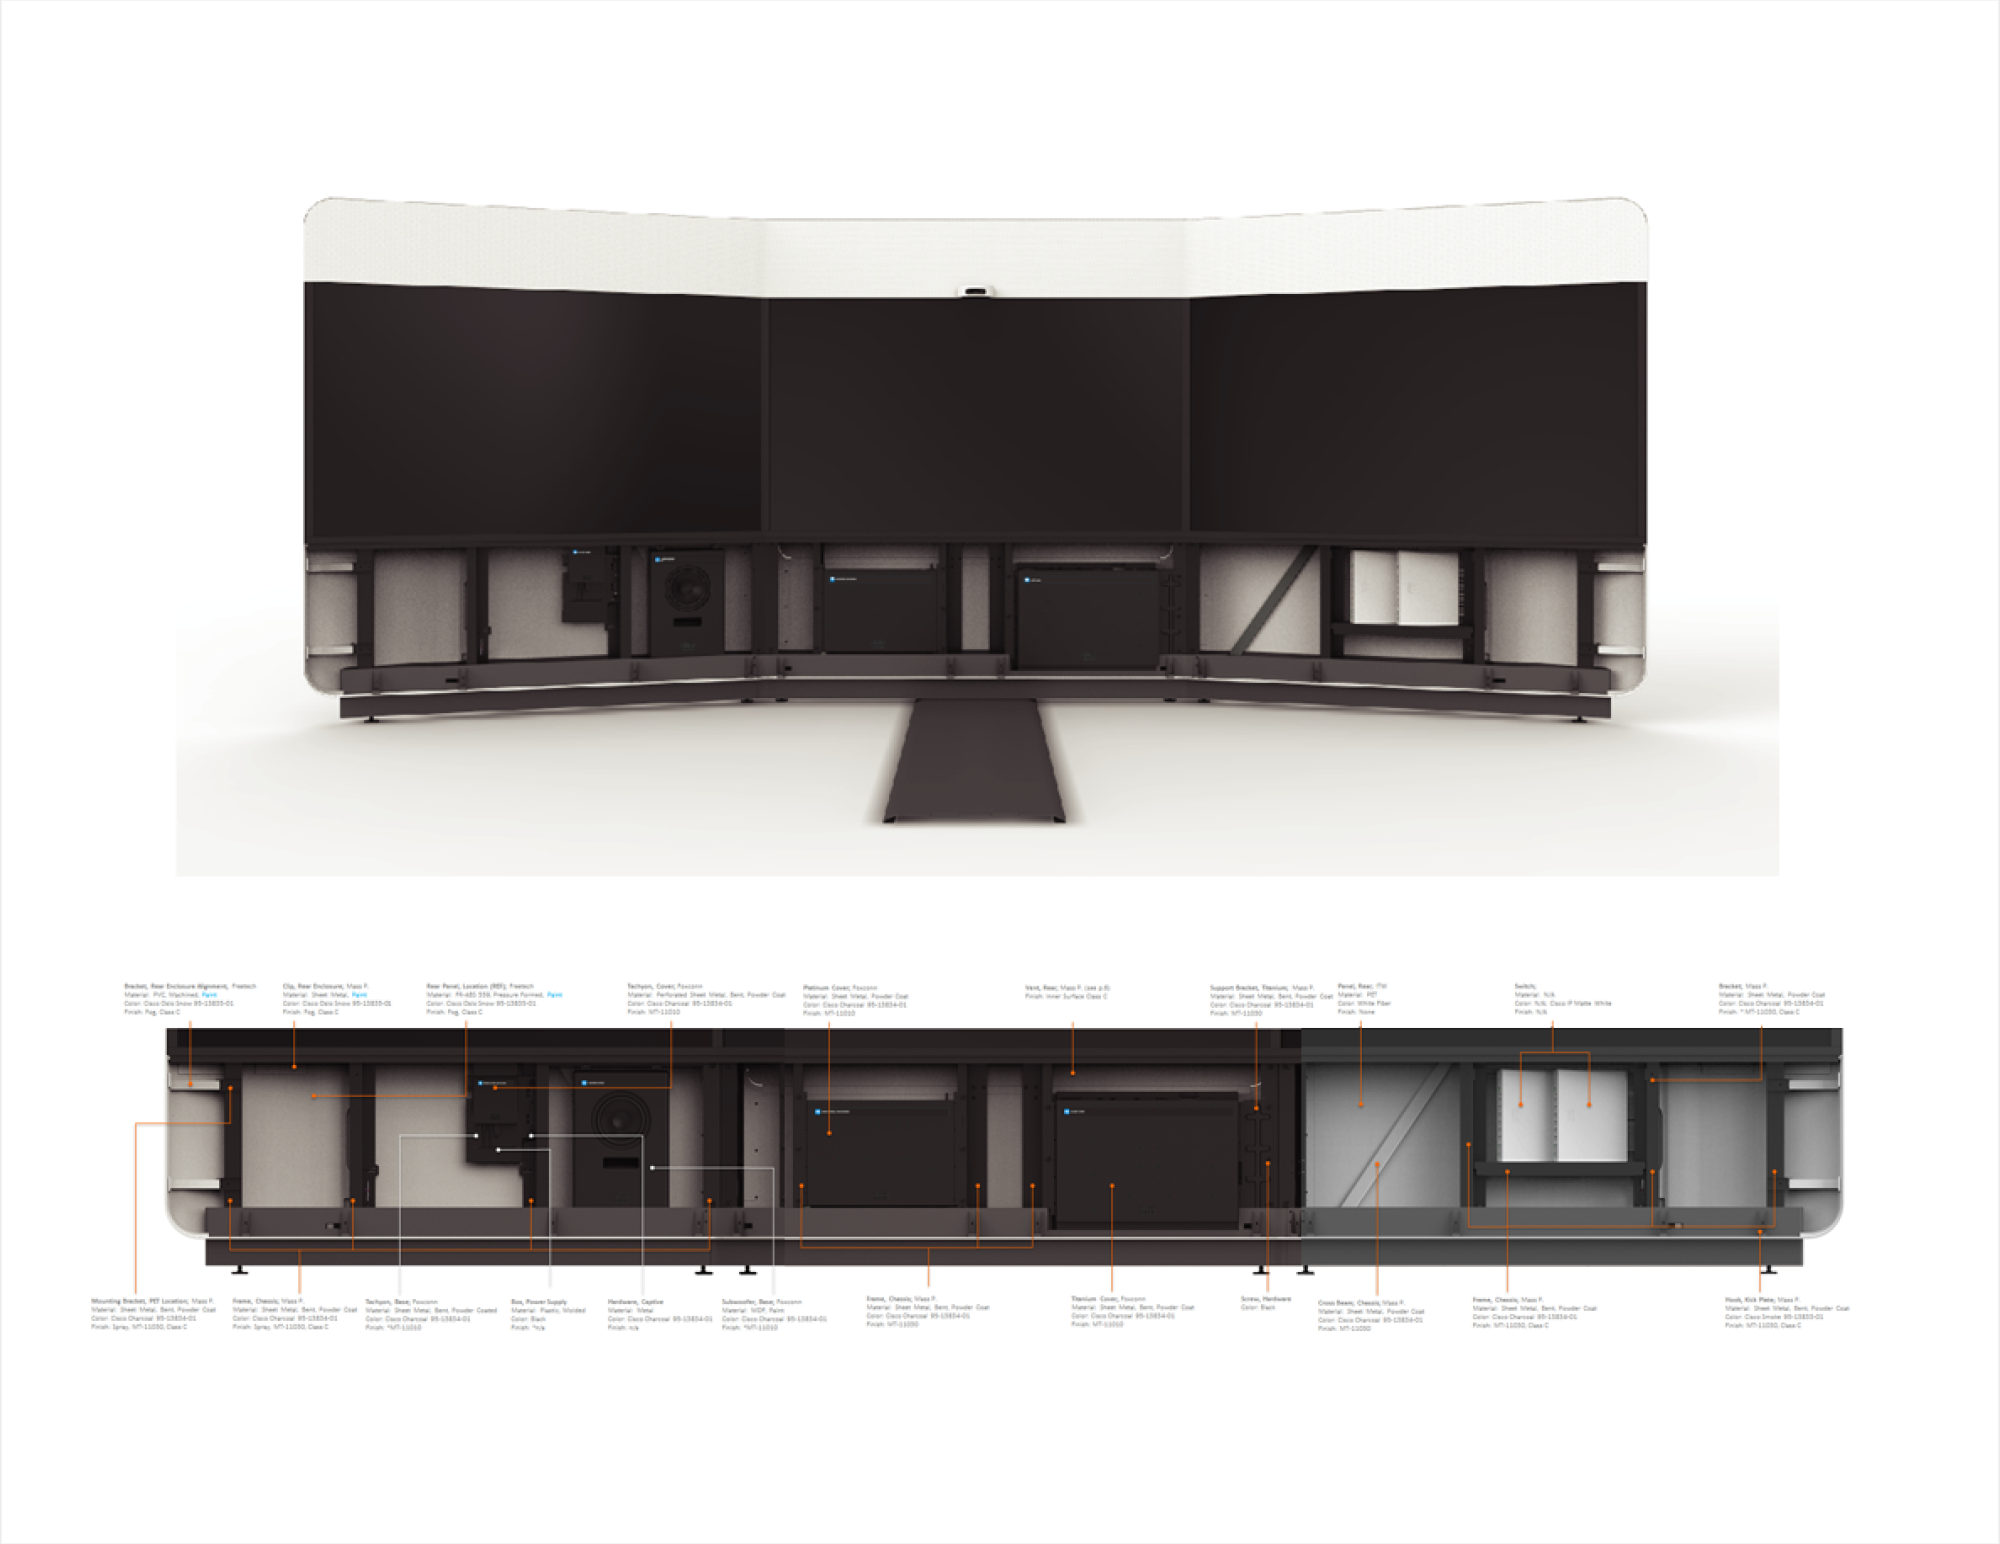
We often referred to the rear as the second front. With most display devices, the image is the important focus, so having a clear strategy for the design on the design and rear was absolutely essential.
The designs required consideration for shipping sizes as these hit the maximum limit for palette support.
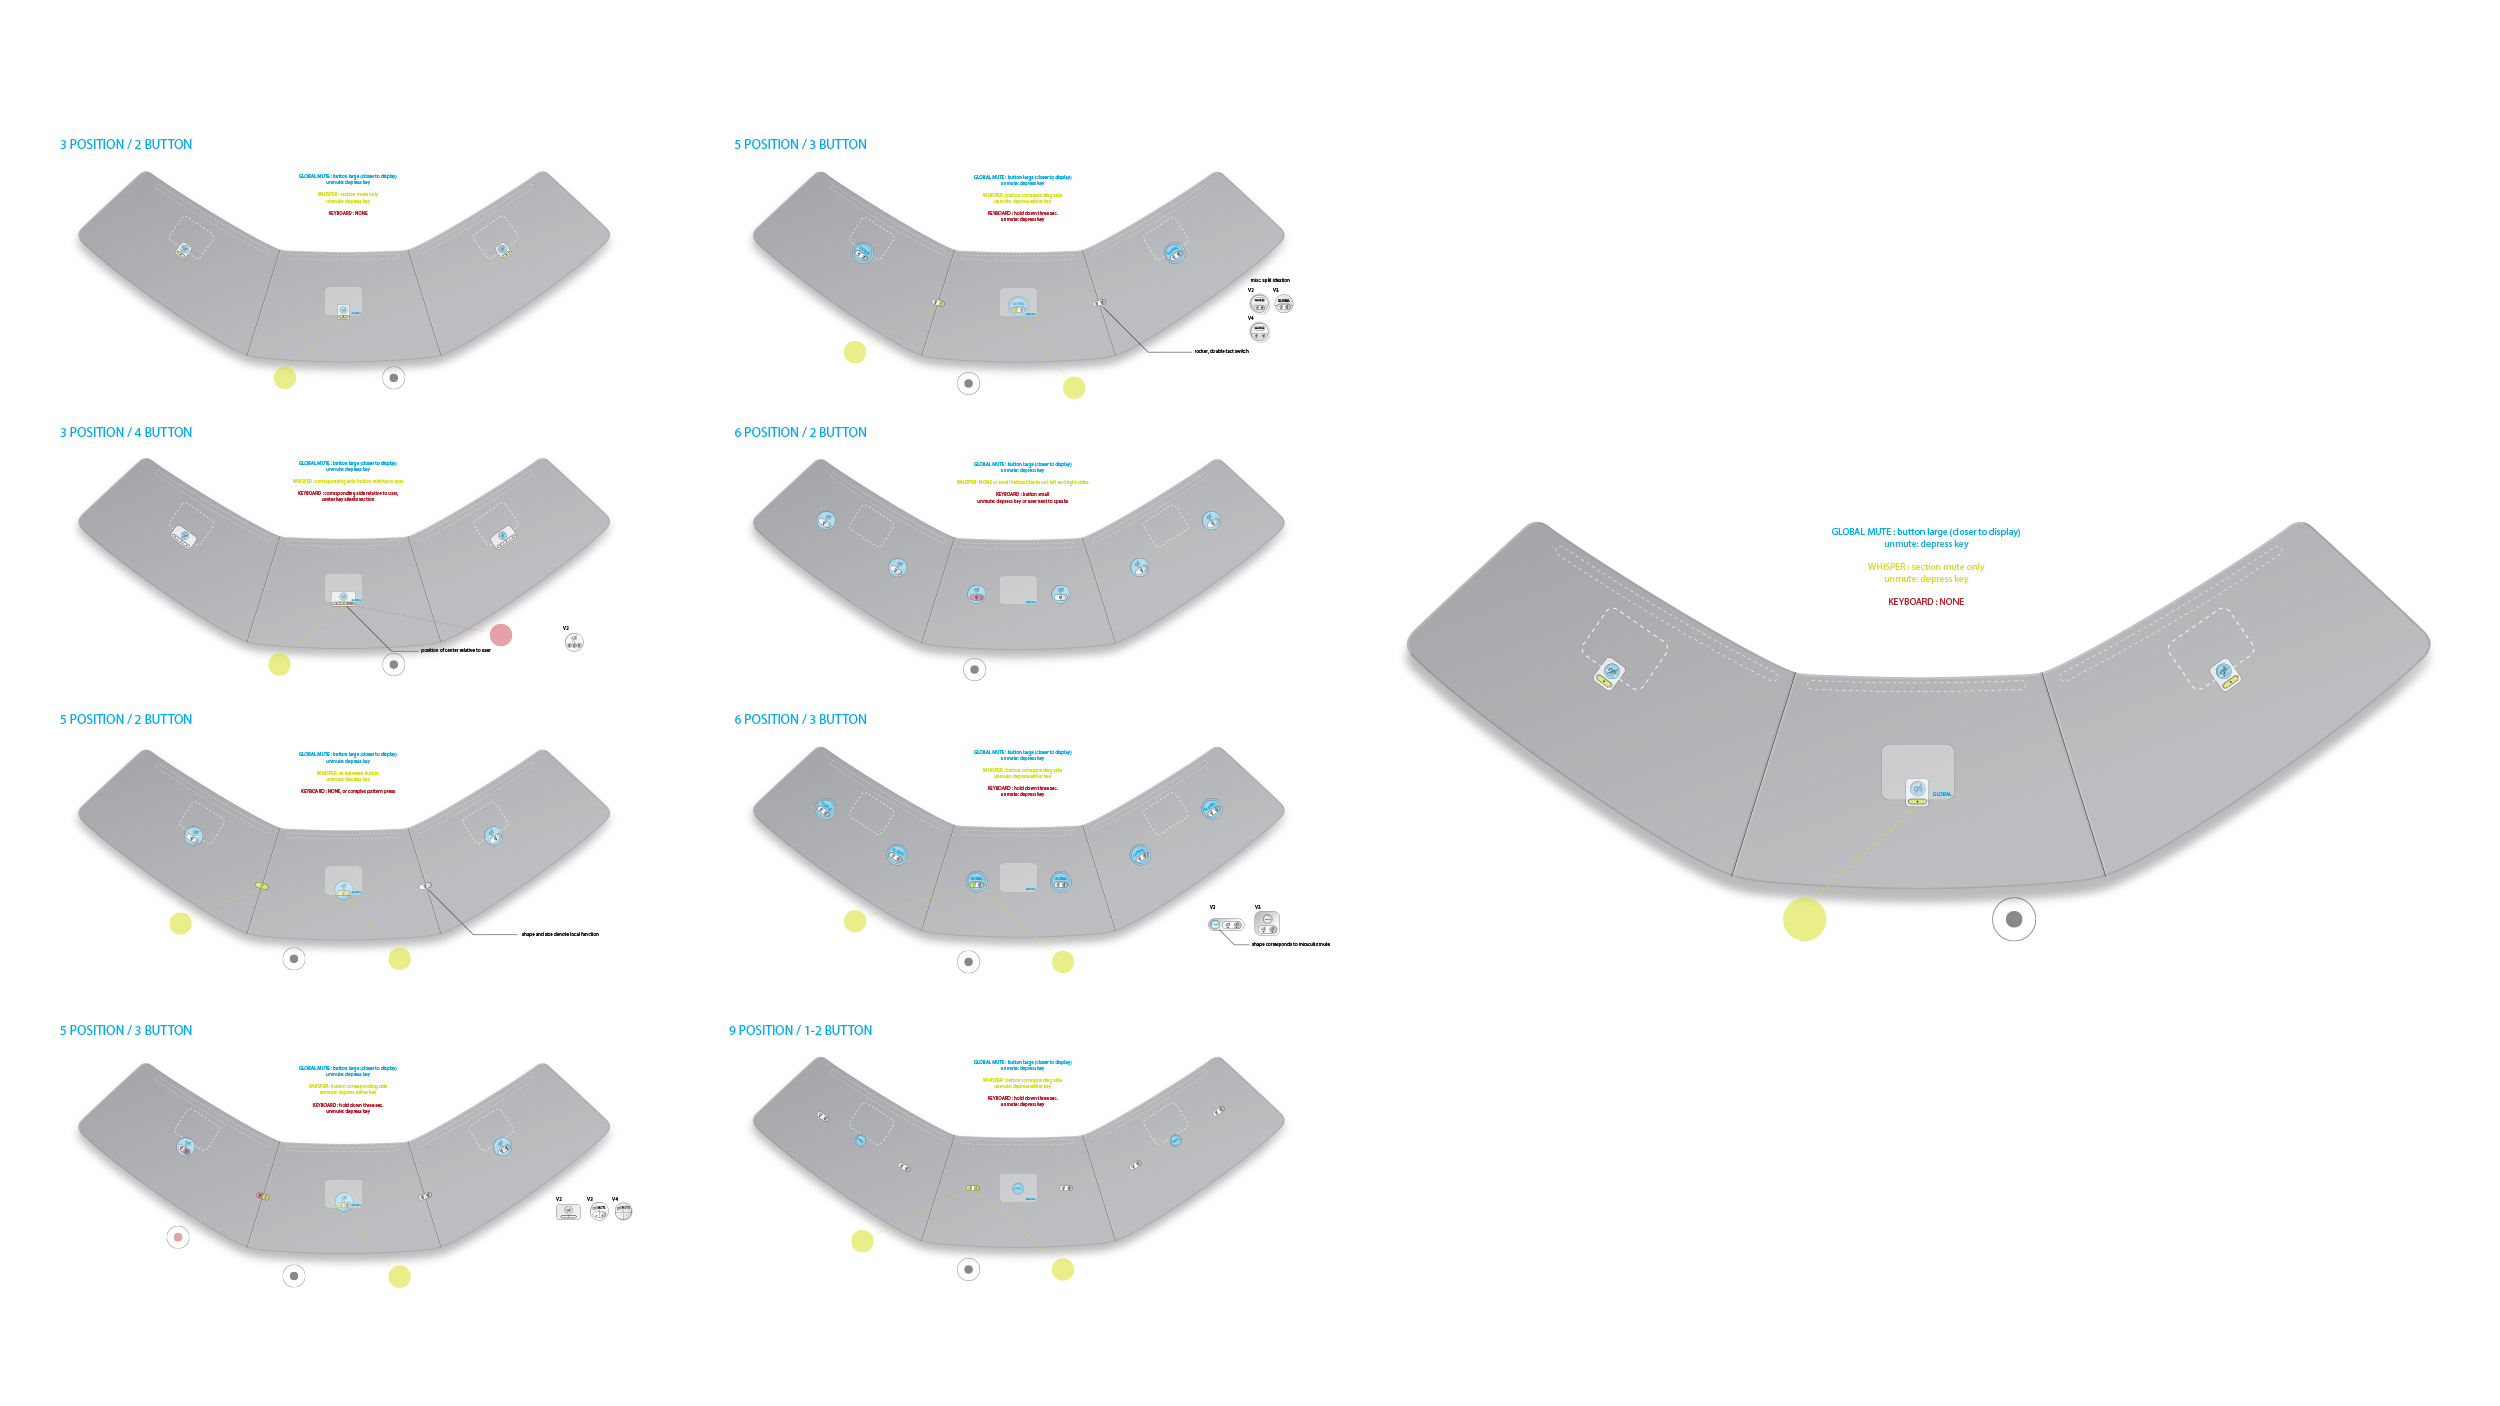
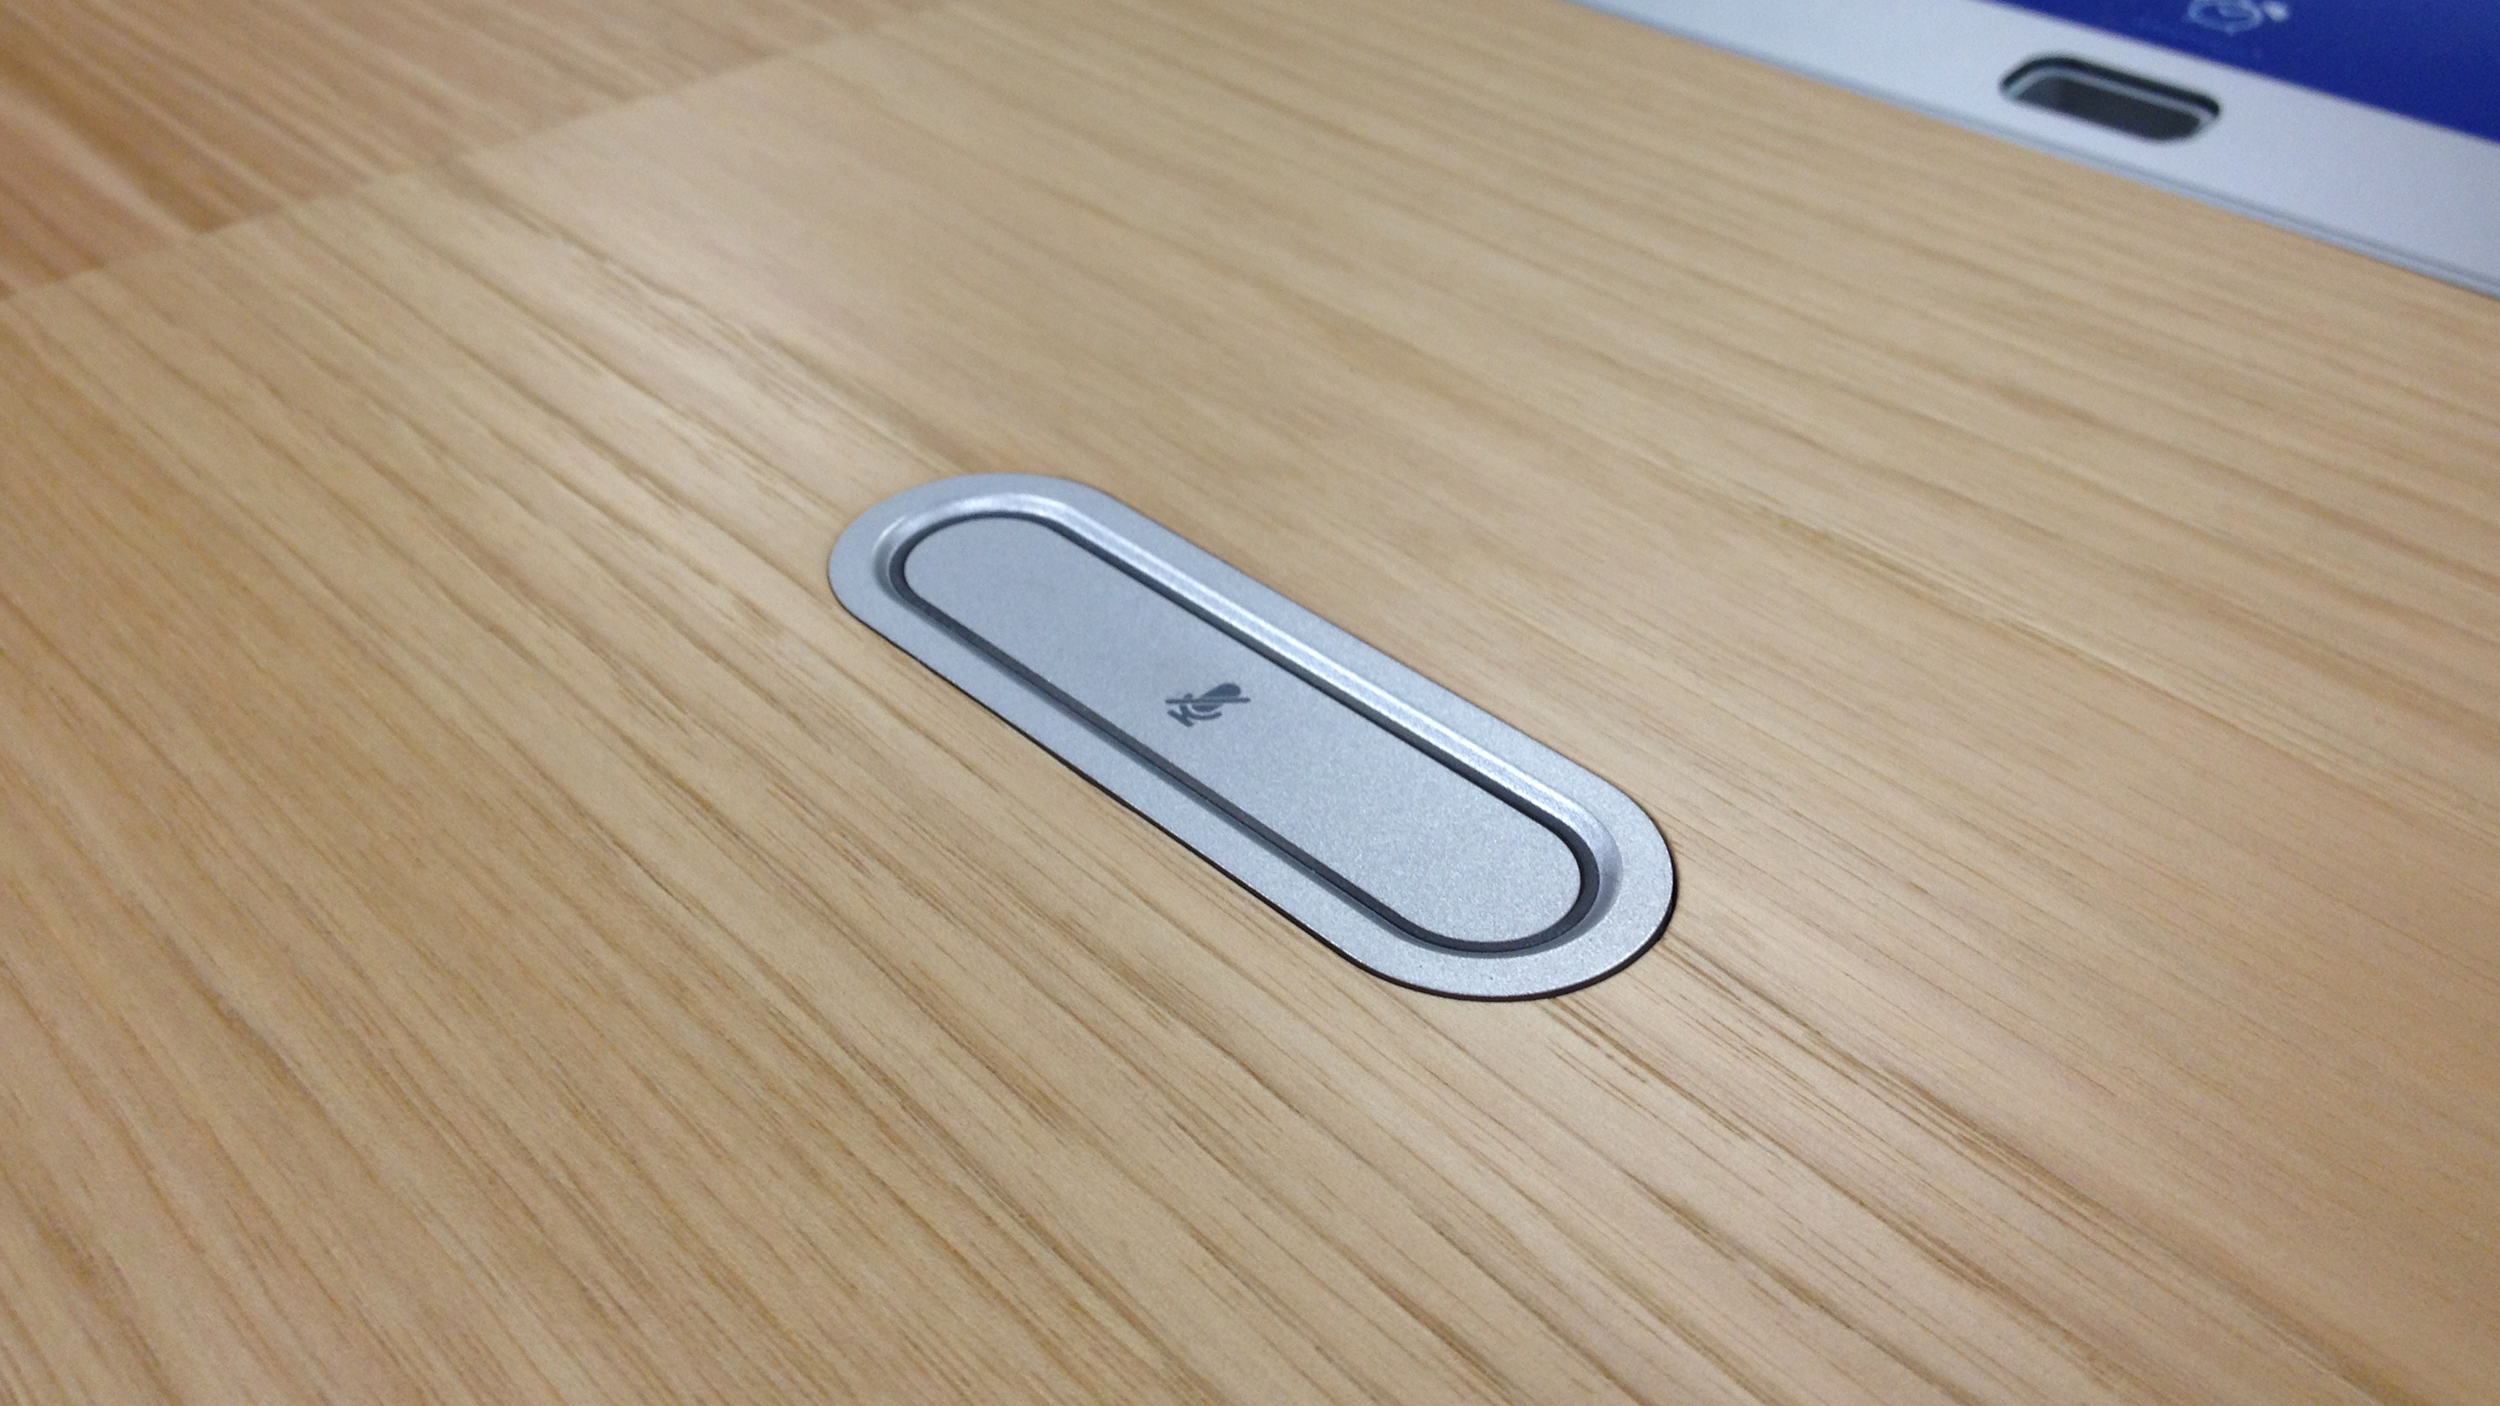
Table usability was extensively studied to understand how different combinations of actions would occur and how many controls, mics, plugs and controllers to include.
We spent time to study each detail, allowing the ebb and flow of details to mature into a language to make this product and inform the overall corporate language.
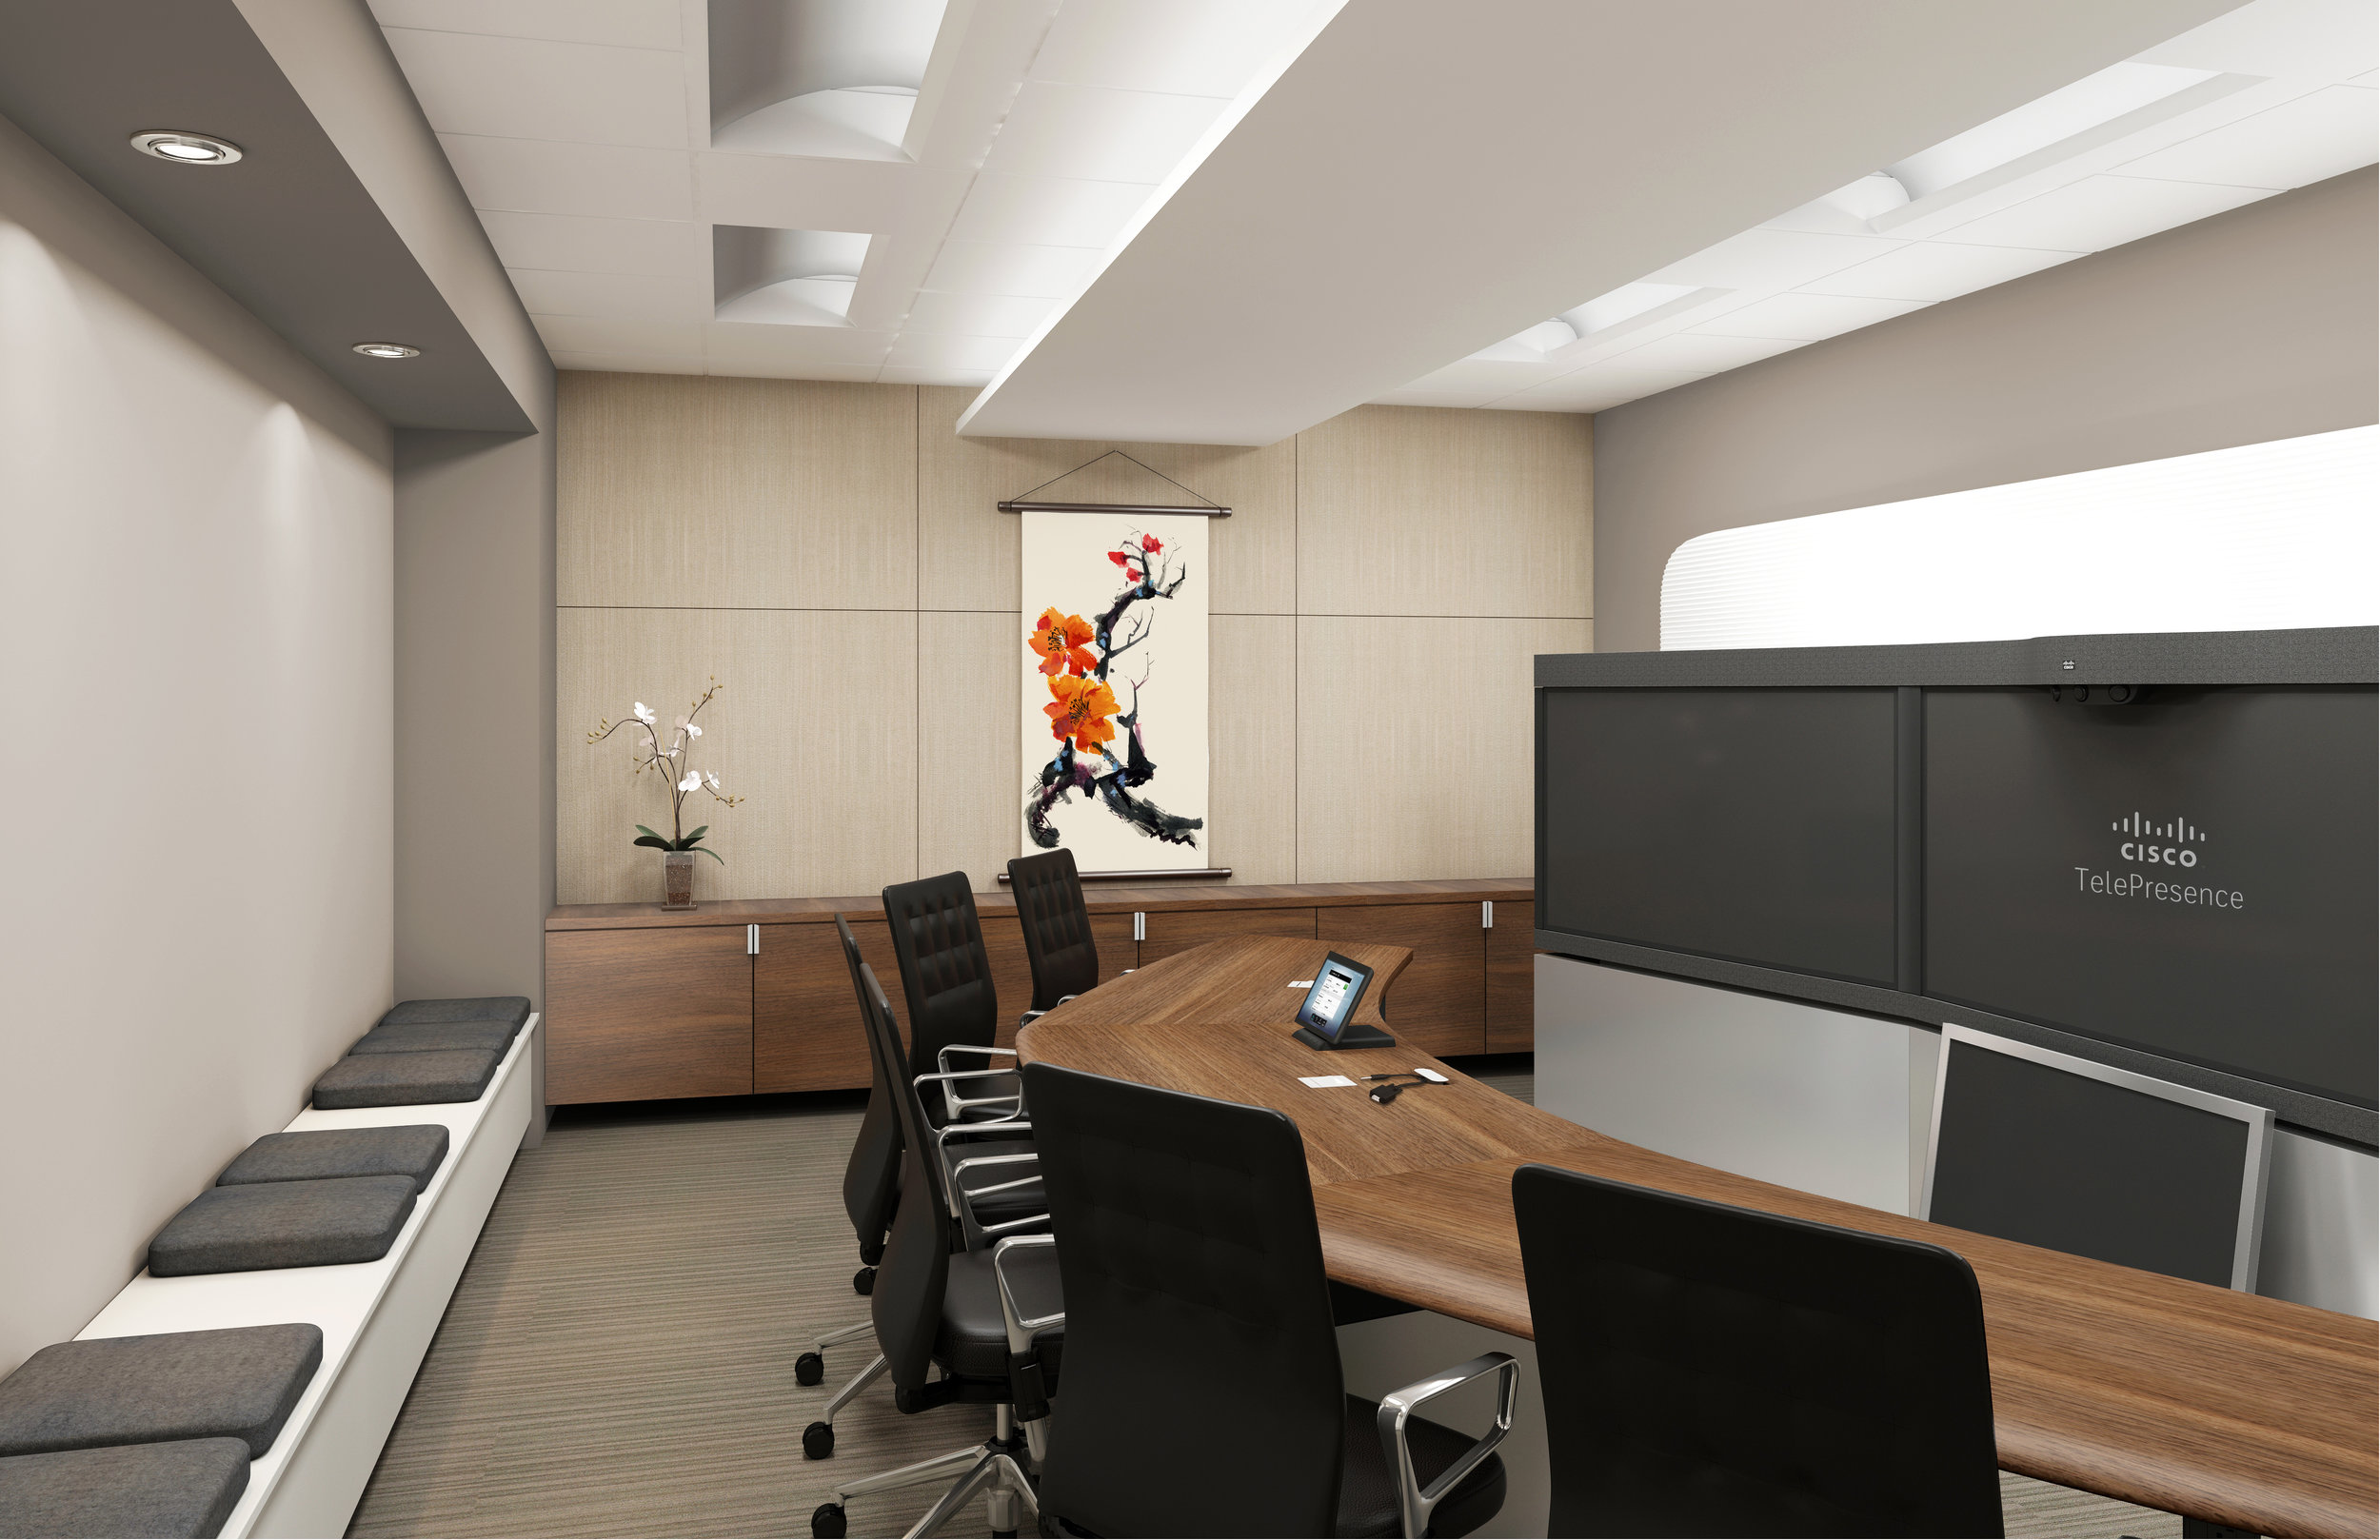
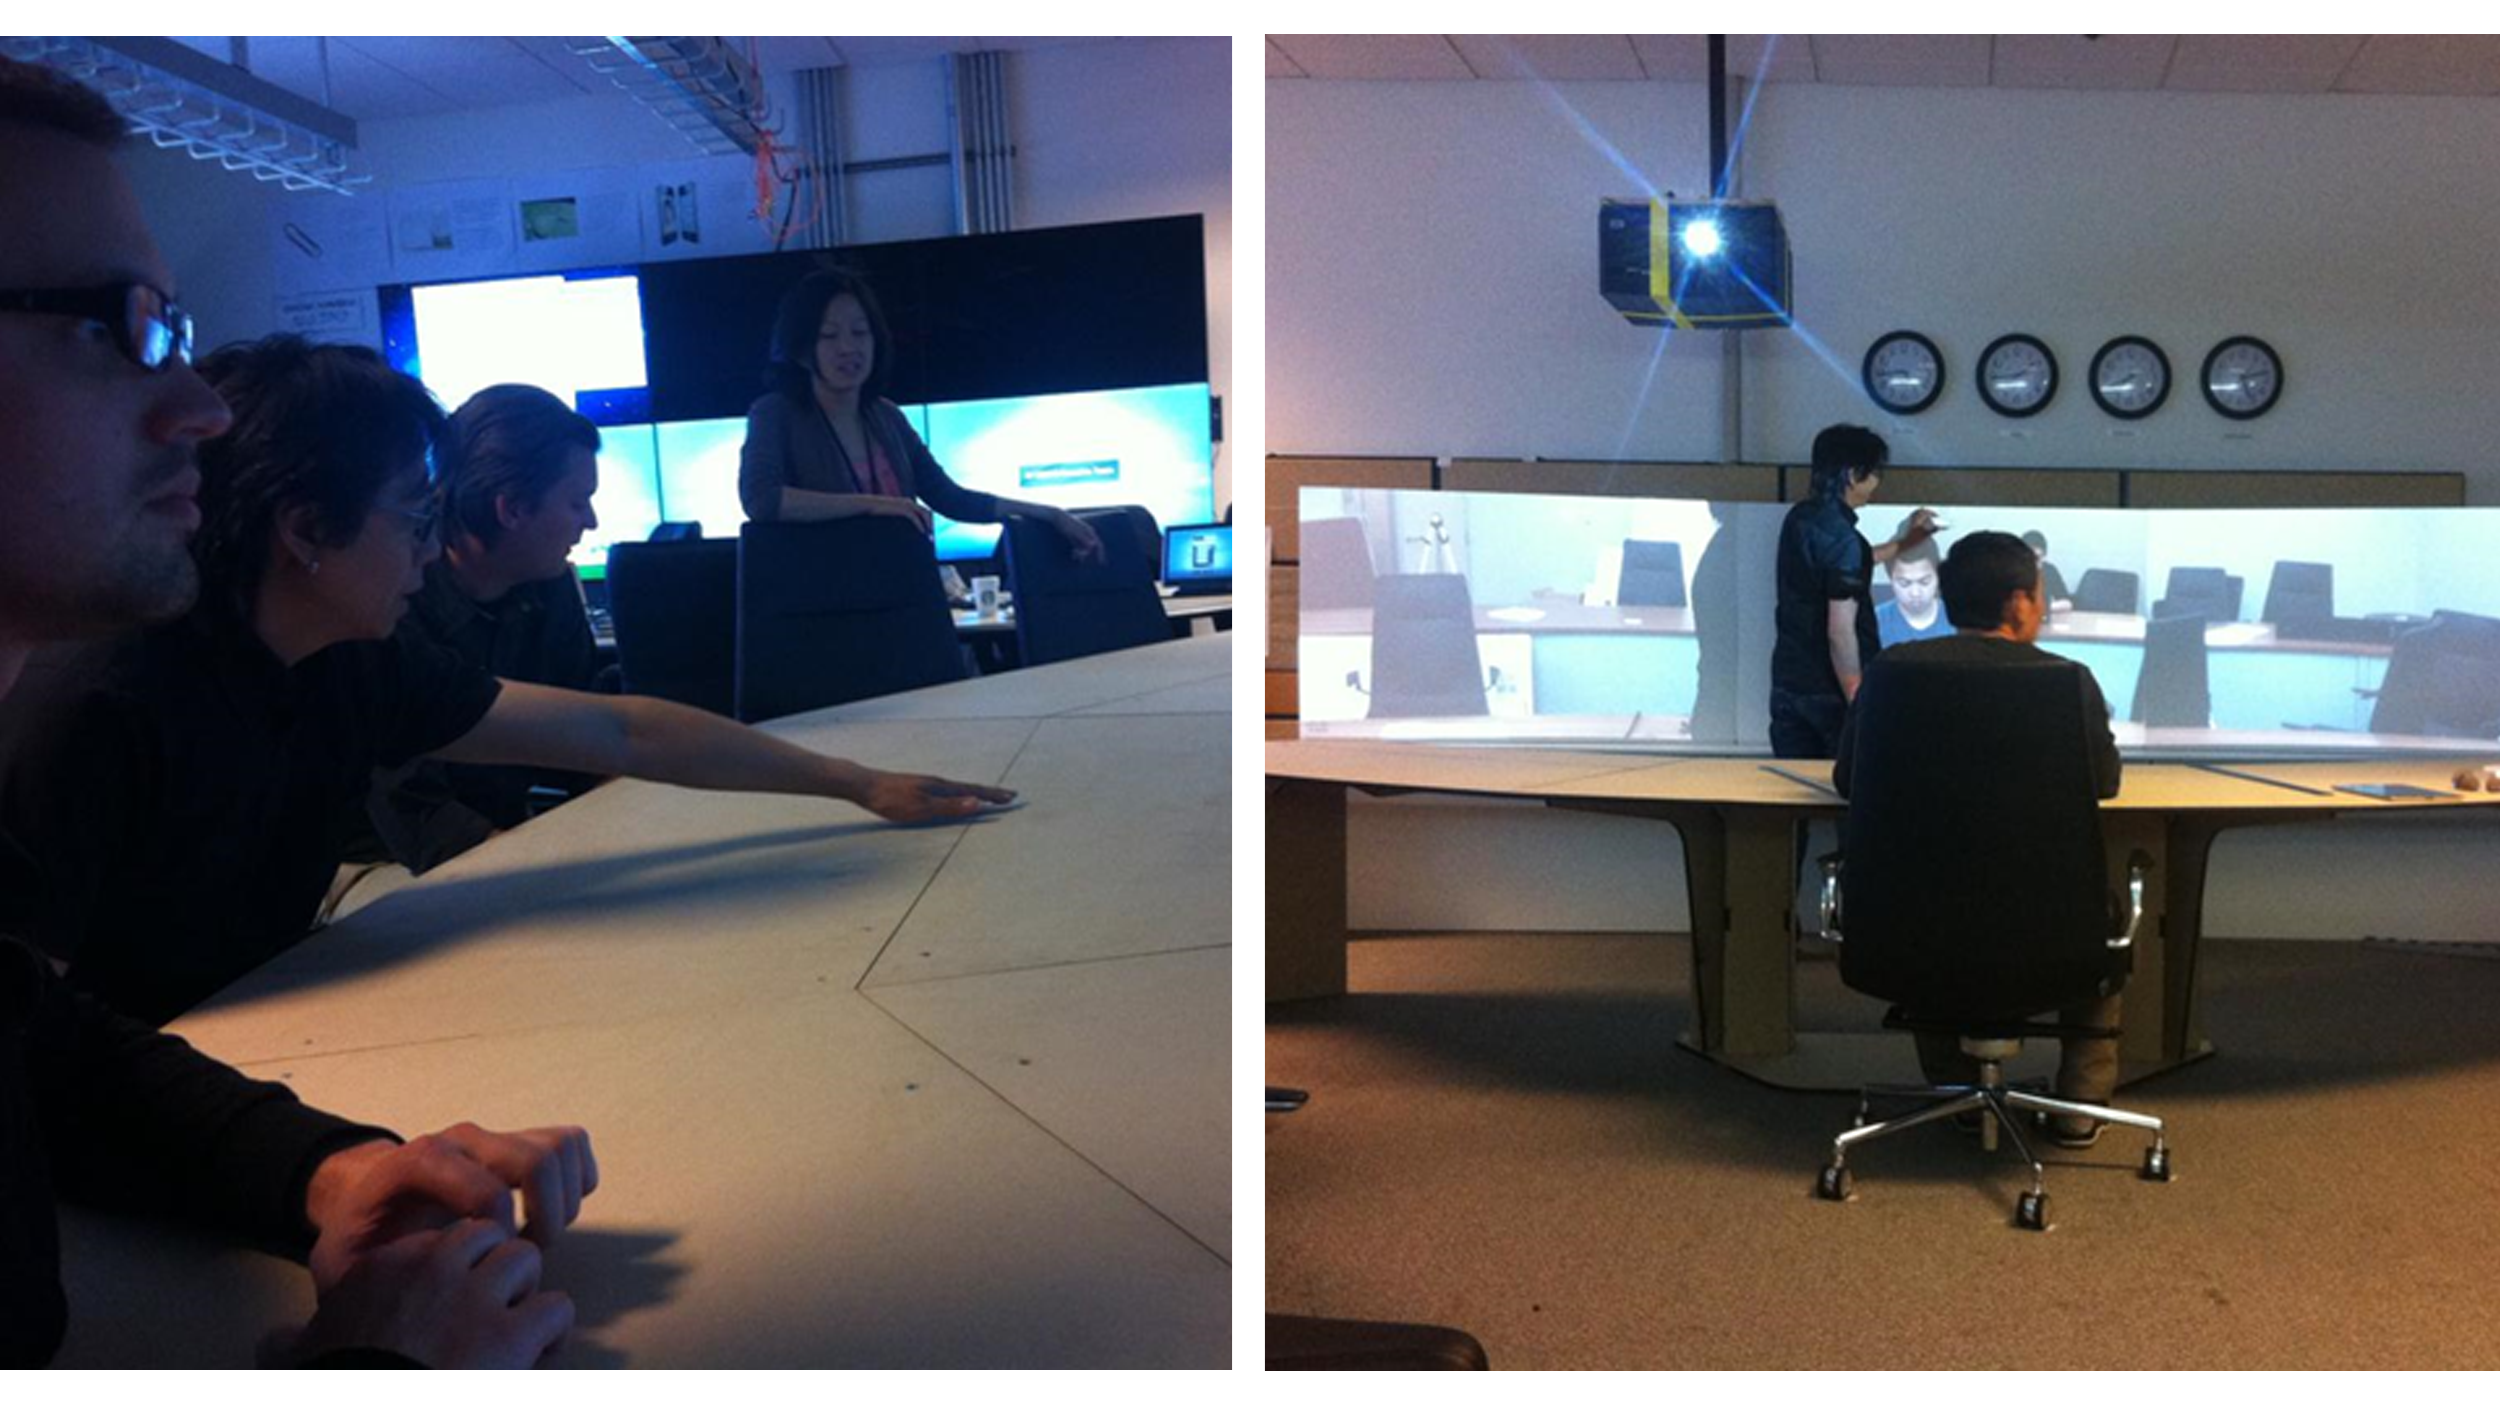
A study and survey was done to understand user perception when viewing life size heads on screens. Does the bottom extension help or hinder communication be it distracting or helping focus?
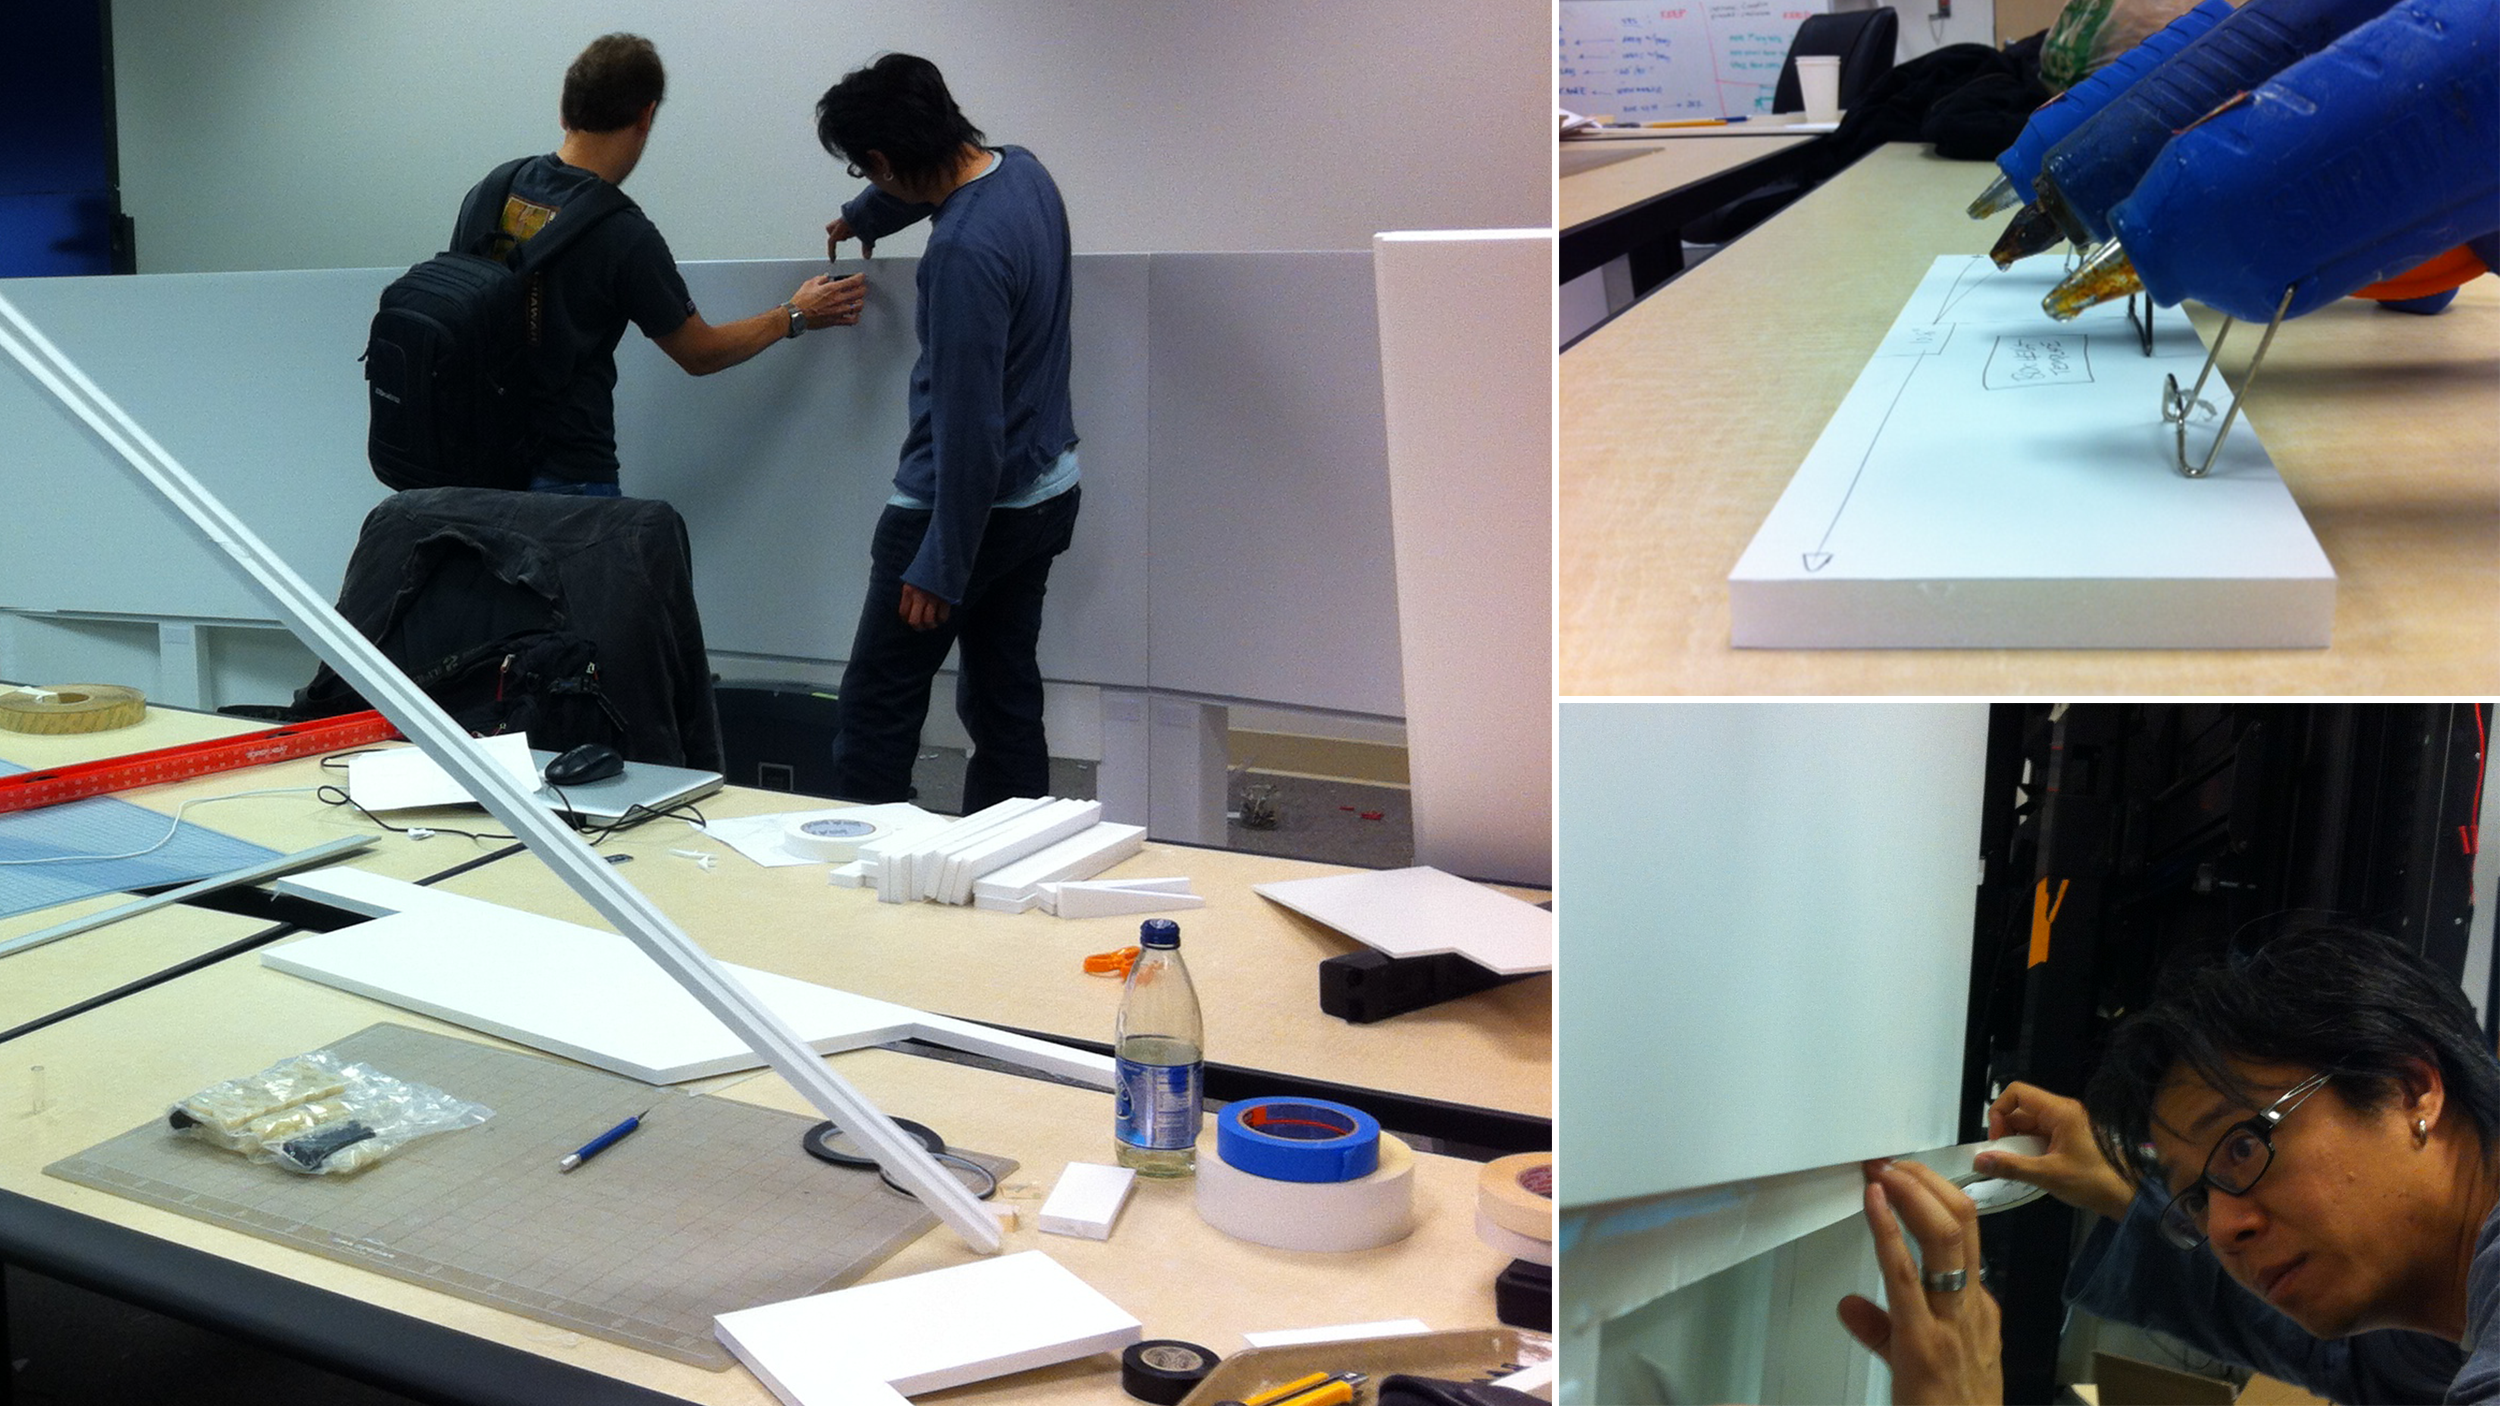
Once we narrowed the concepts, the CAD helped everyone understand what our goals were for the mock up builds.
The team set out to create mock ups to understand what the design was really going to feel like. Foam core, precision cutting, strategic use of wall mounts and tape allowed stakeholders to see what was taking shape.
A table mock up allowed testing of leg room, ingress/egress, plug connections. It also helped to inform about viewing area cutoffs and tradeoffs around cables, laptops, and voice reception.
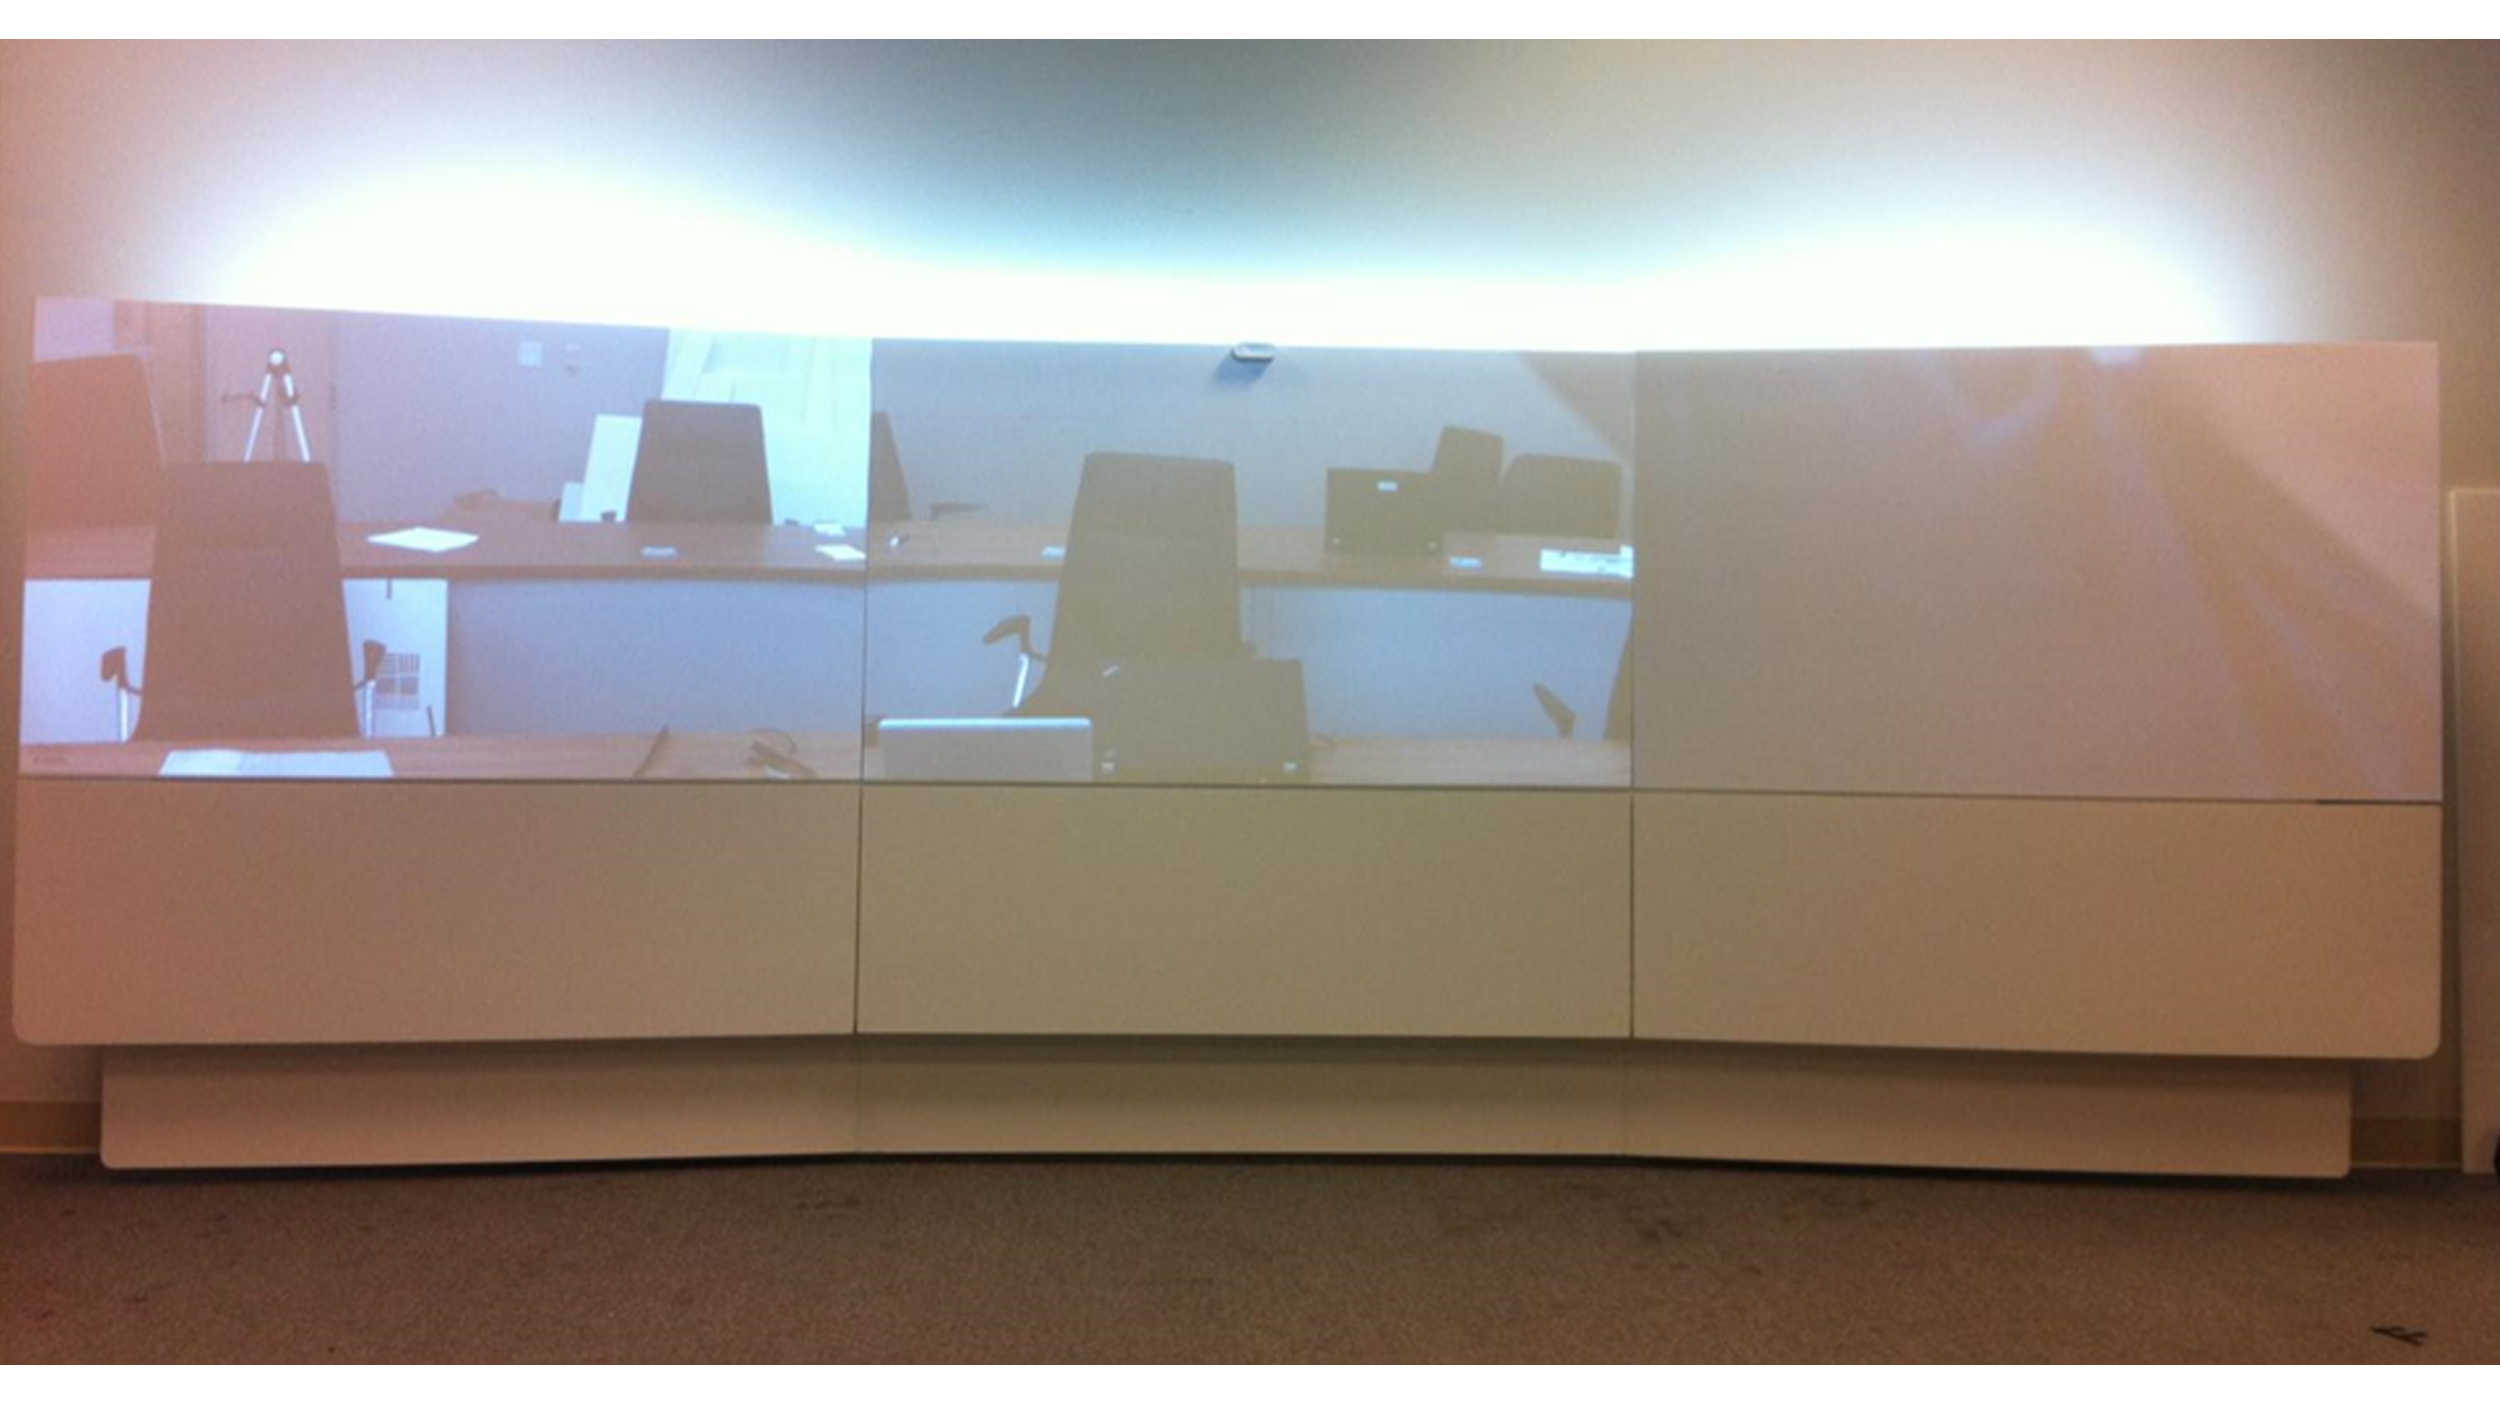
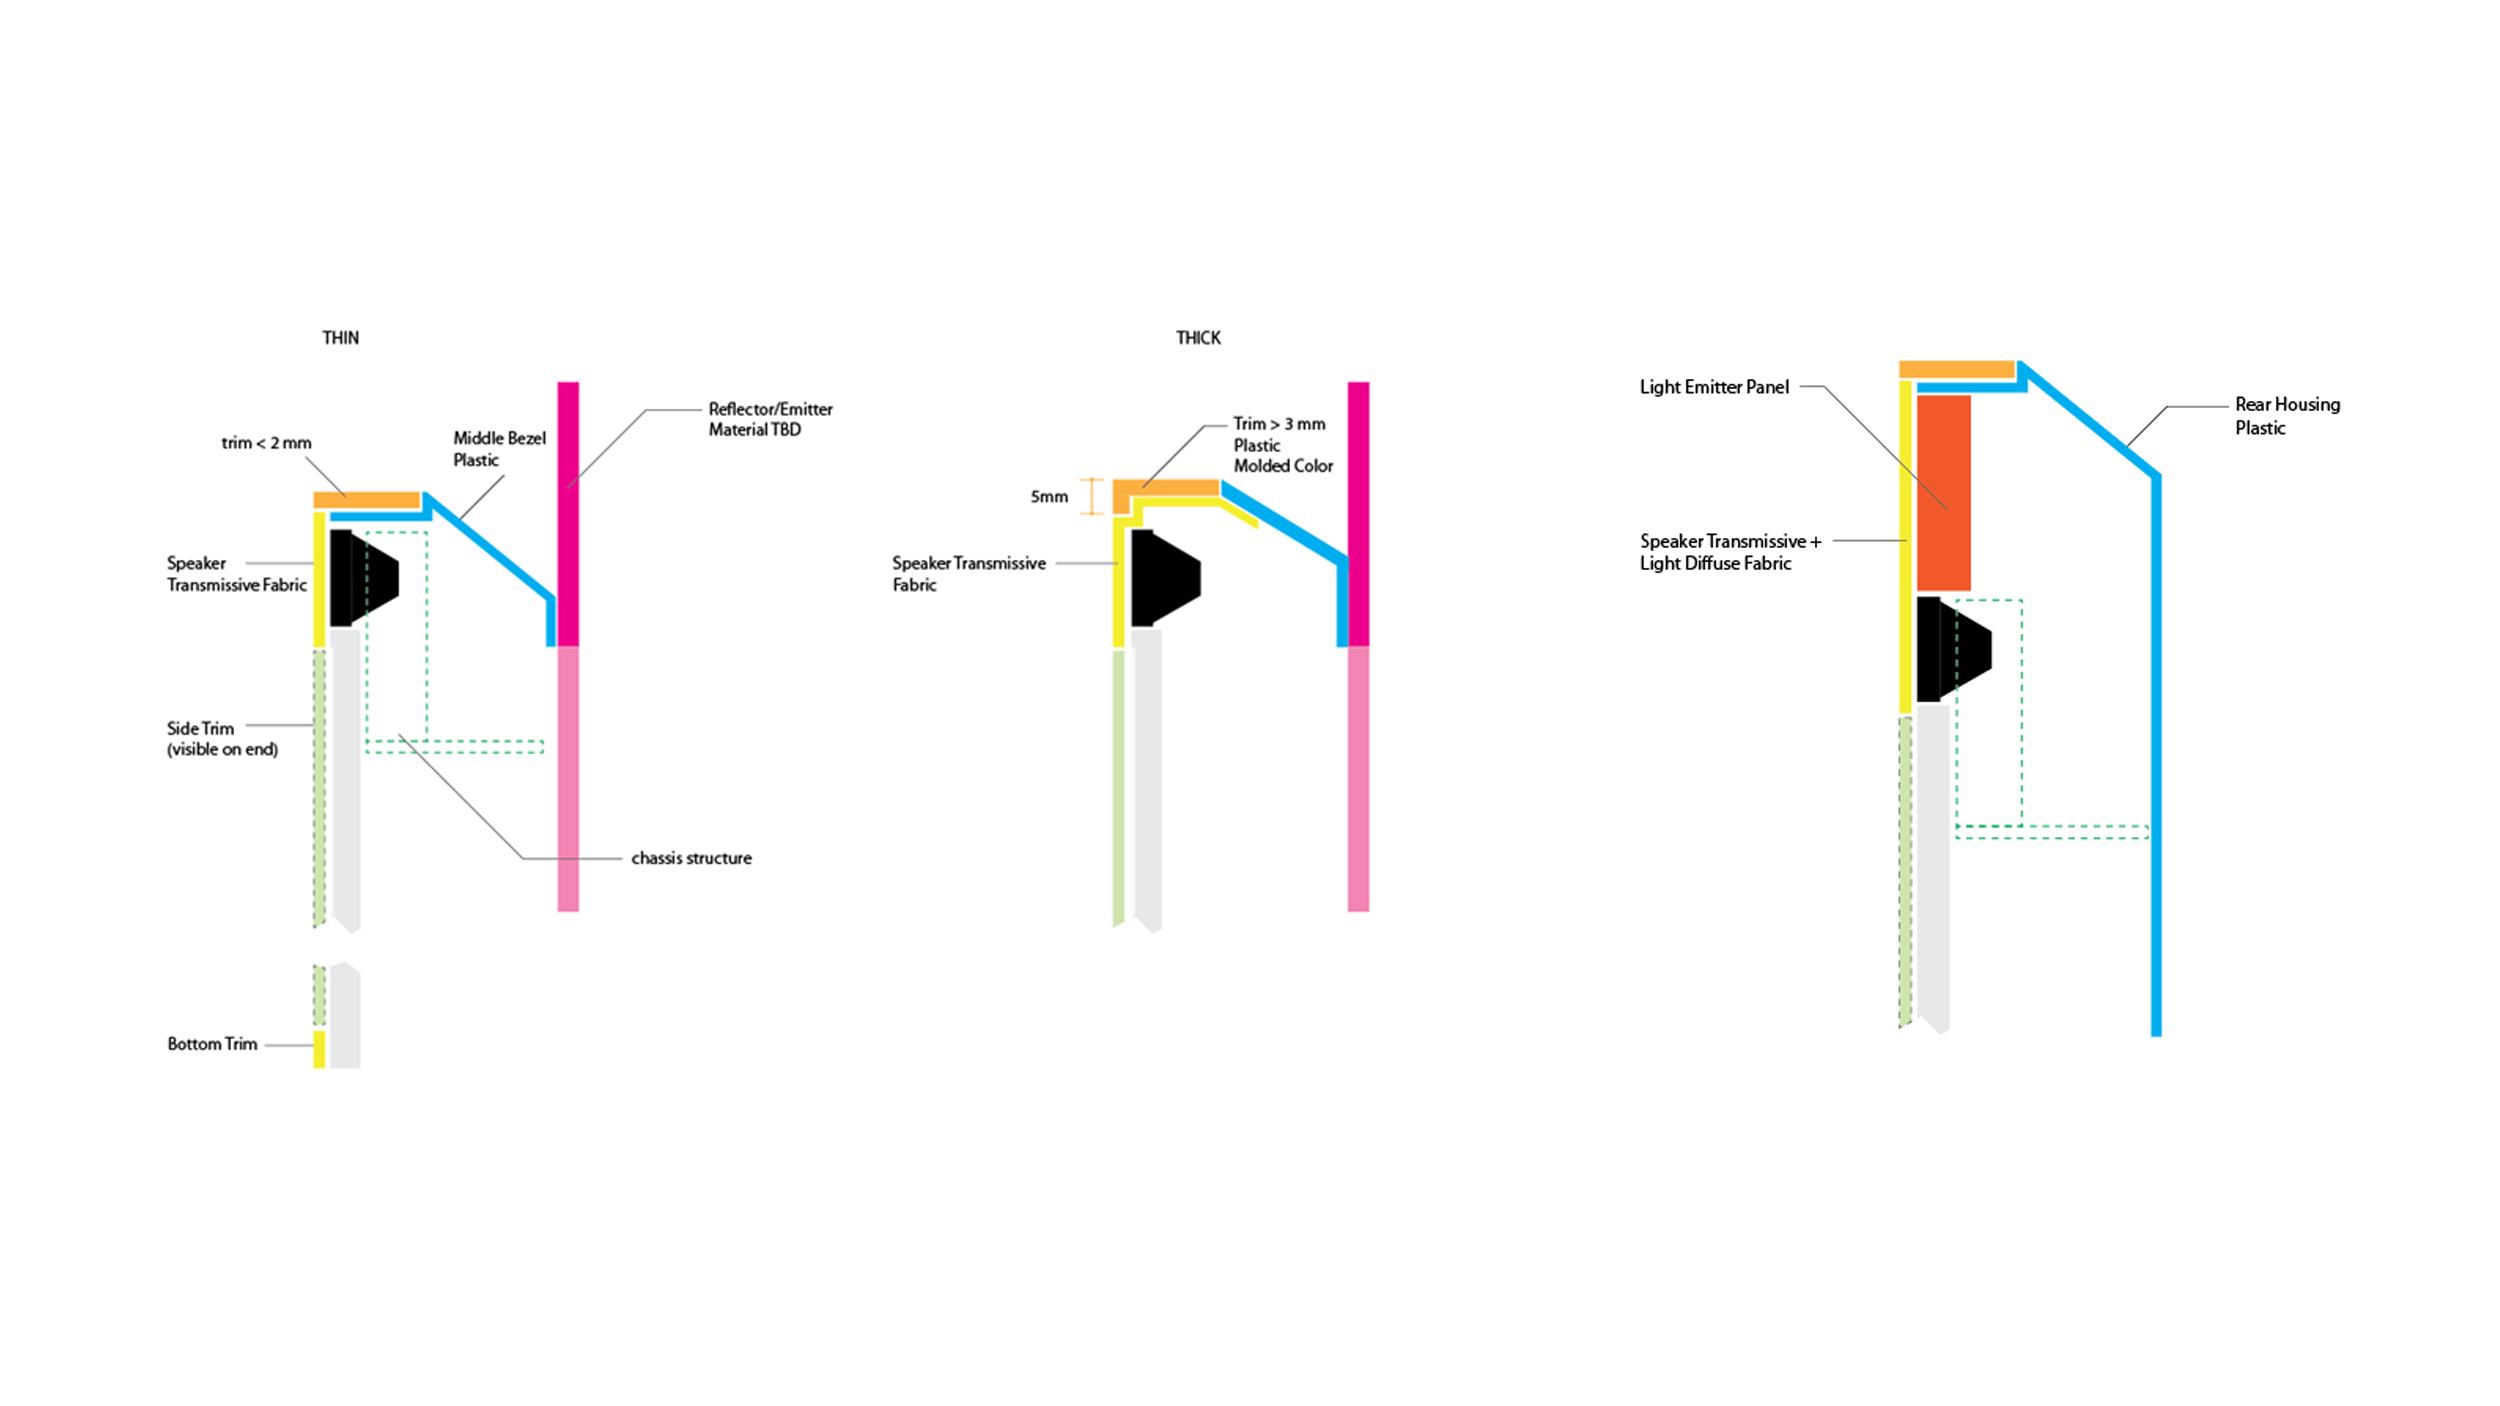
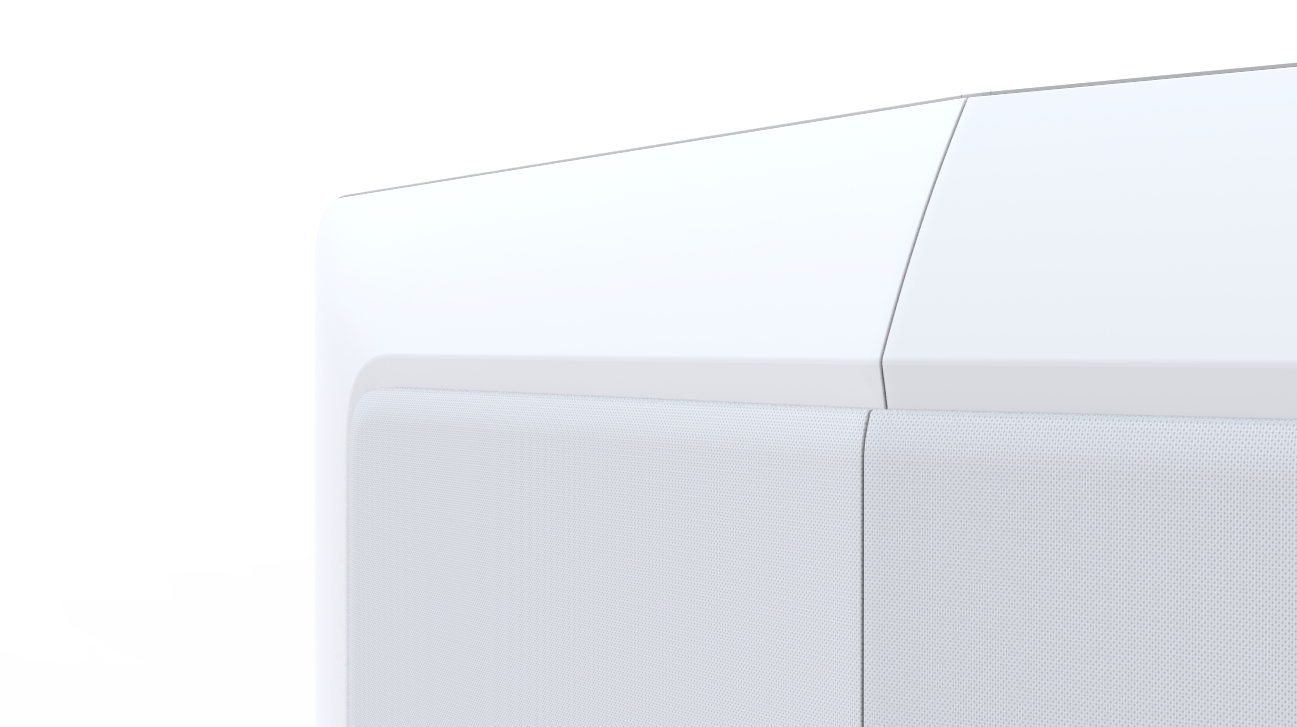
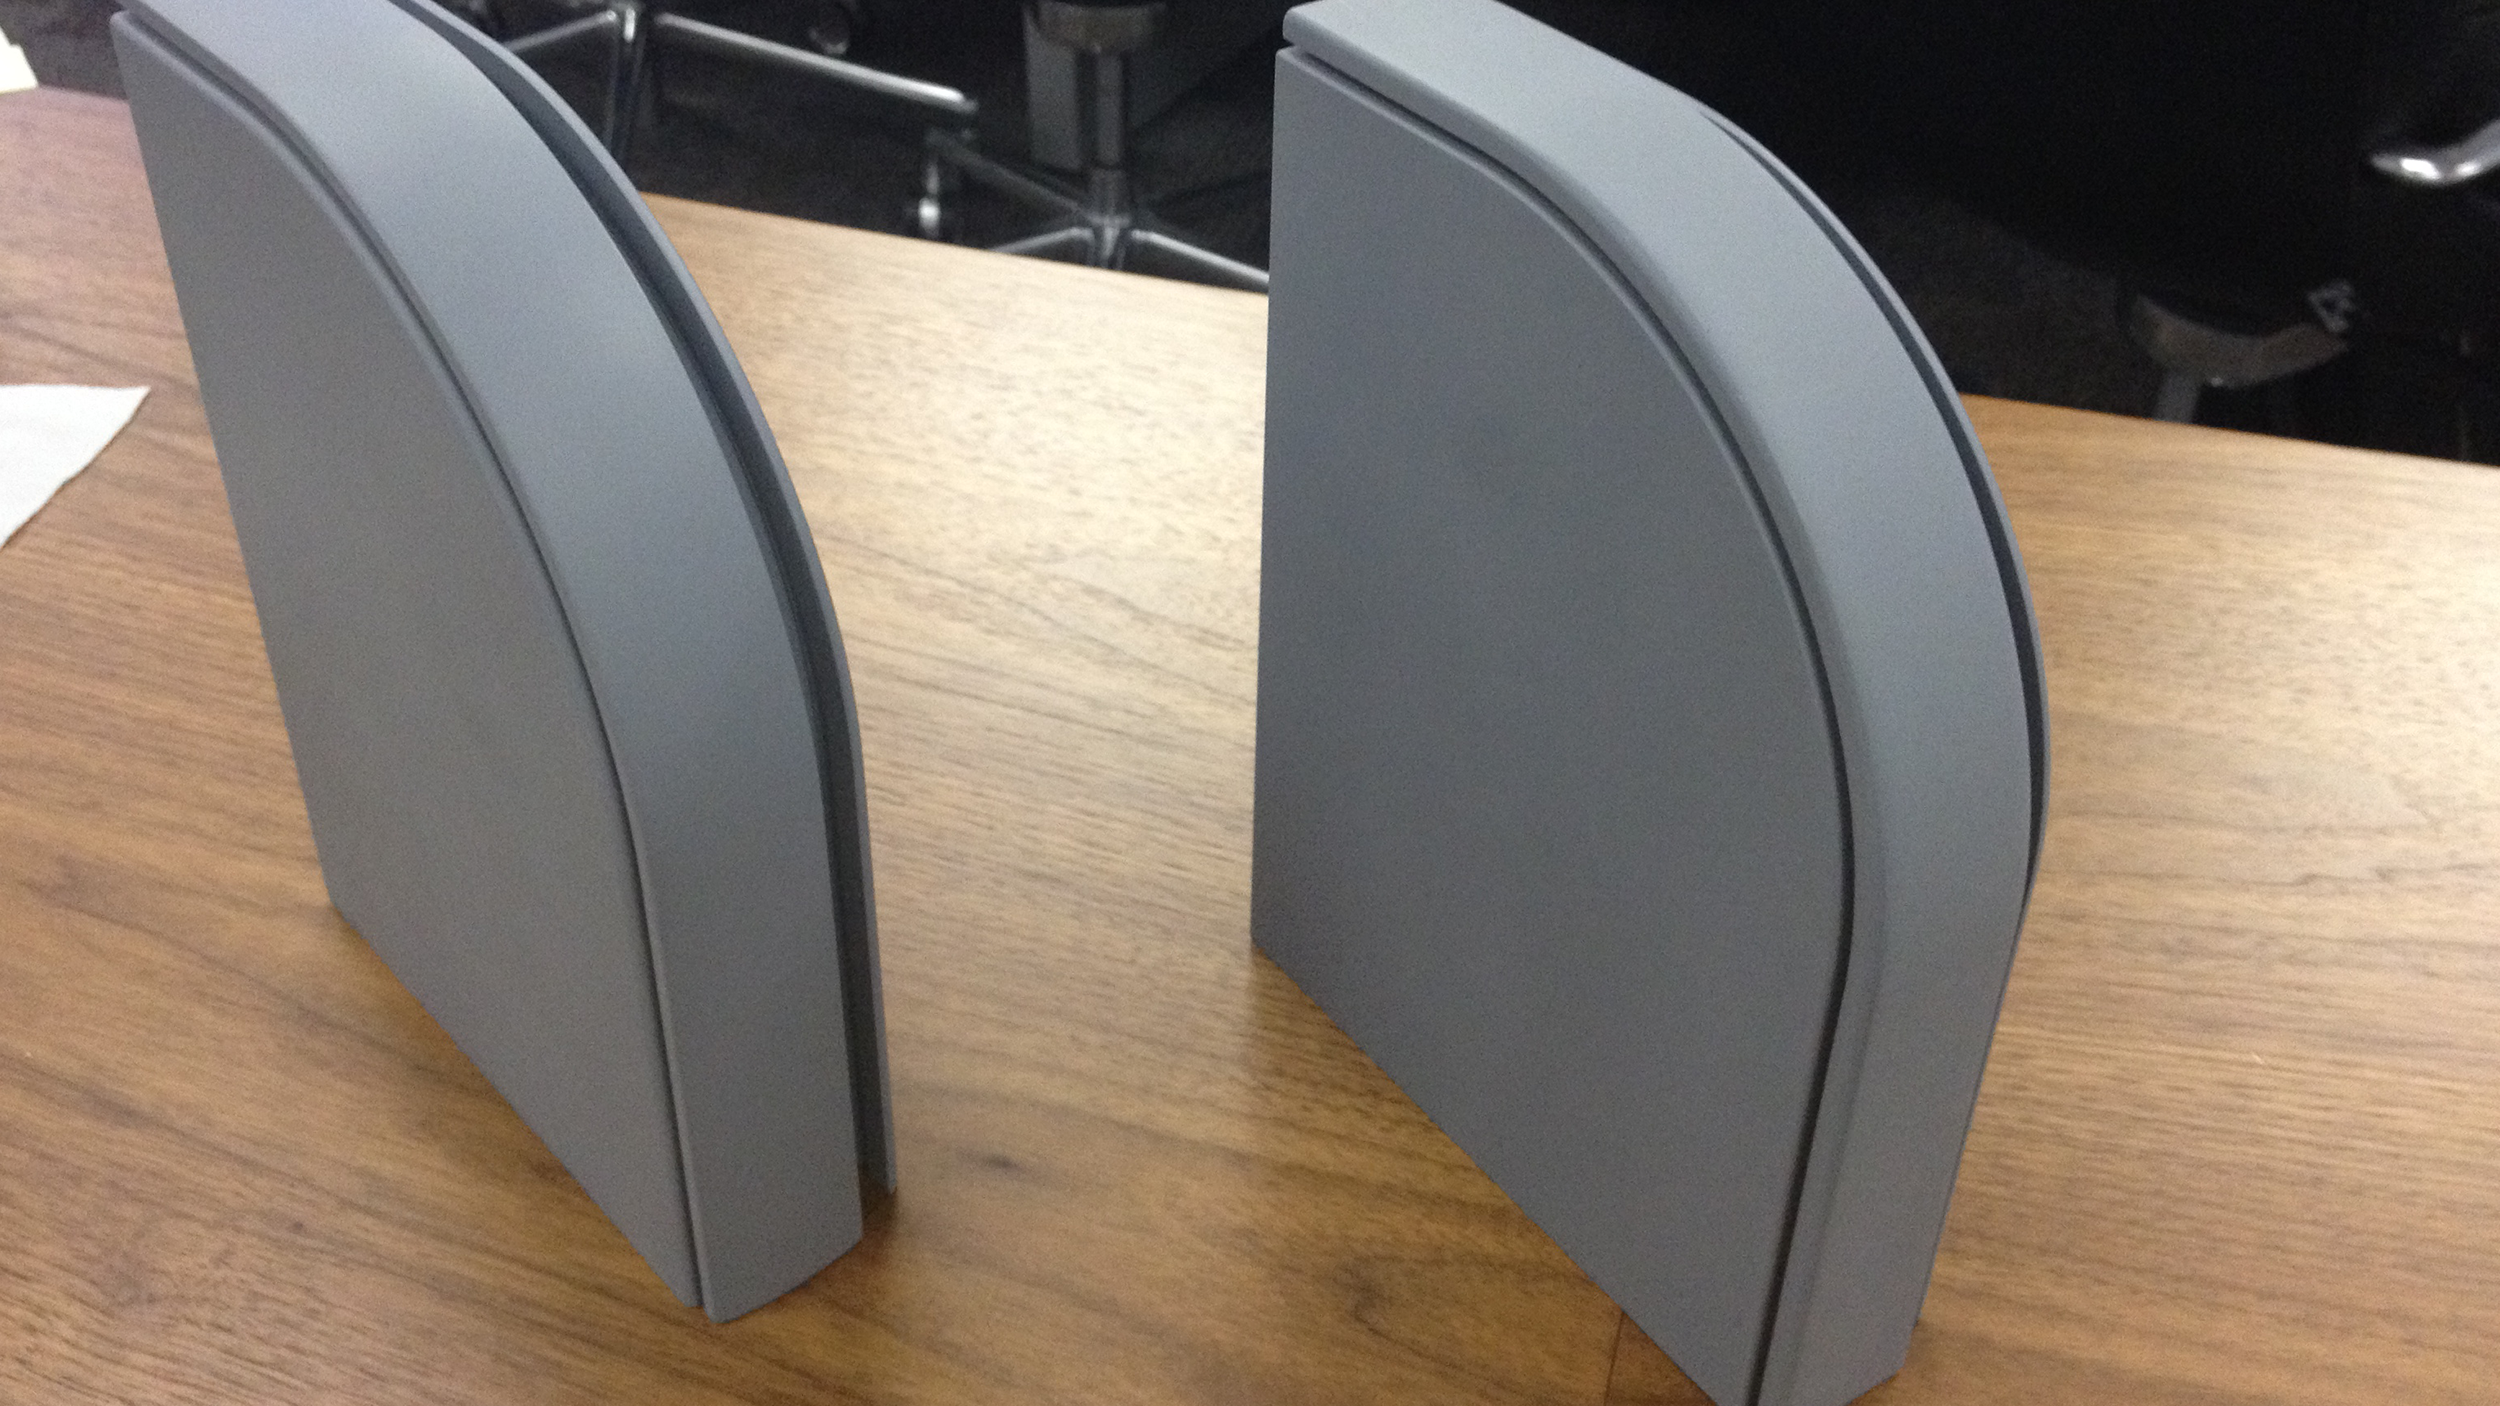
With large scale panels, any small deviation was going to be magnified. Execution of Class A surfacing helped perfect reflections and minimize tooling to part issues. The final design kept the bezels thin at the edge, making the displays feel minimal and precise with a strategy to vent without surface intrusions.
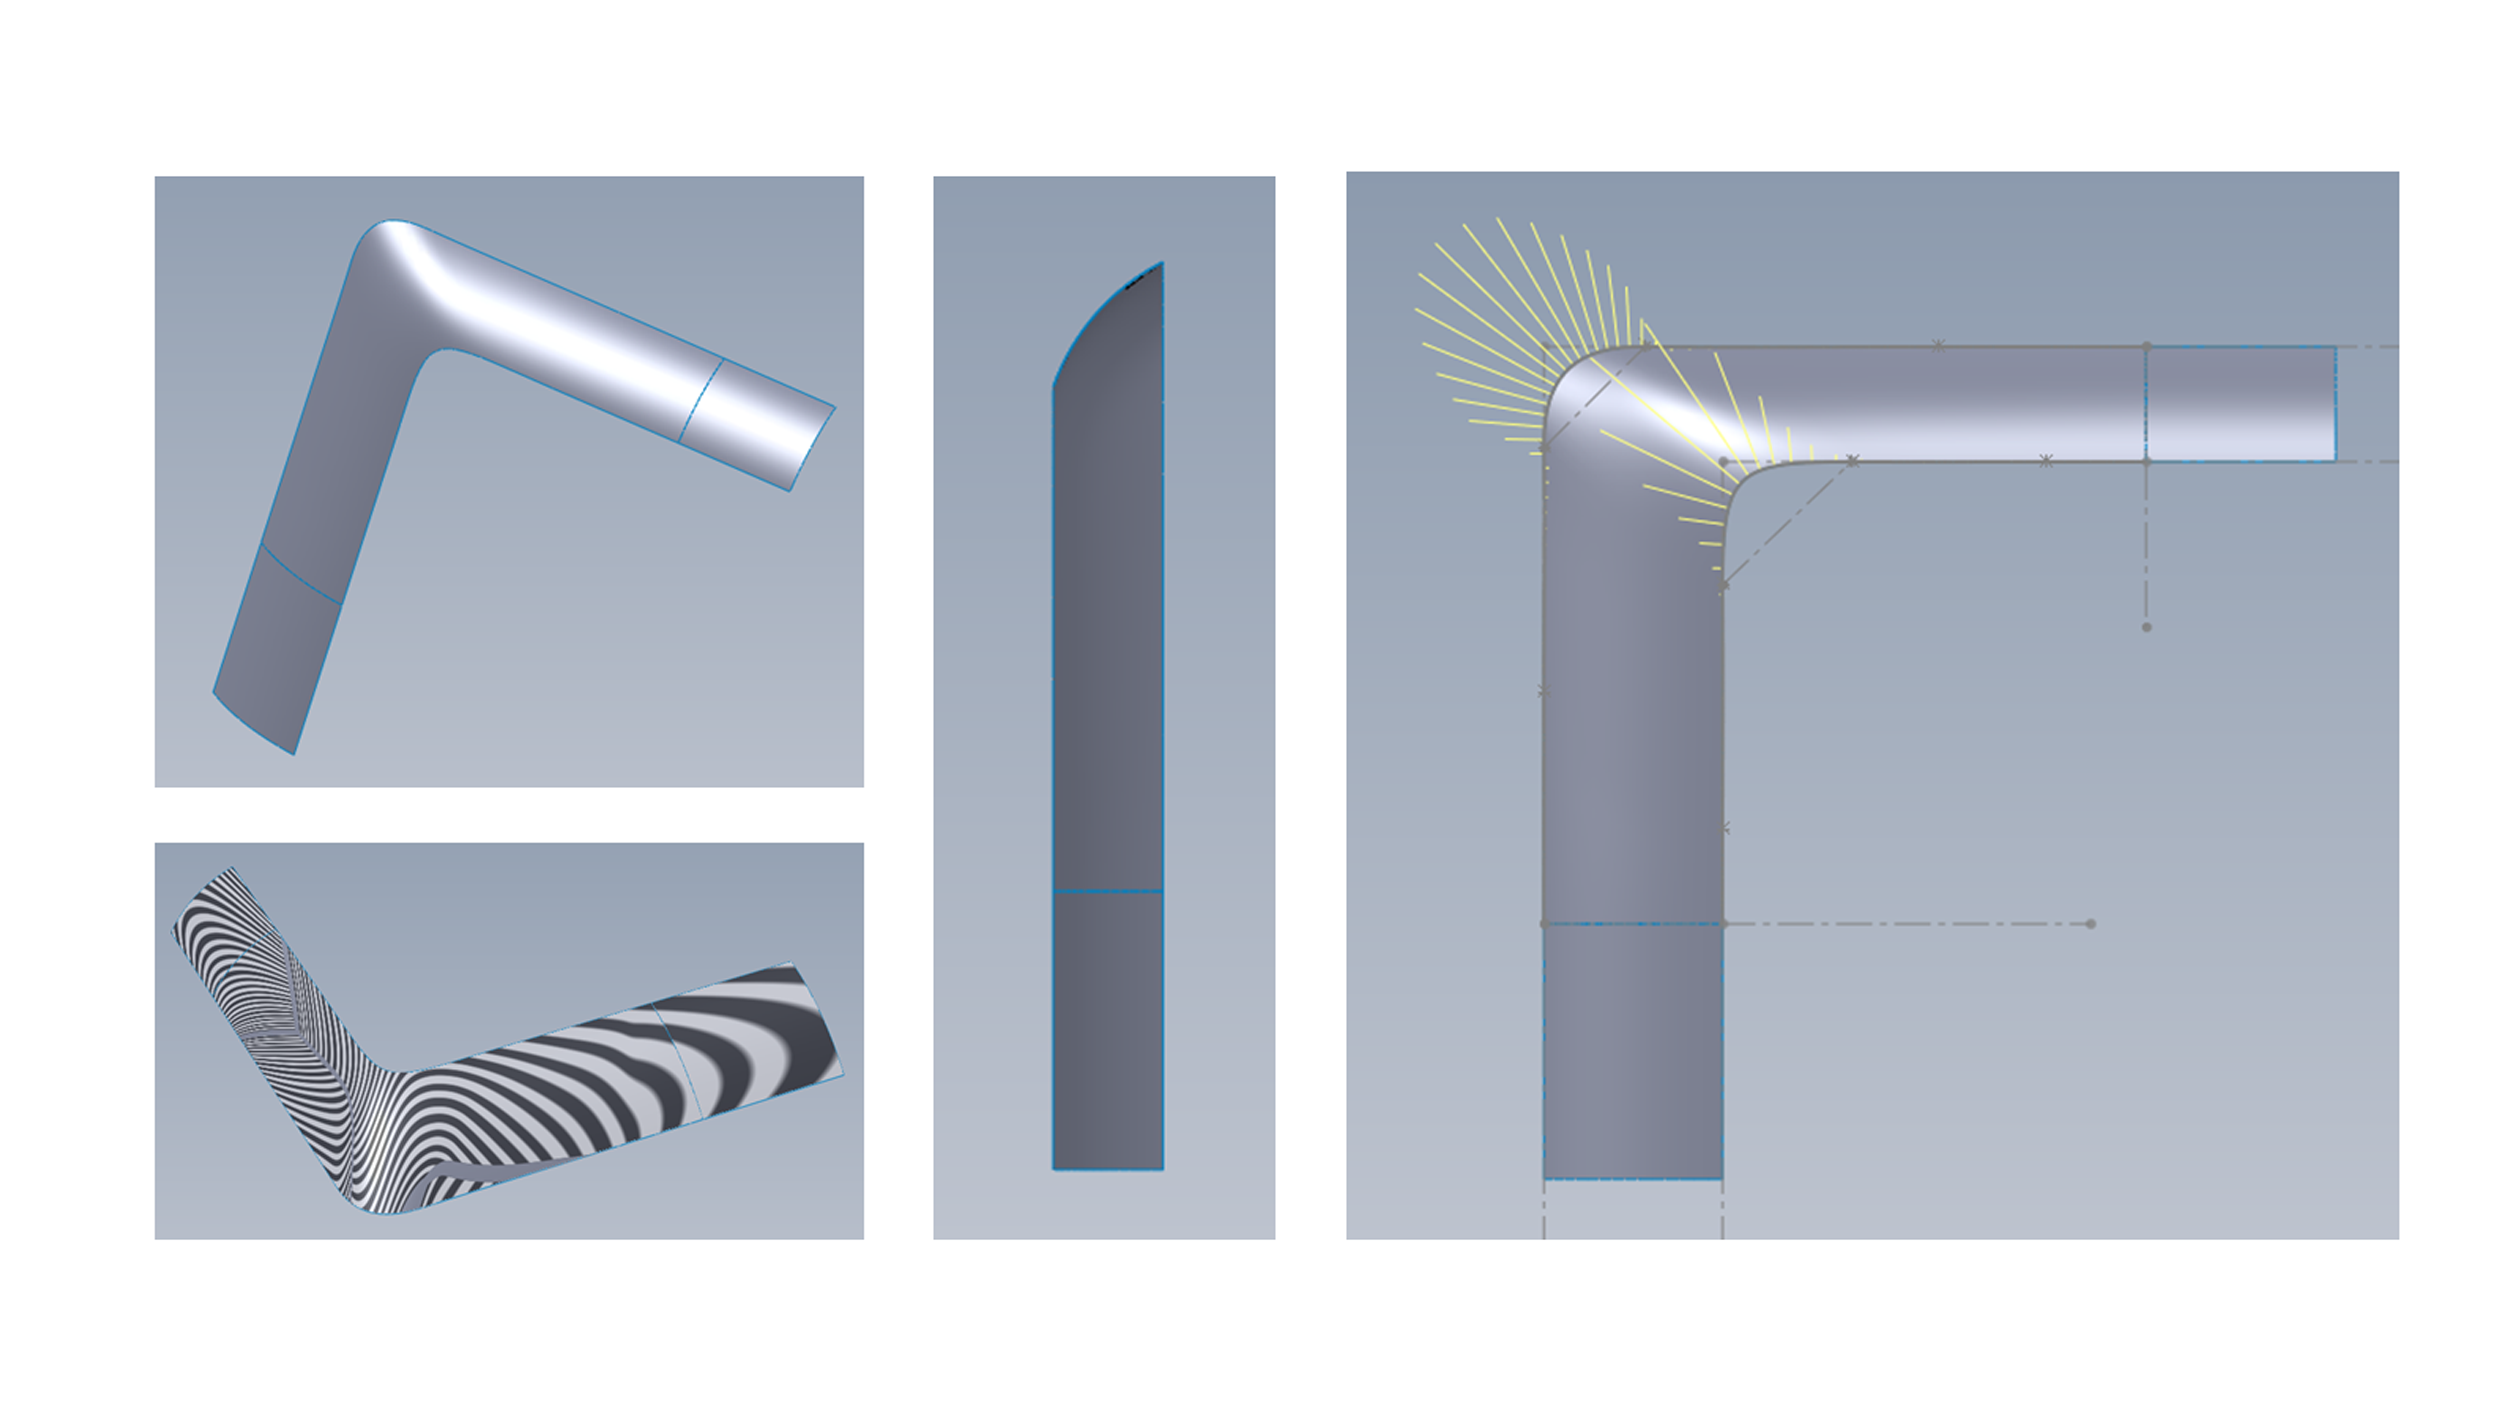
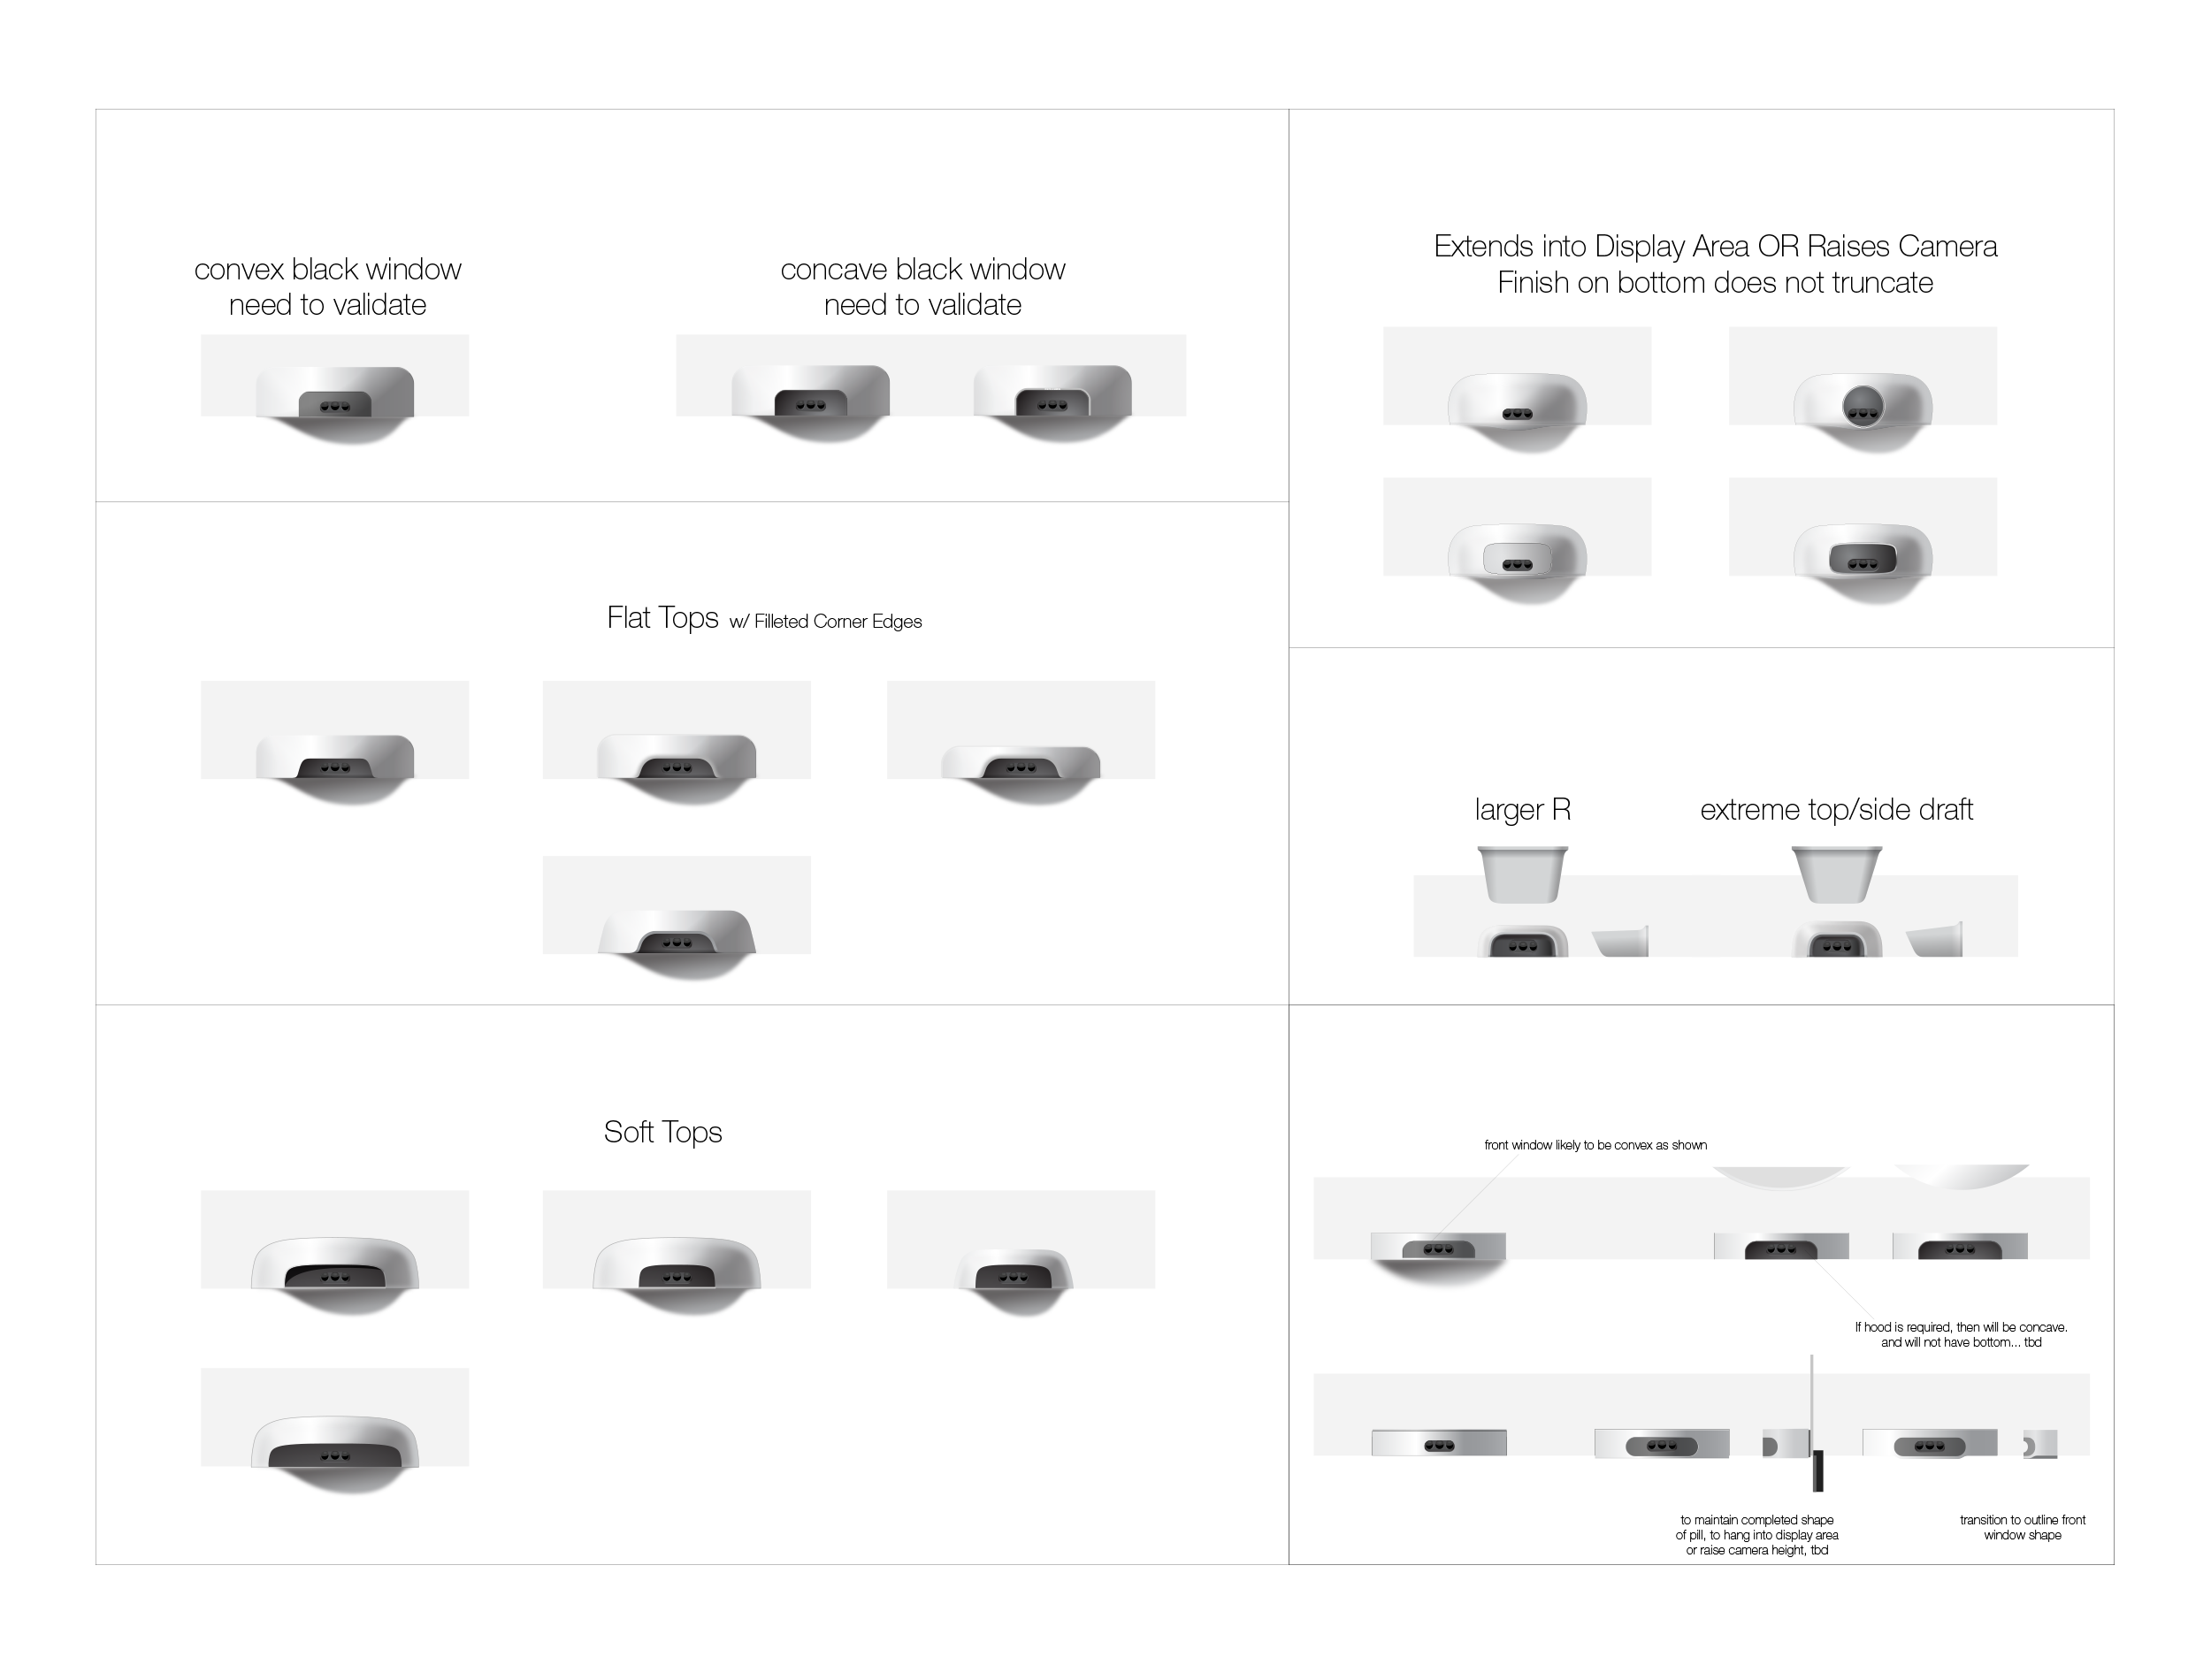
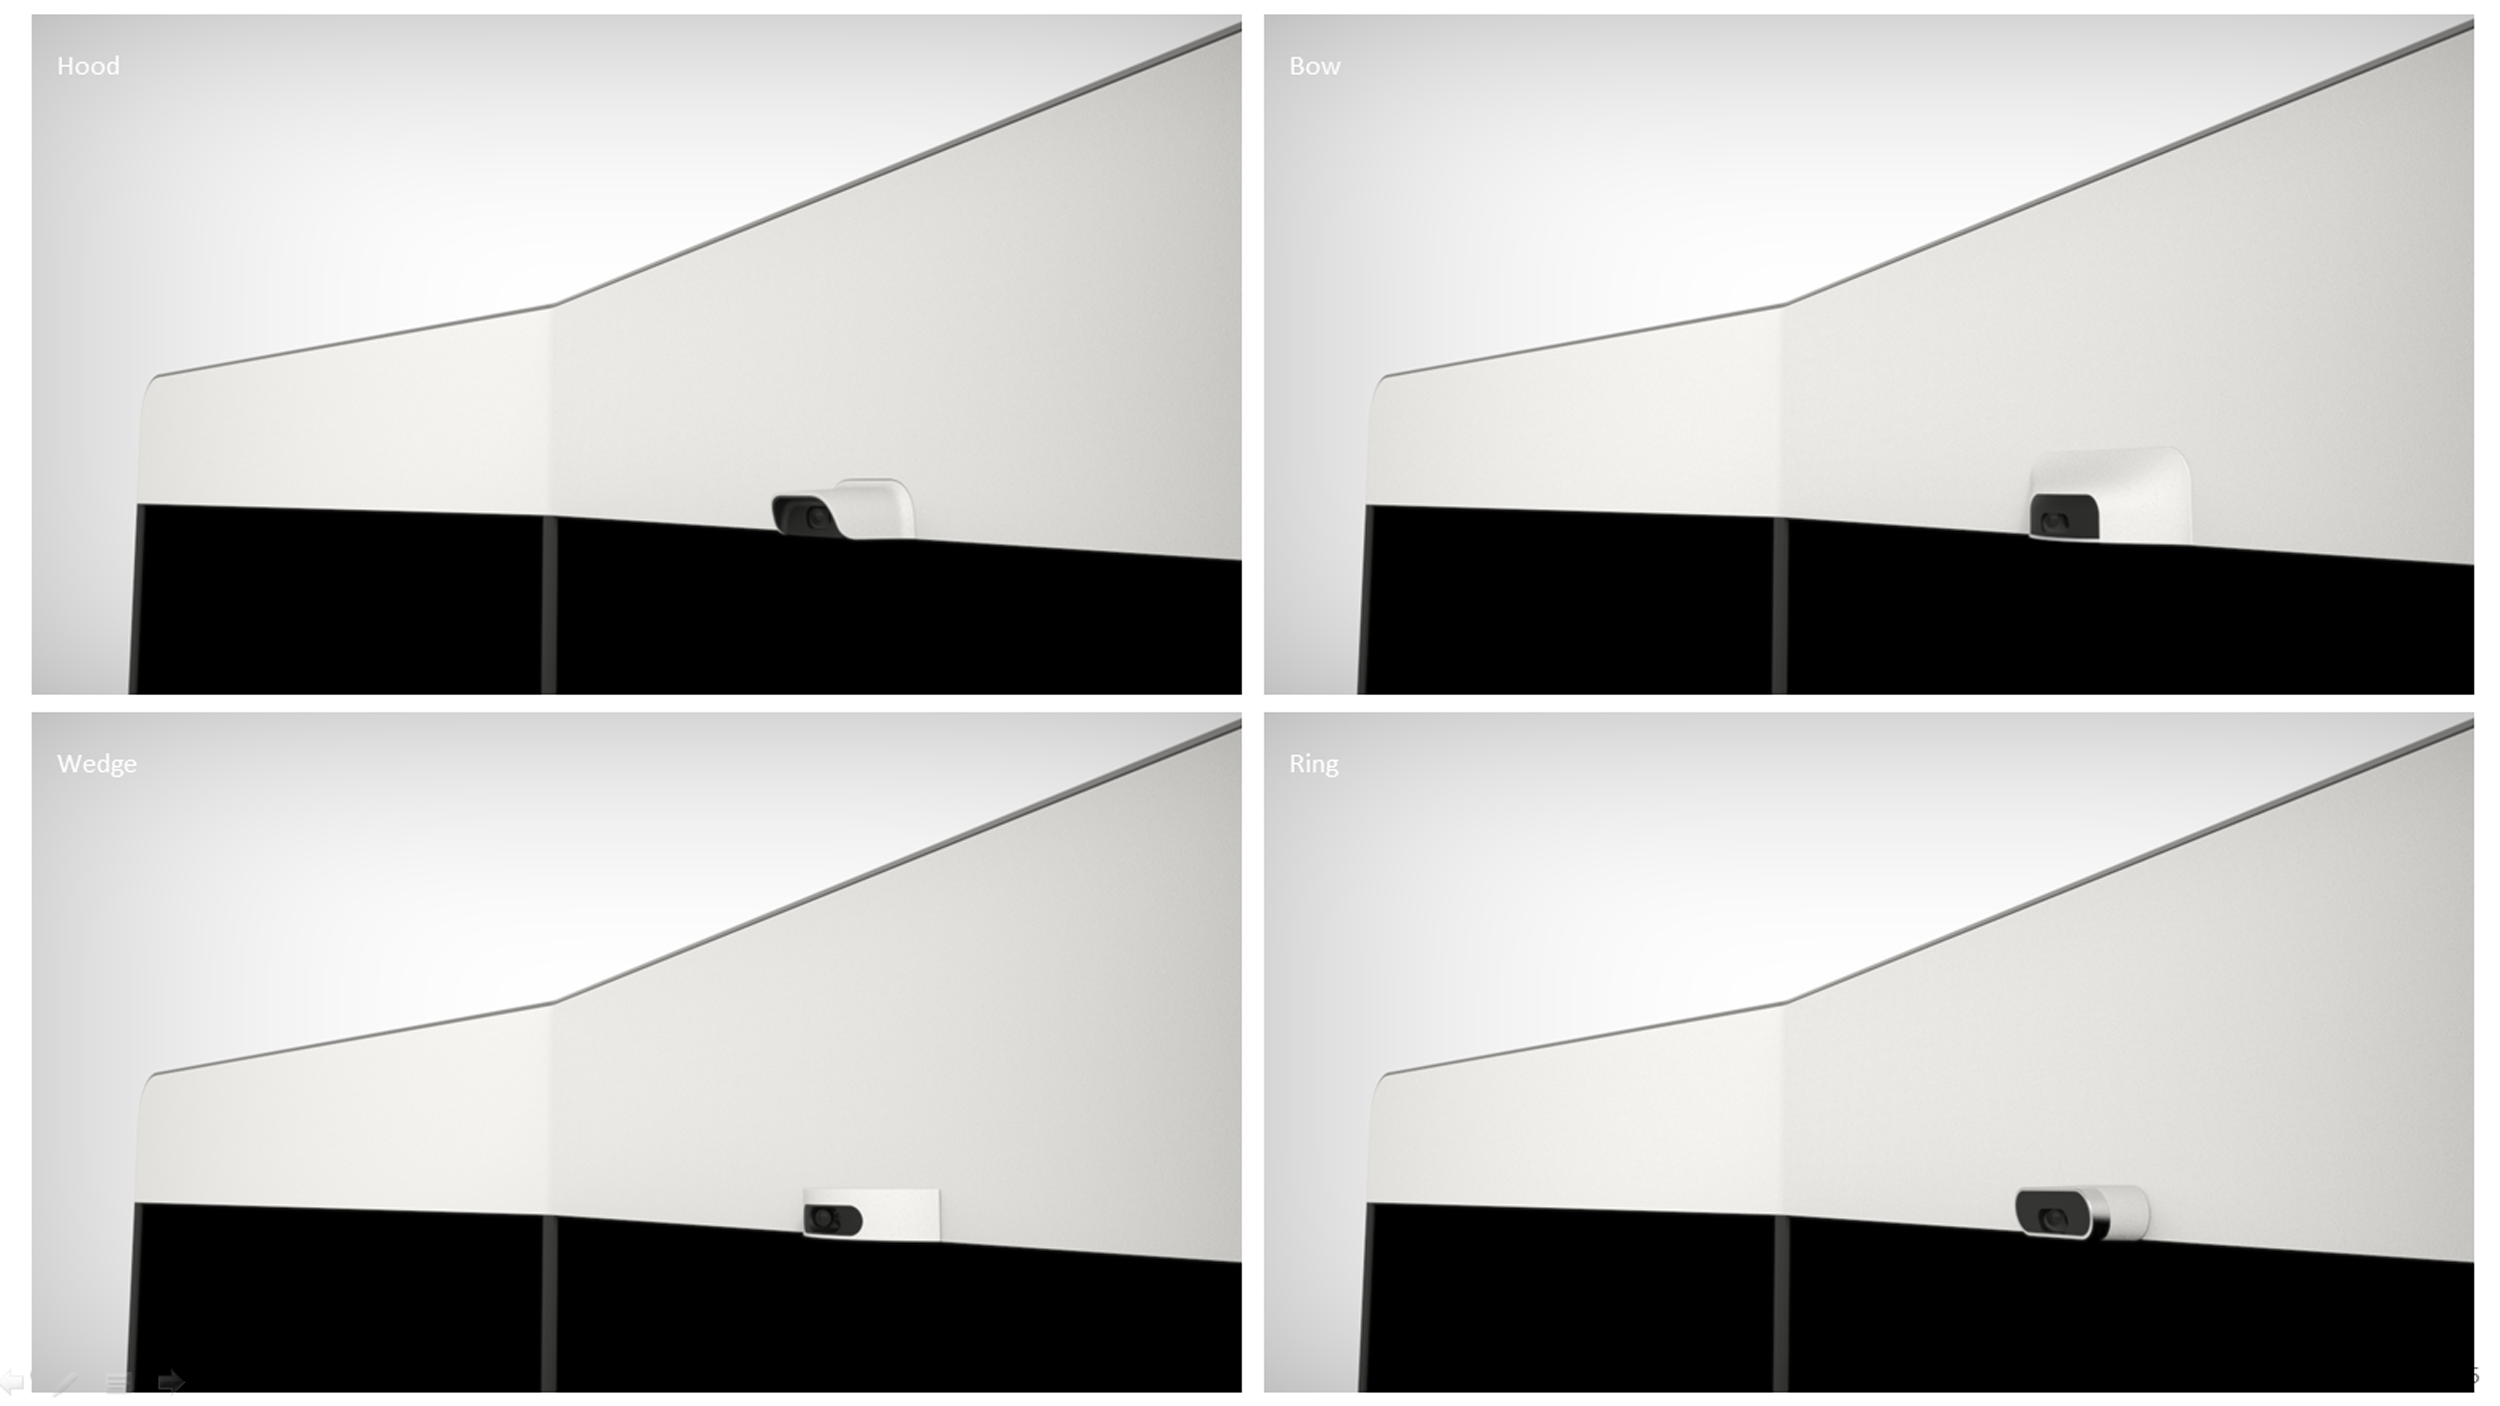
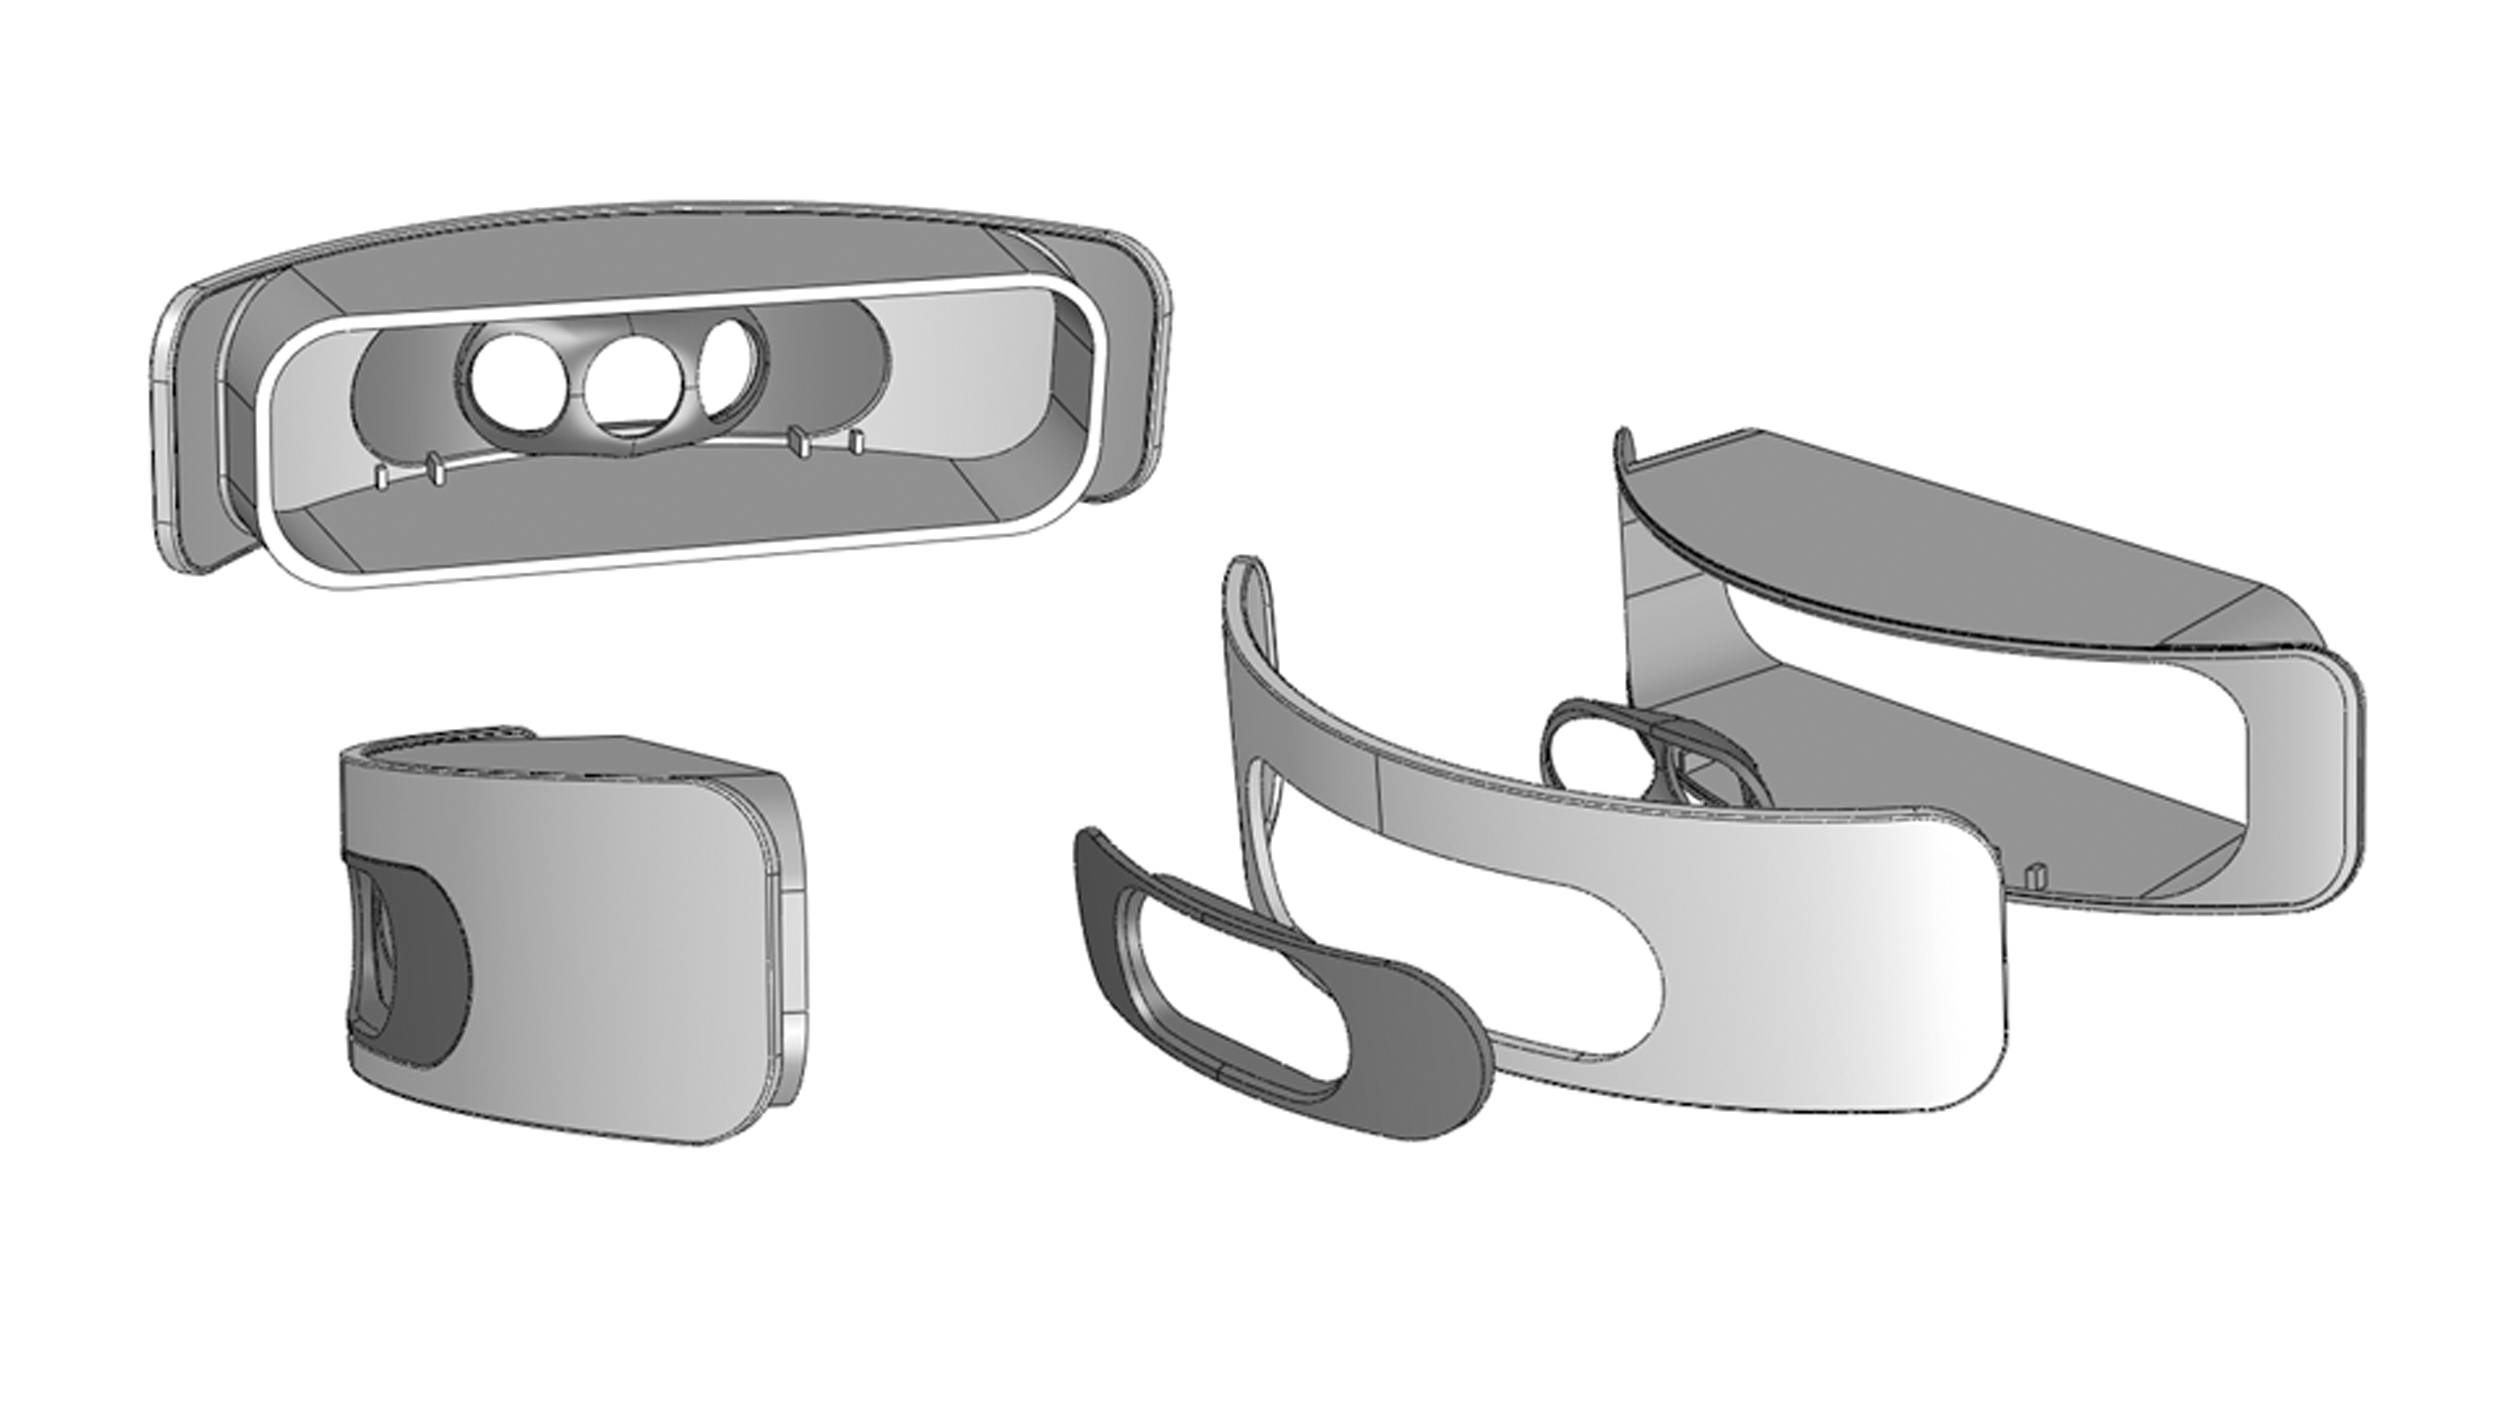
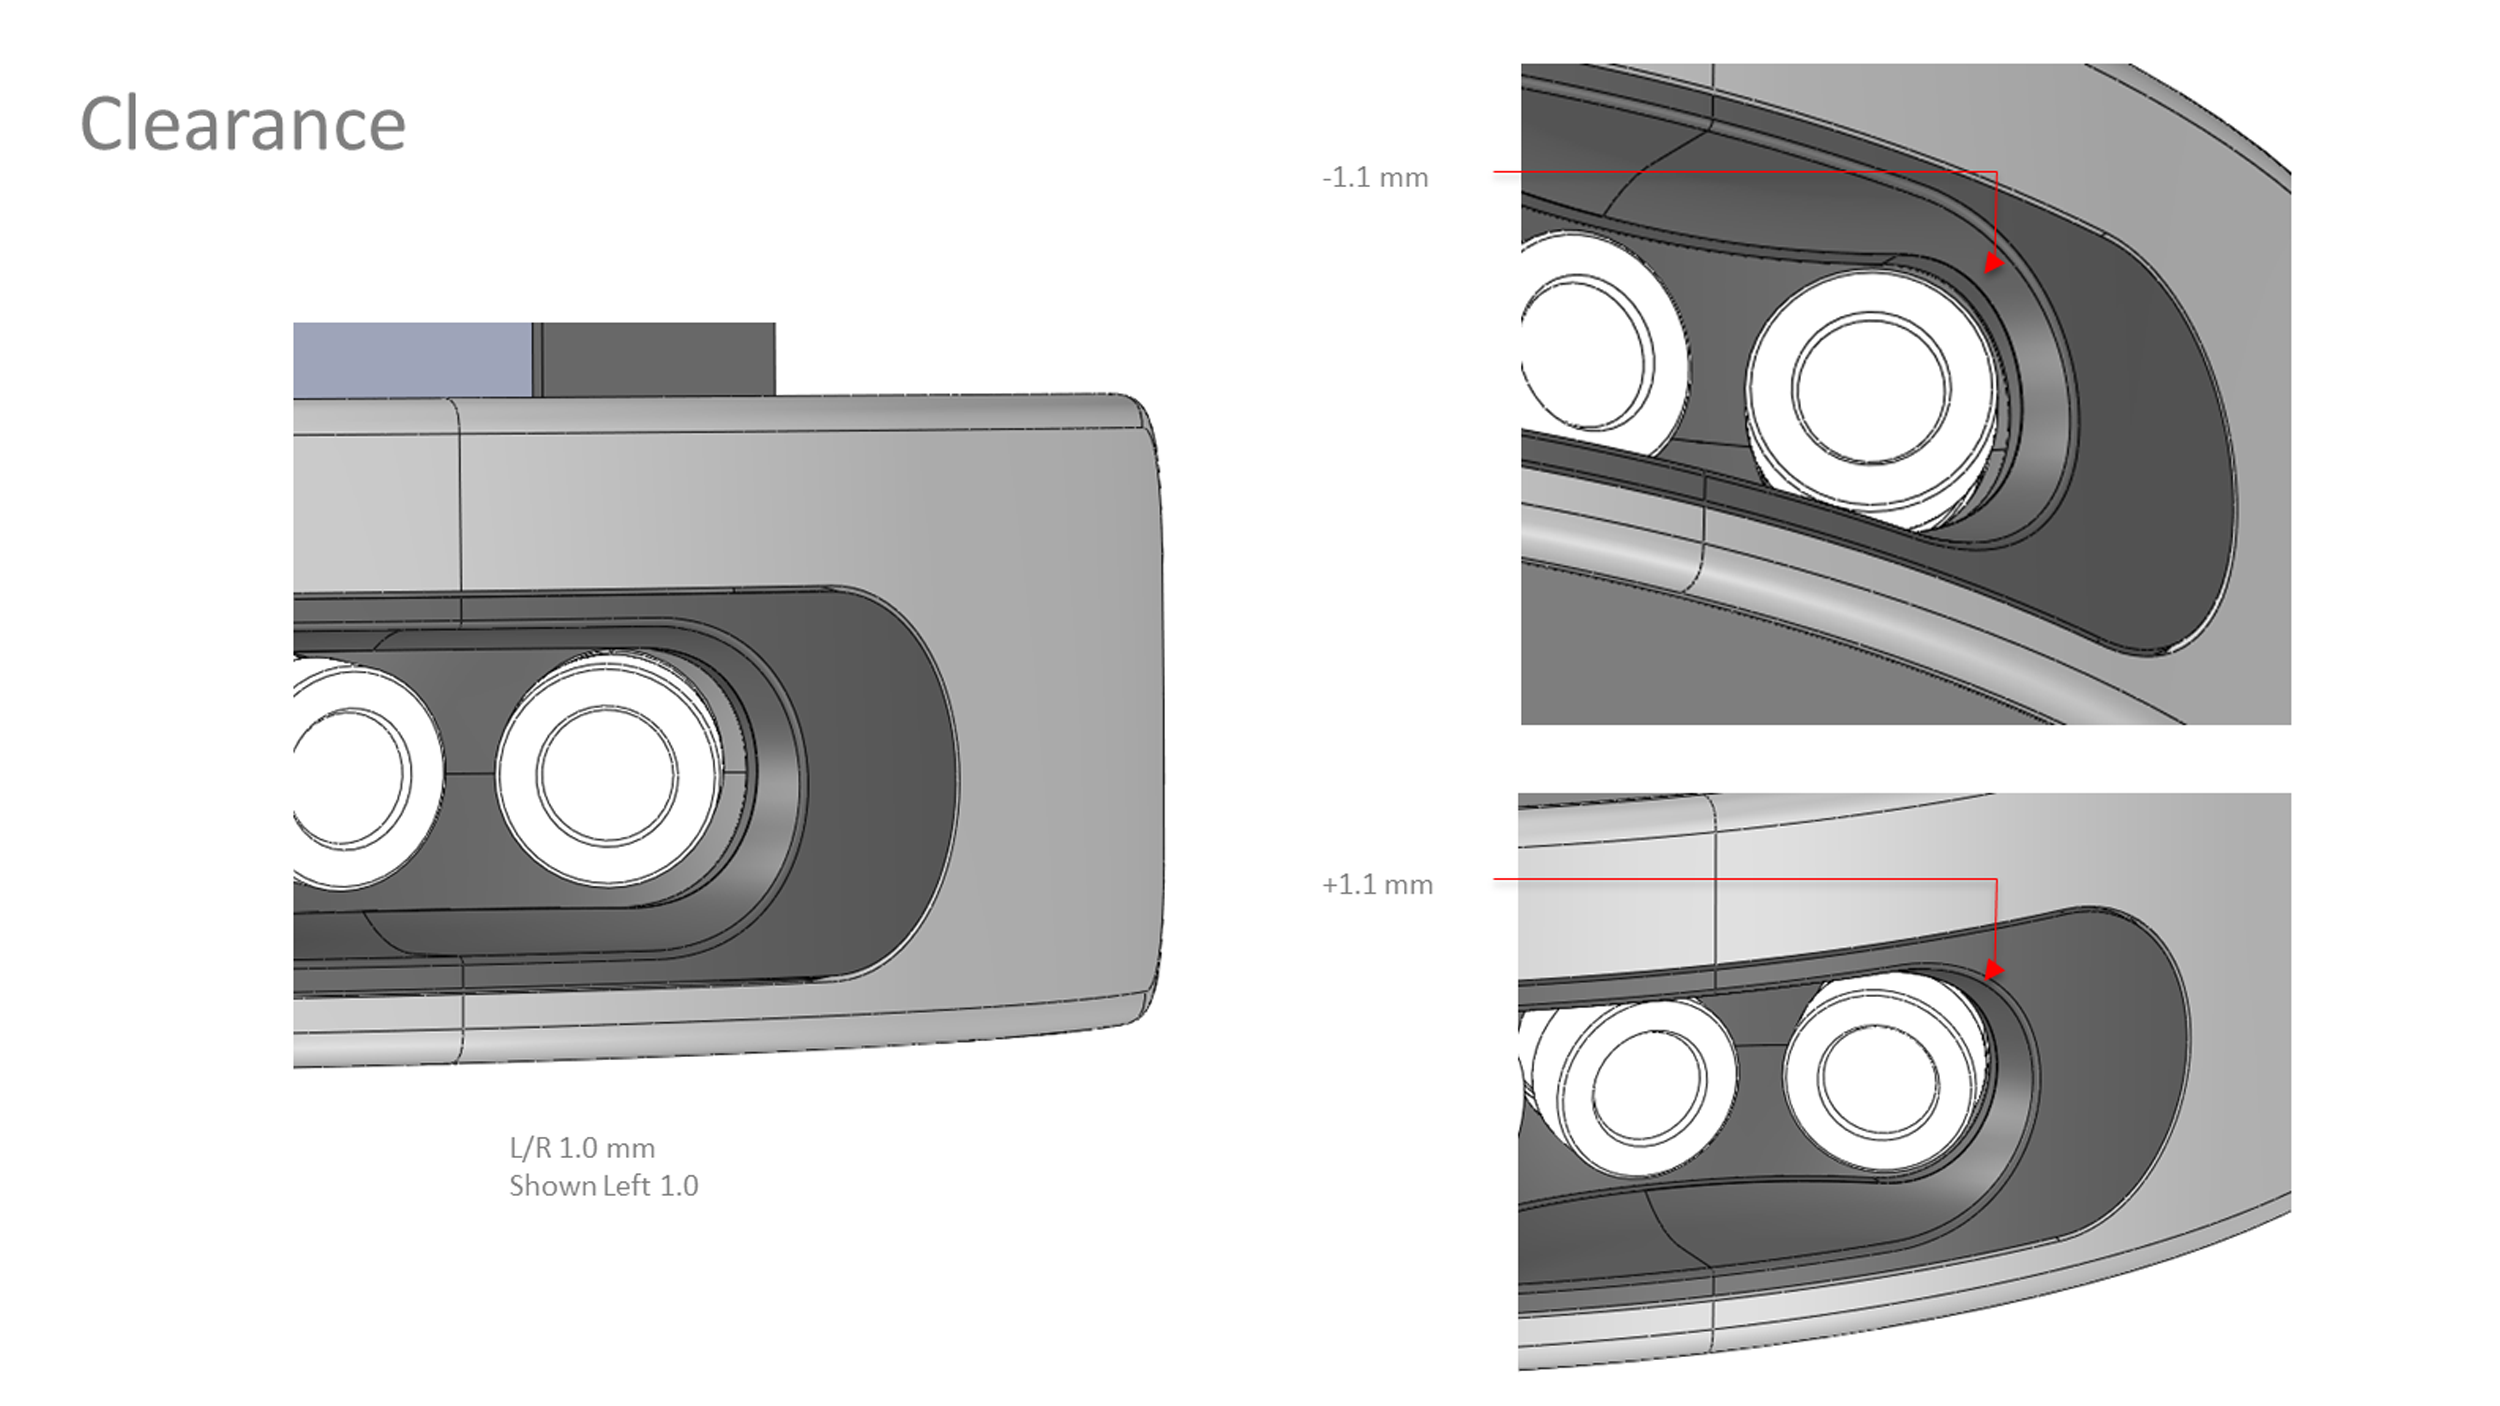
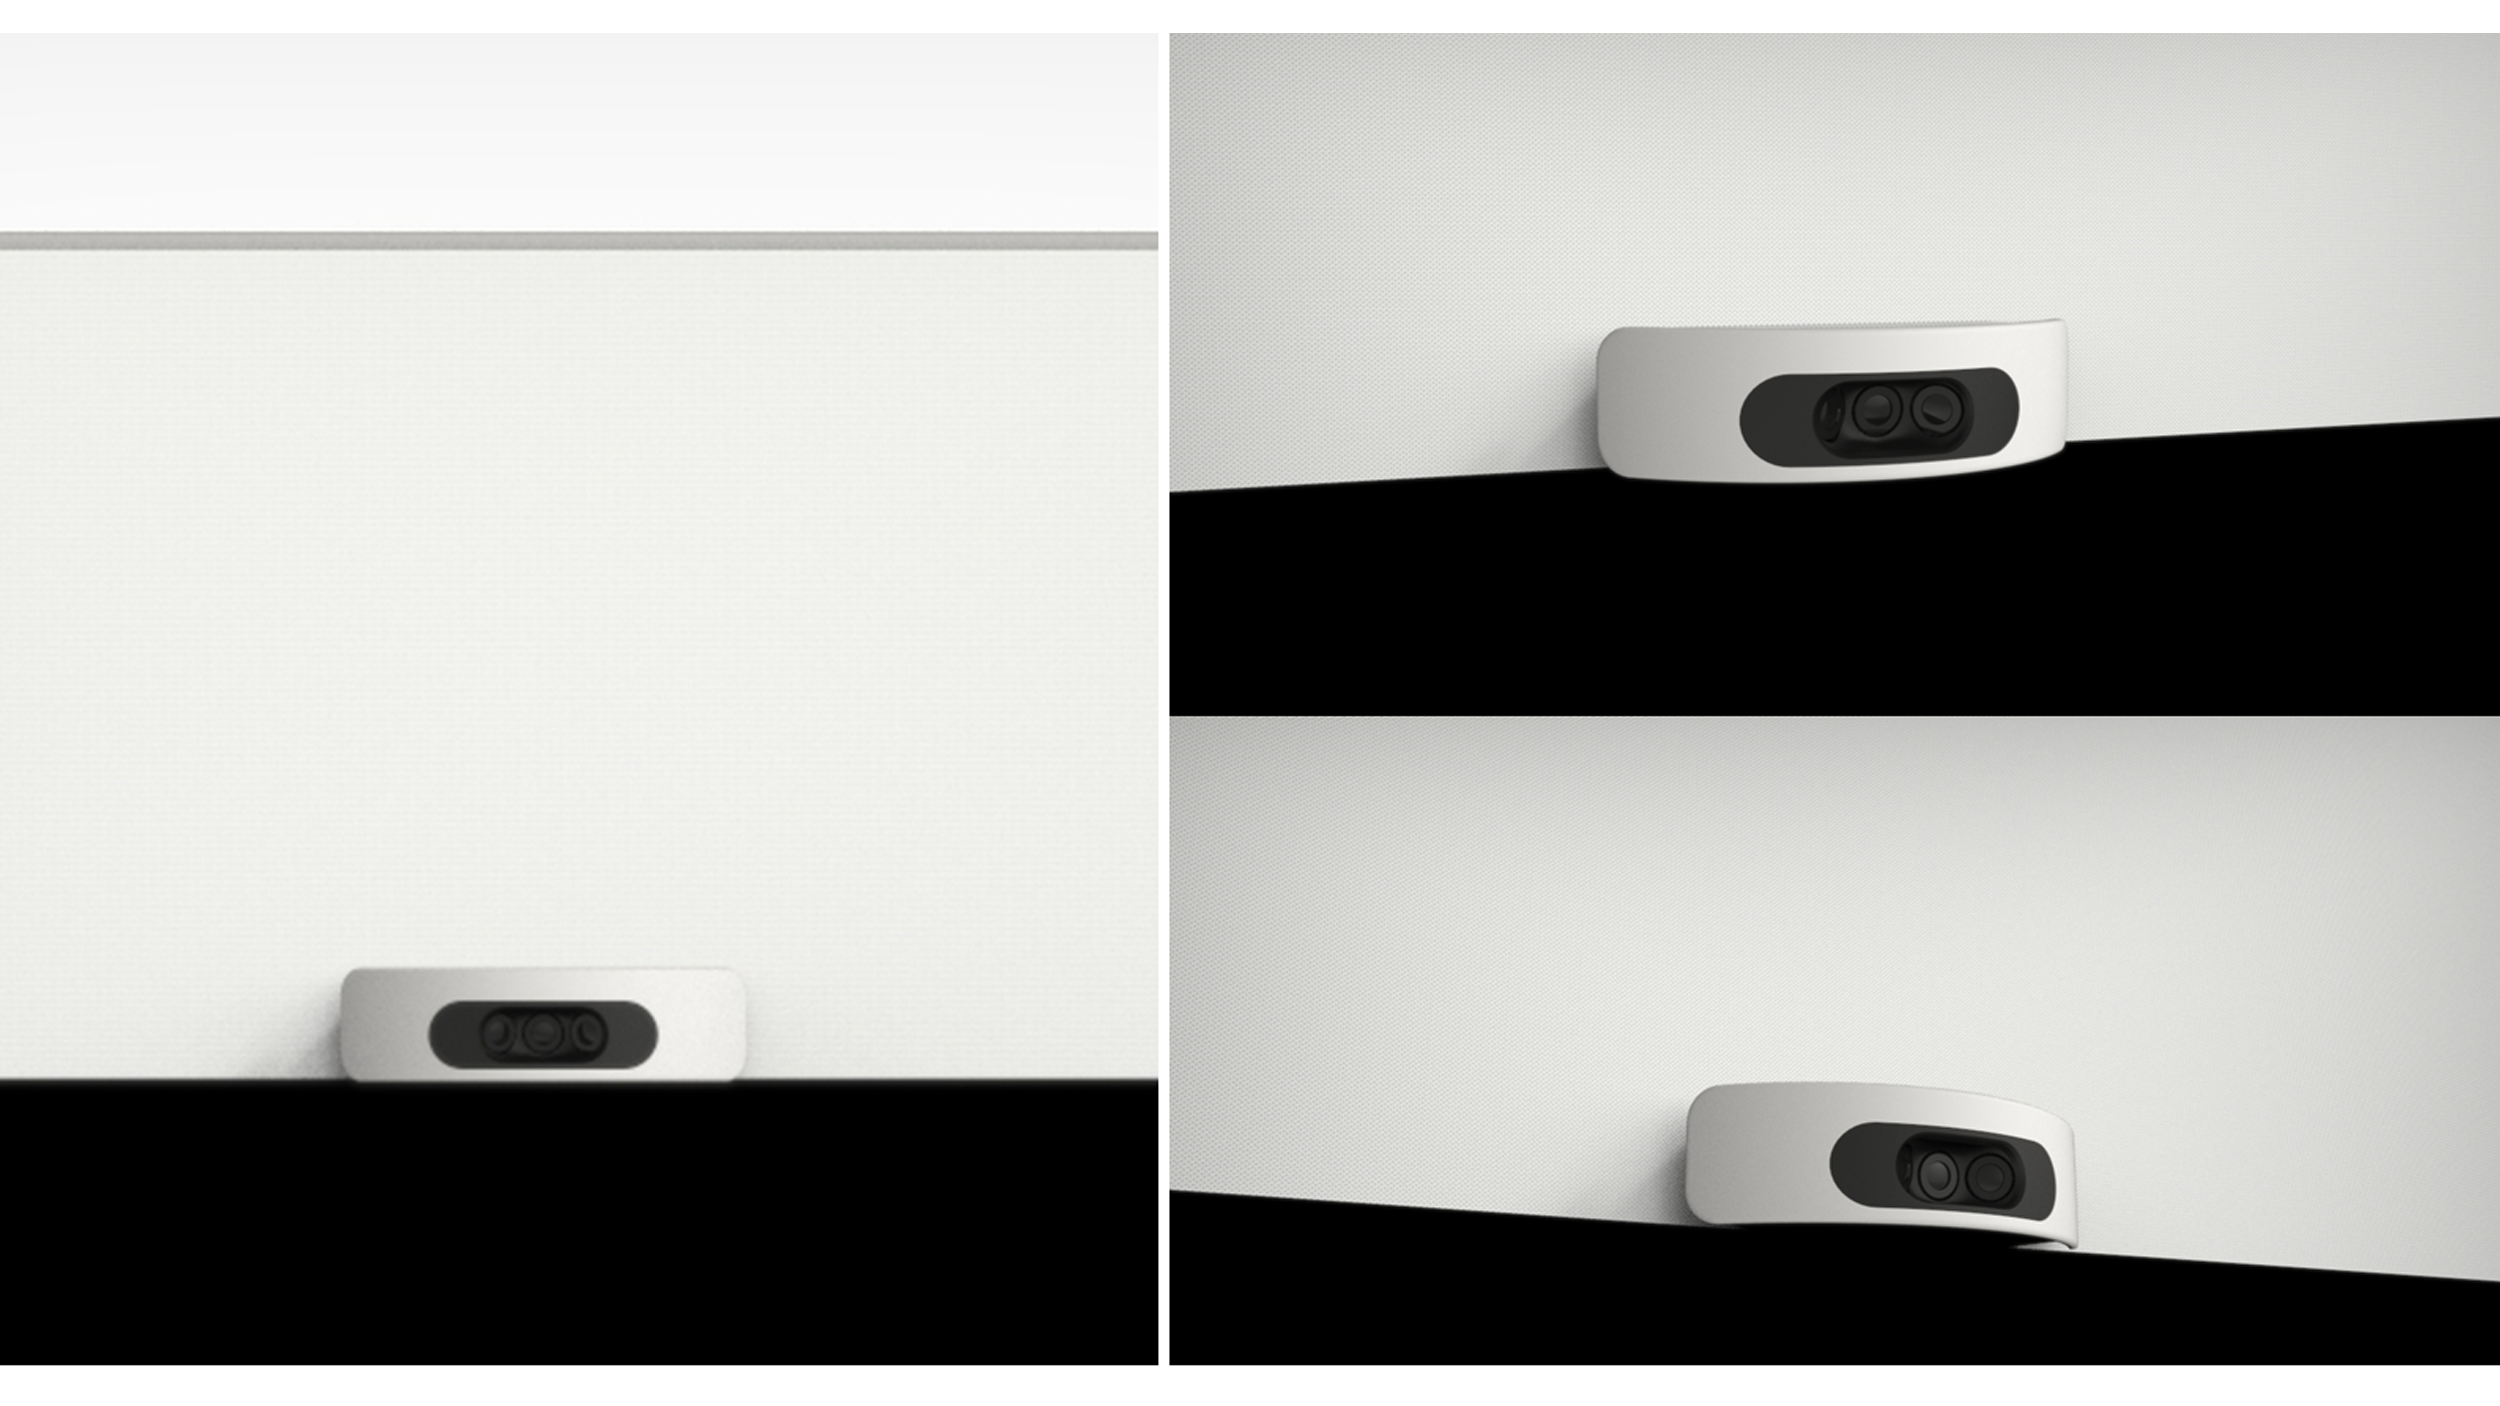
The camera lens assembly was explored to identify a harmonious solution, to meet extreme tolerance scenarios, while also informing the greater portfolio language.
Looking at variations of low tolerance manufacturing and variable assembly helped the team understand best directions to select.
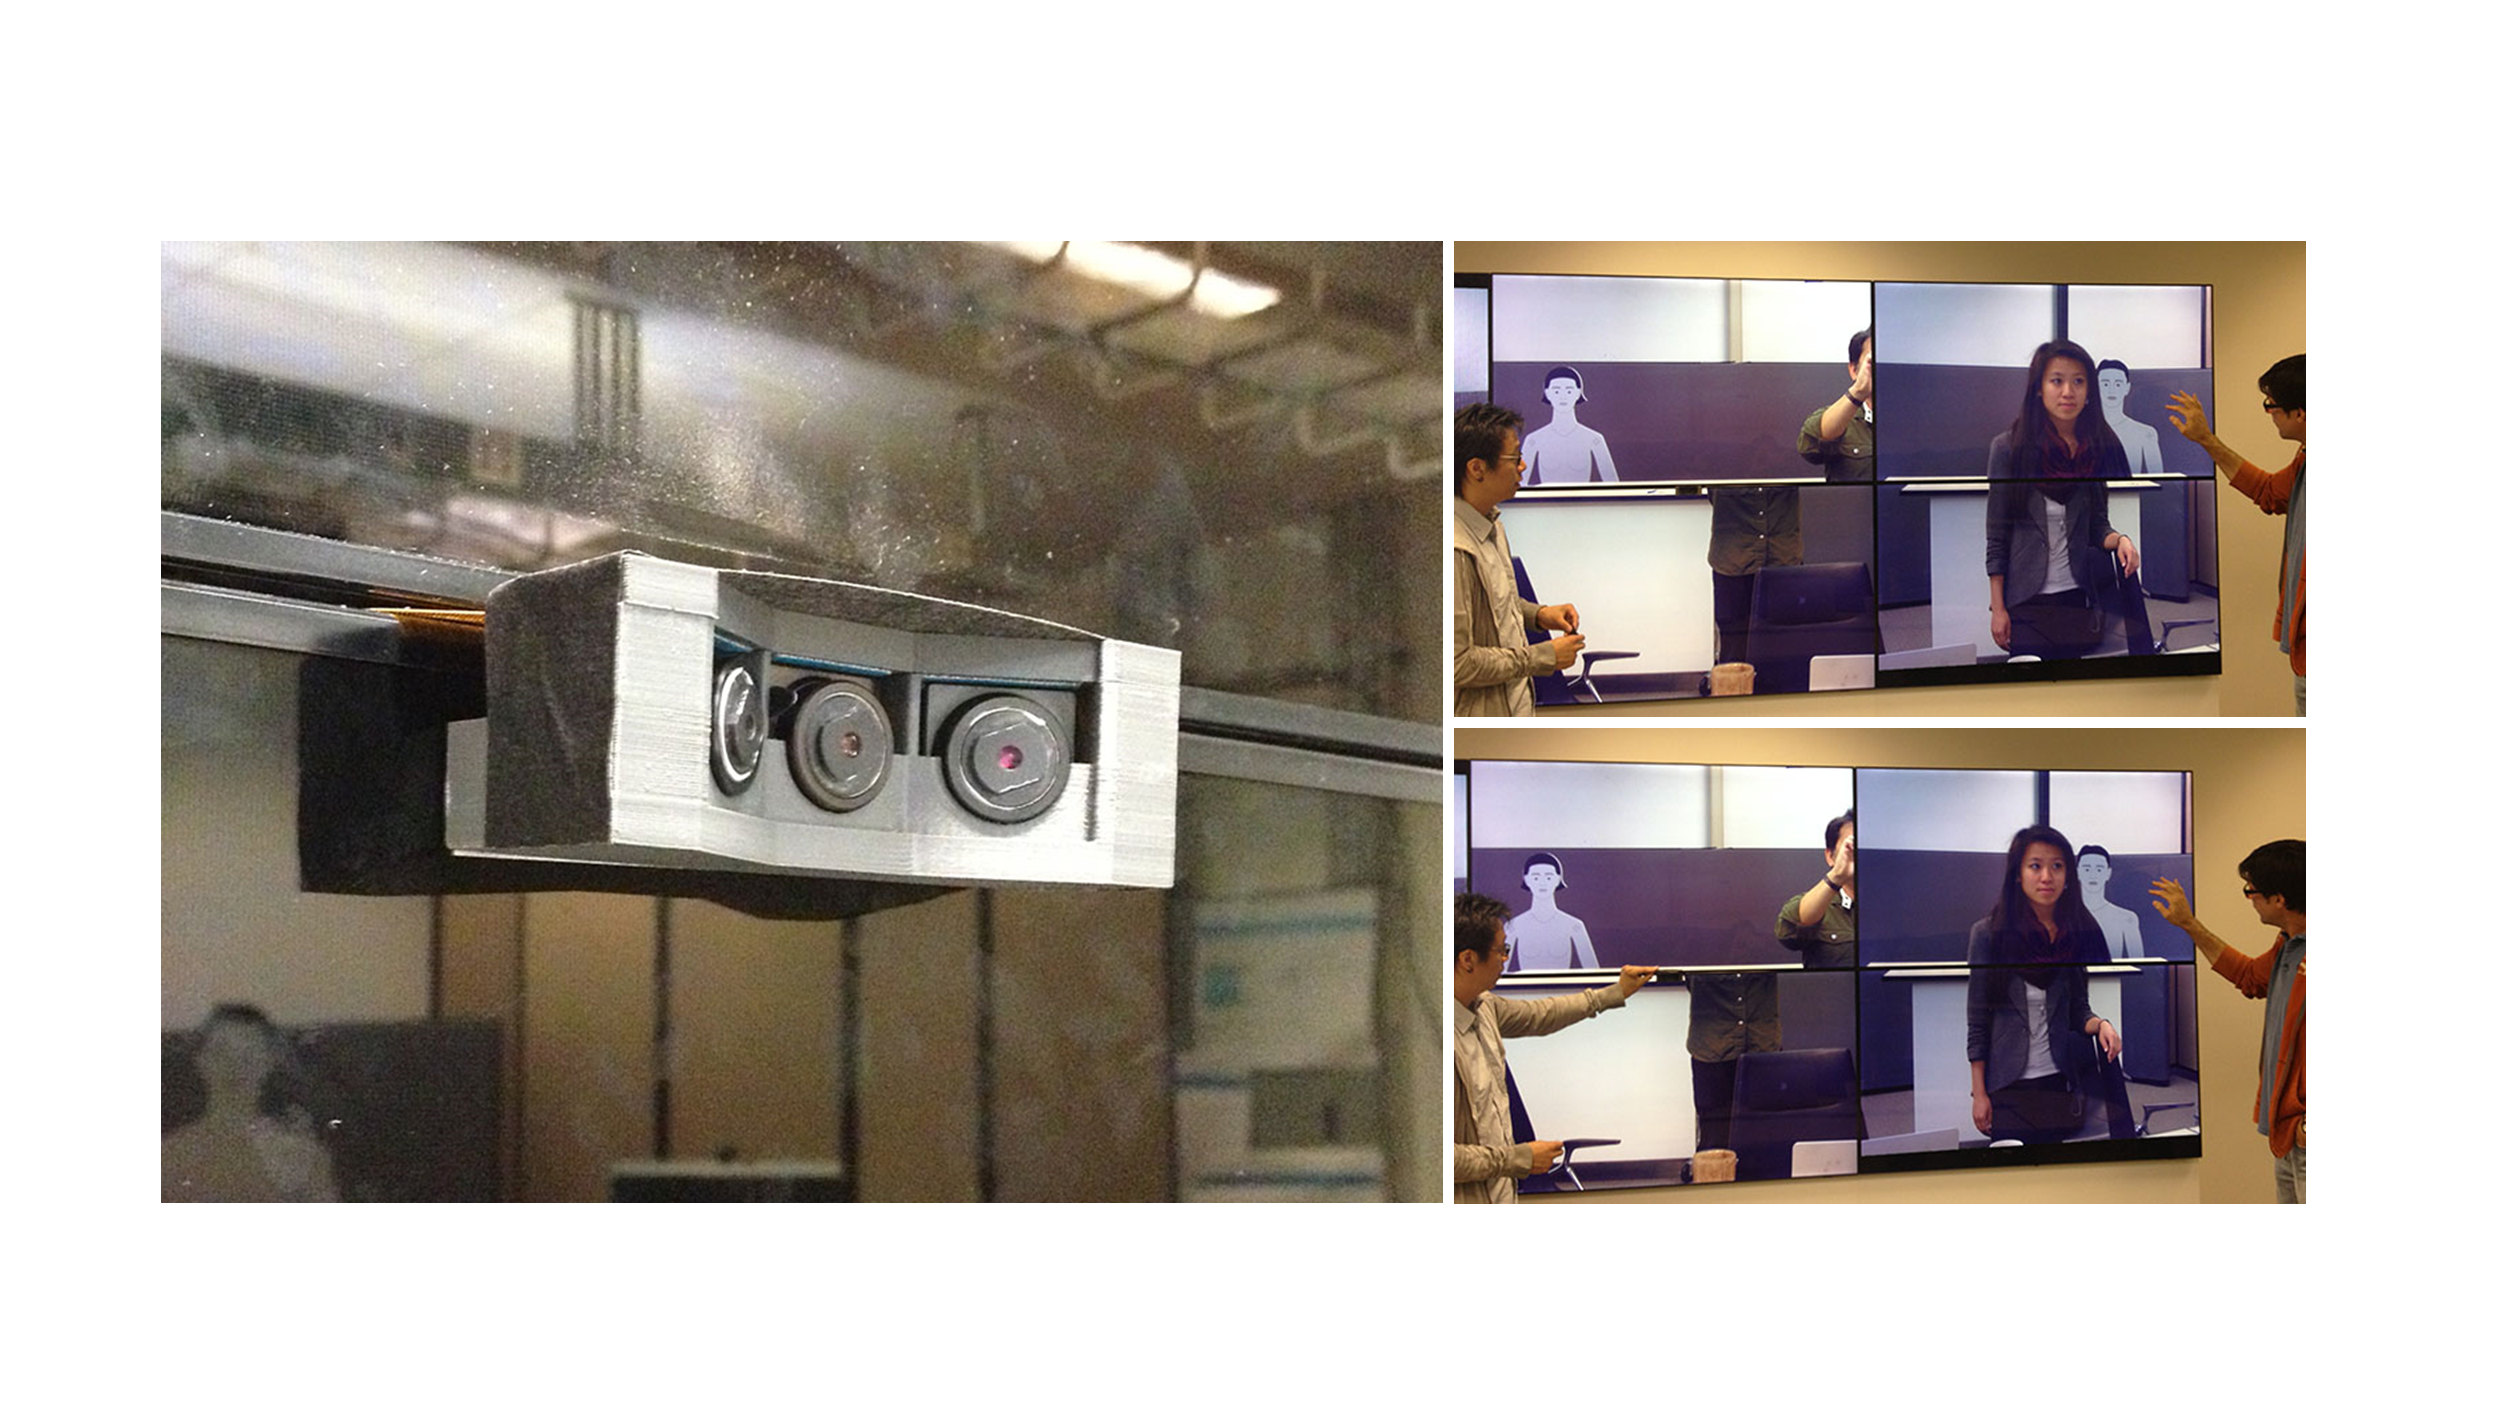
Side explorations included understanding camera cluster functionality with additional screens and auto-track stand up scenarios.
The design was a floating mount allowing for imprecision of light panel installation. A dark, center cluster hides multiple lenses, leaving a simple convex shape hovering above the displays and out of the way.
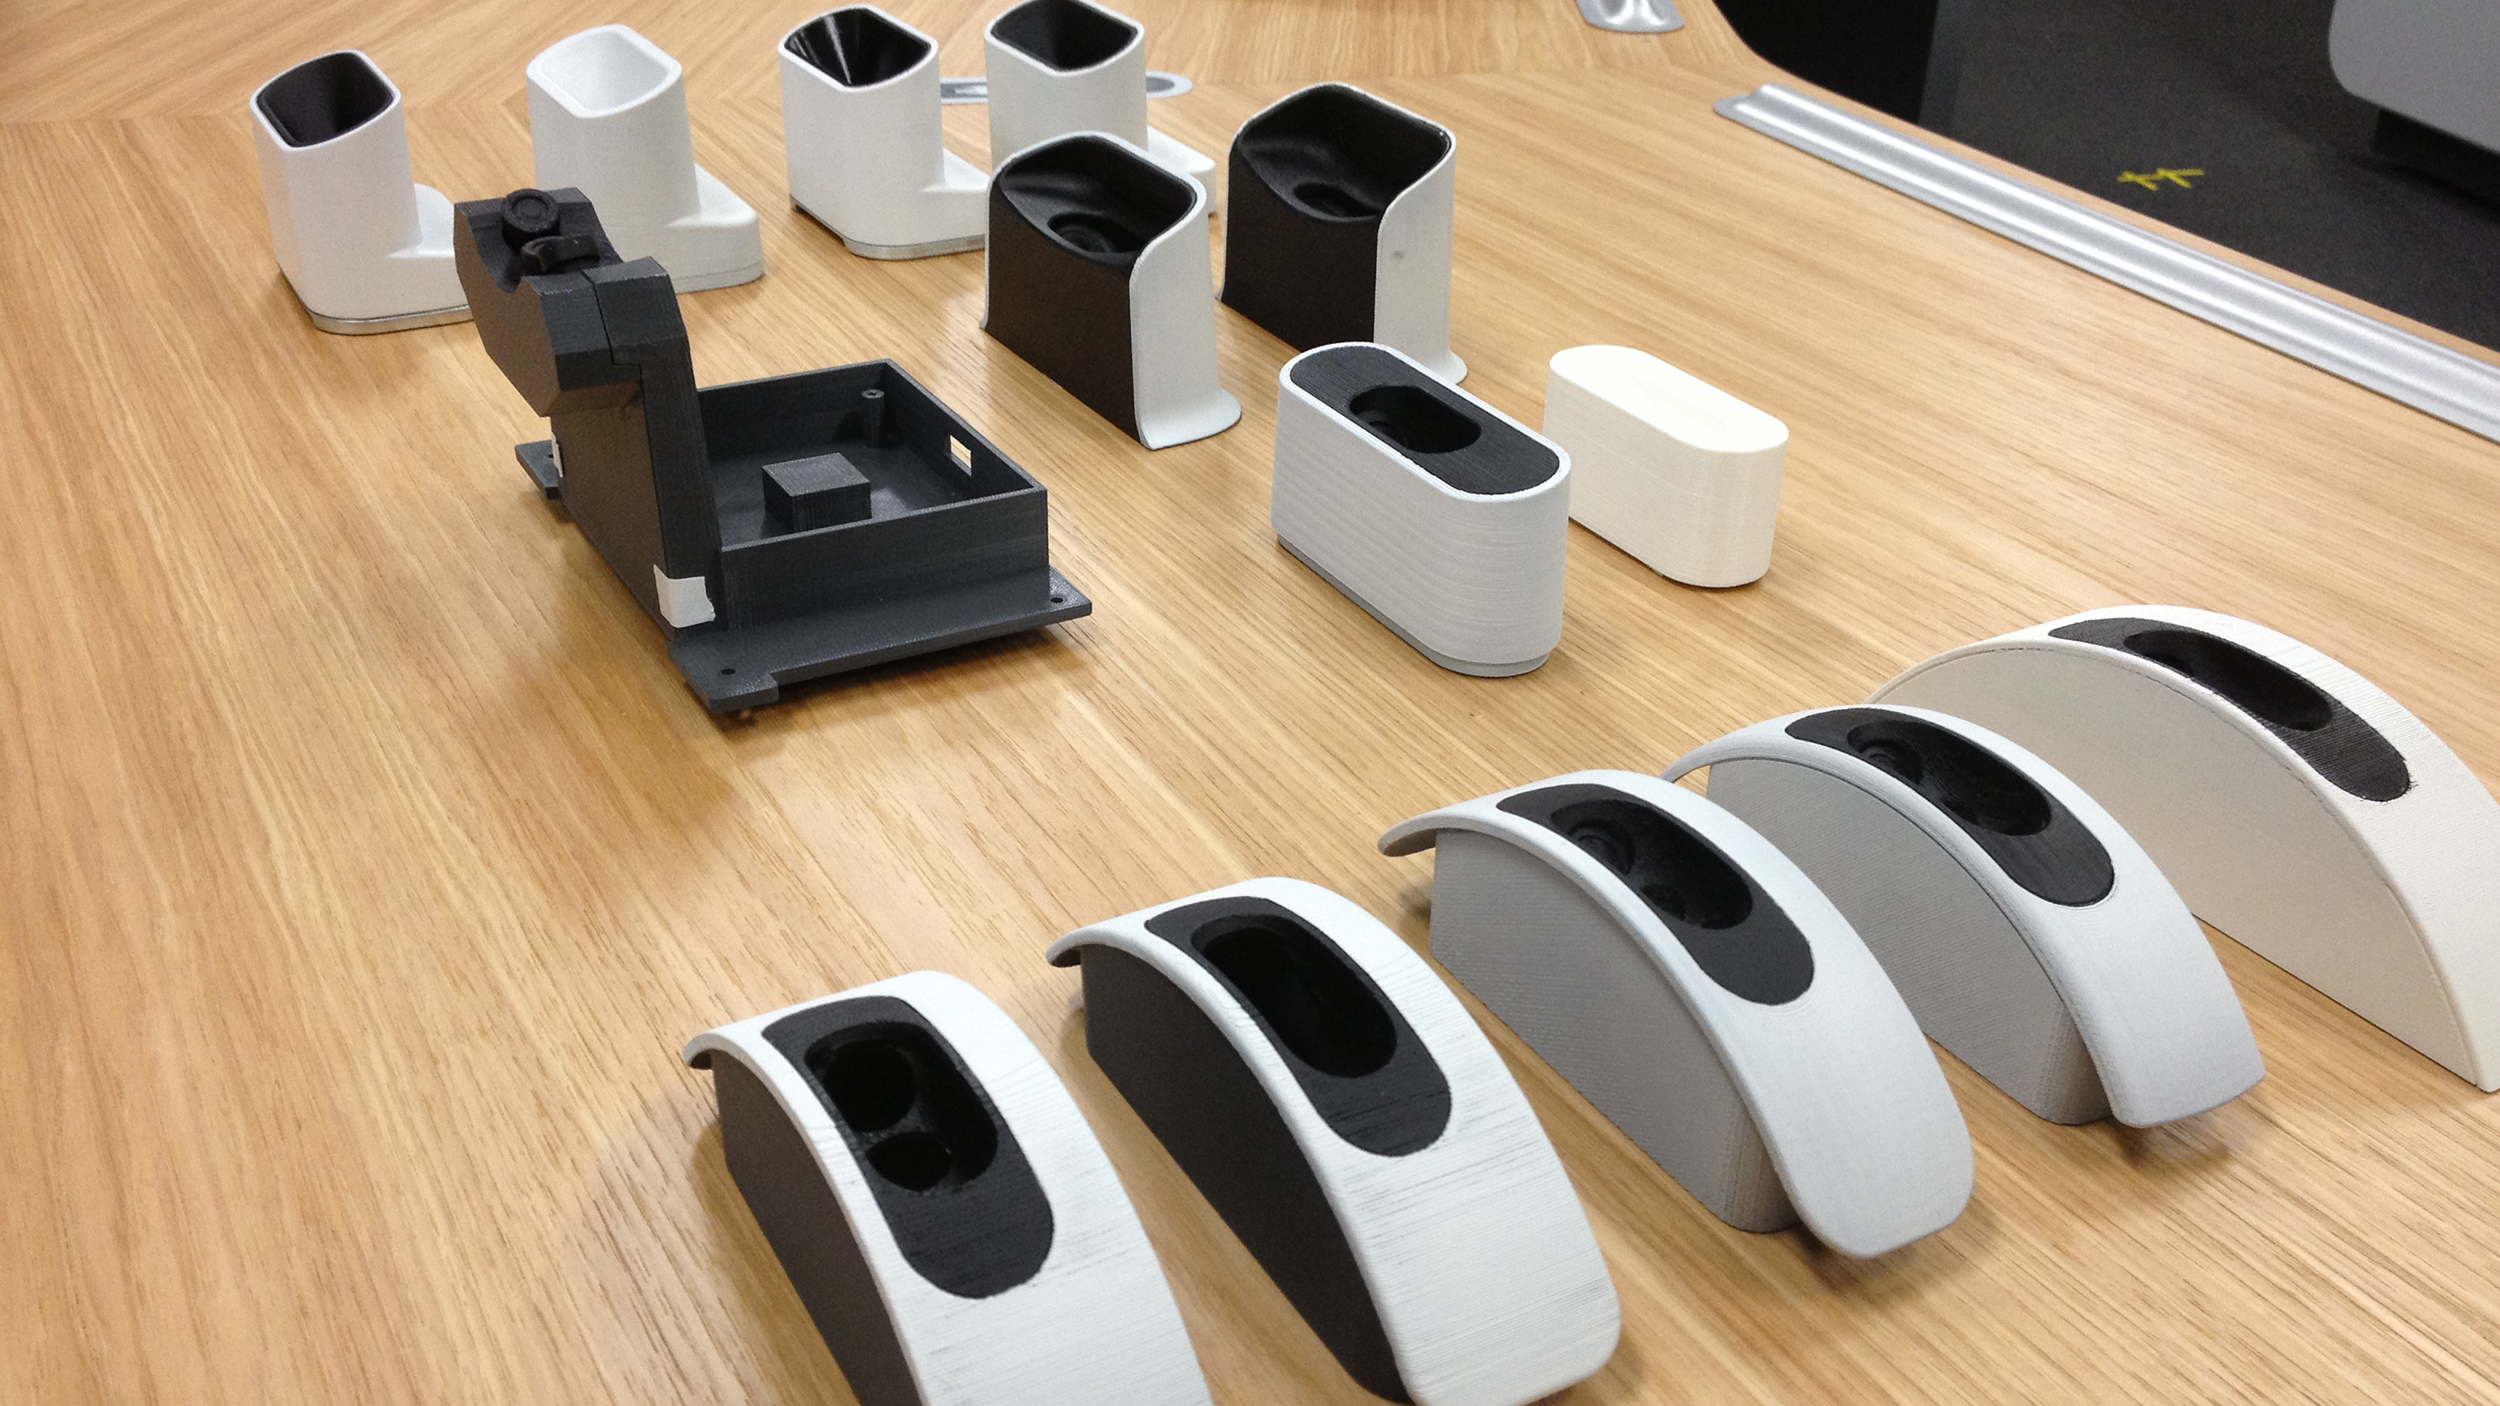
During and after CAD, FDM mockups helped inform on direction and technical considerations.
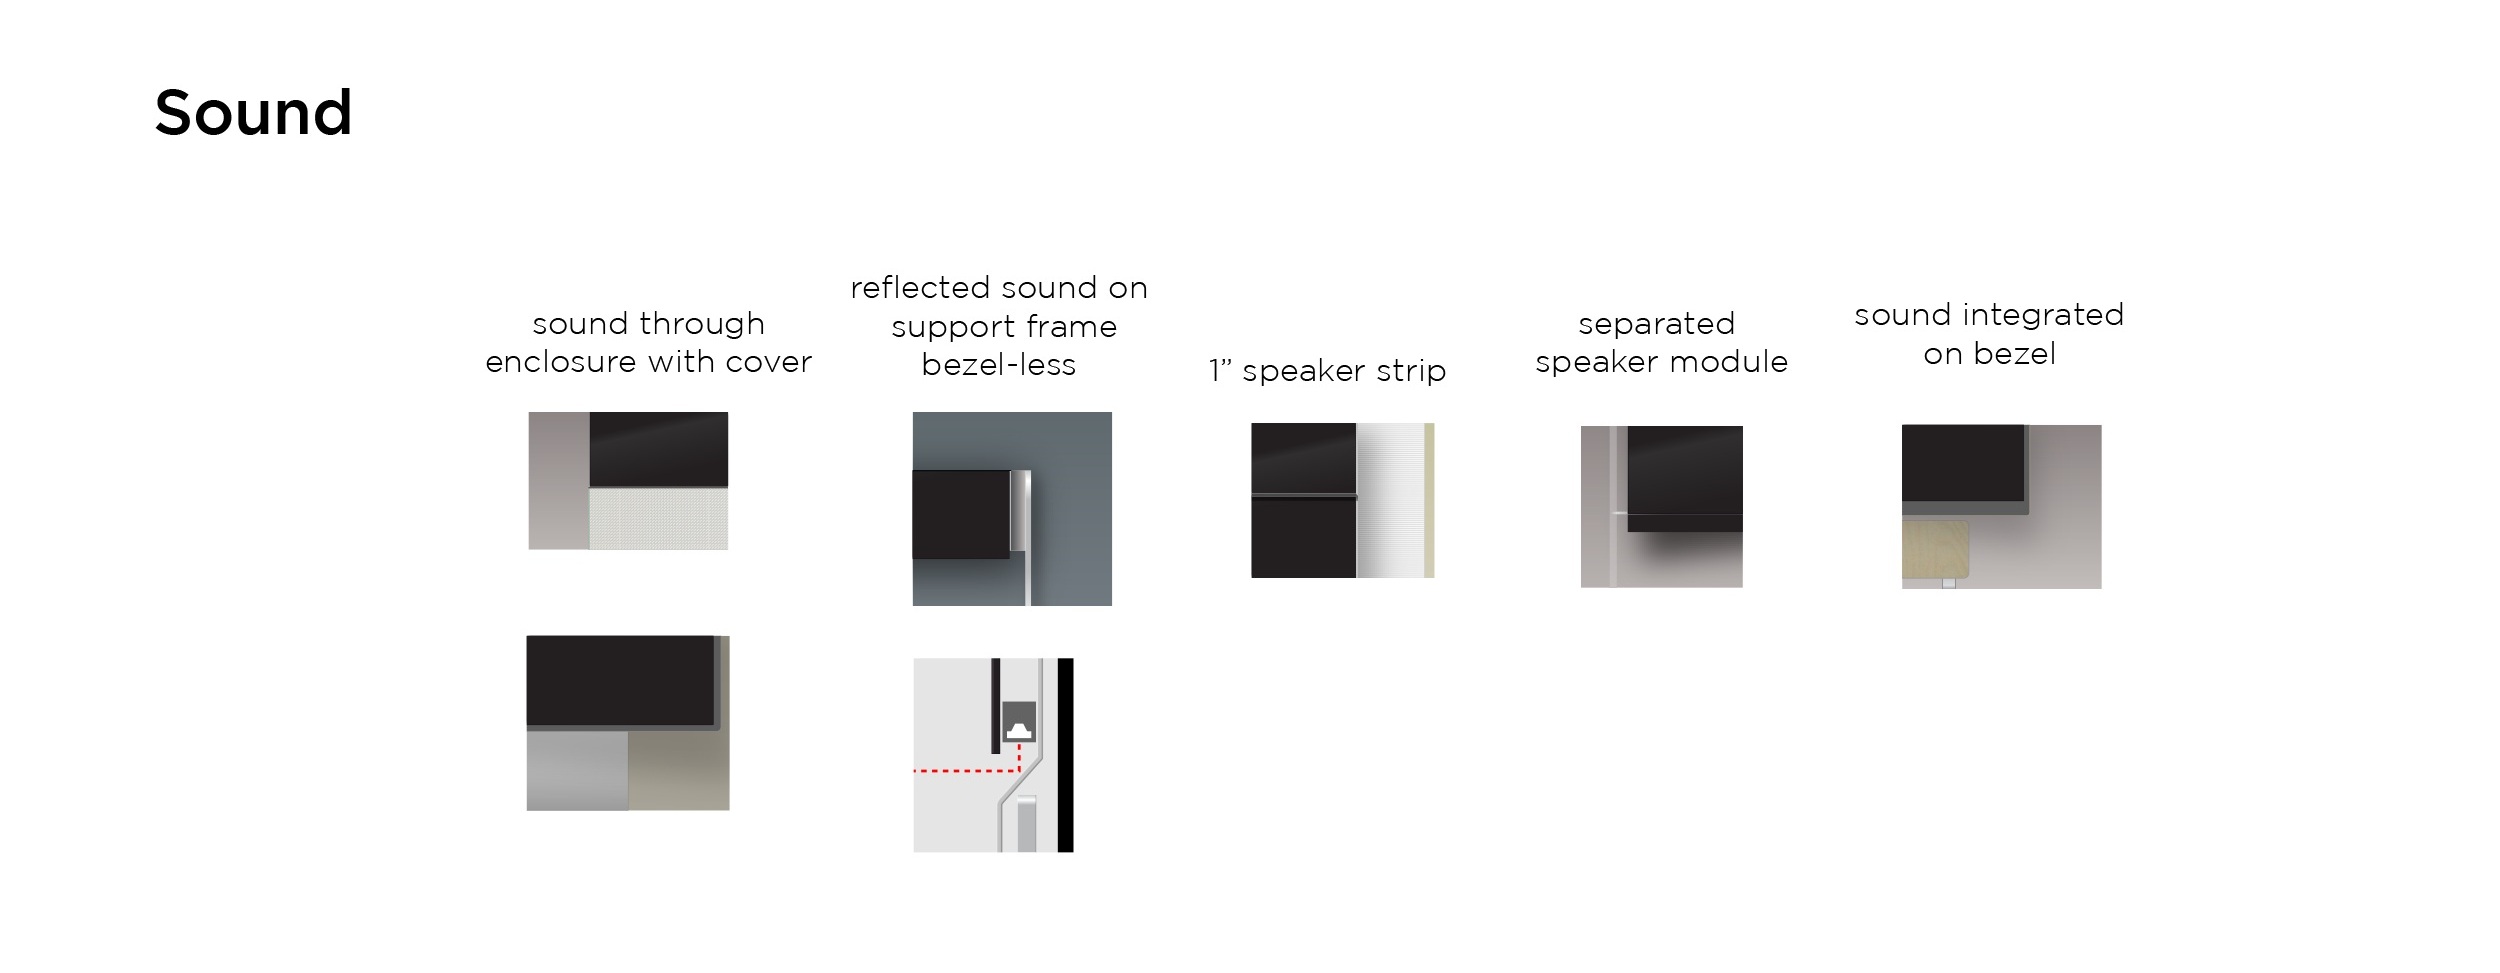
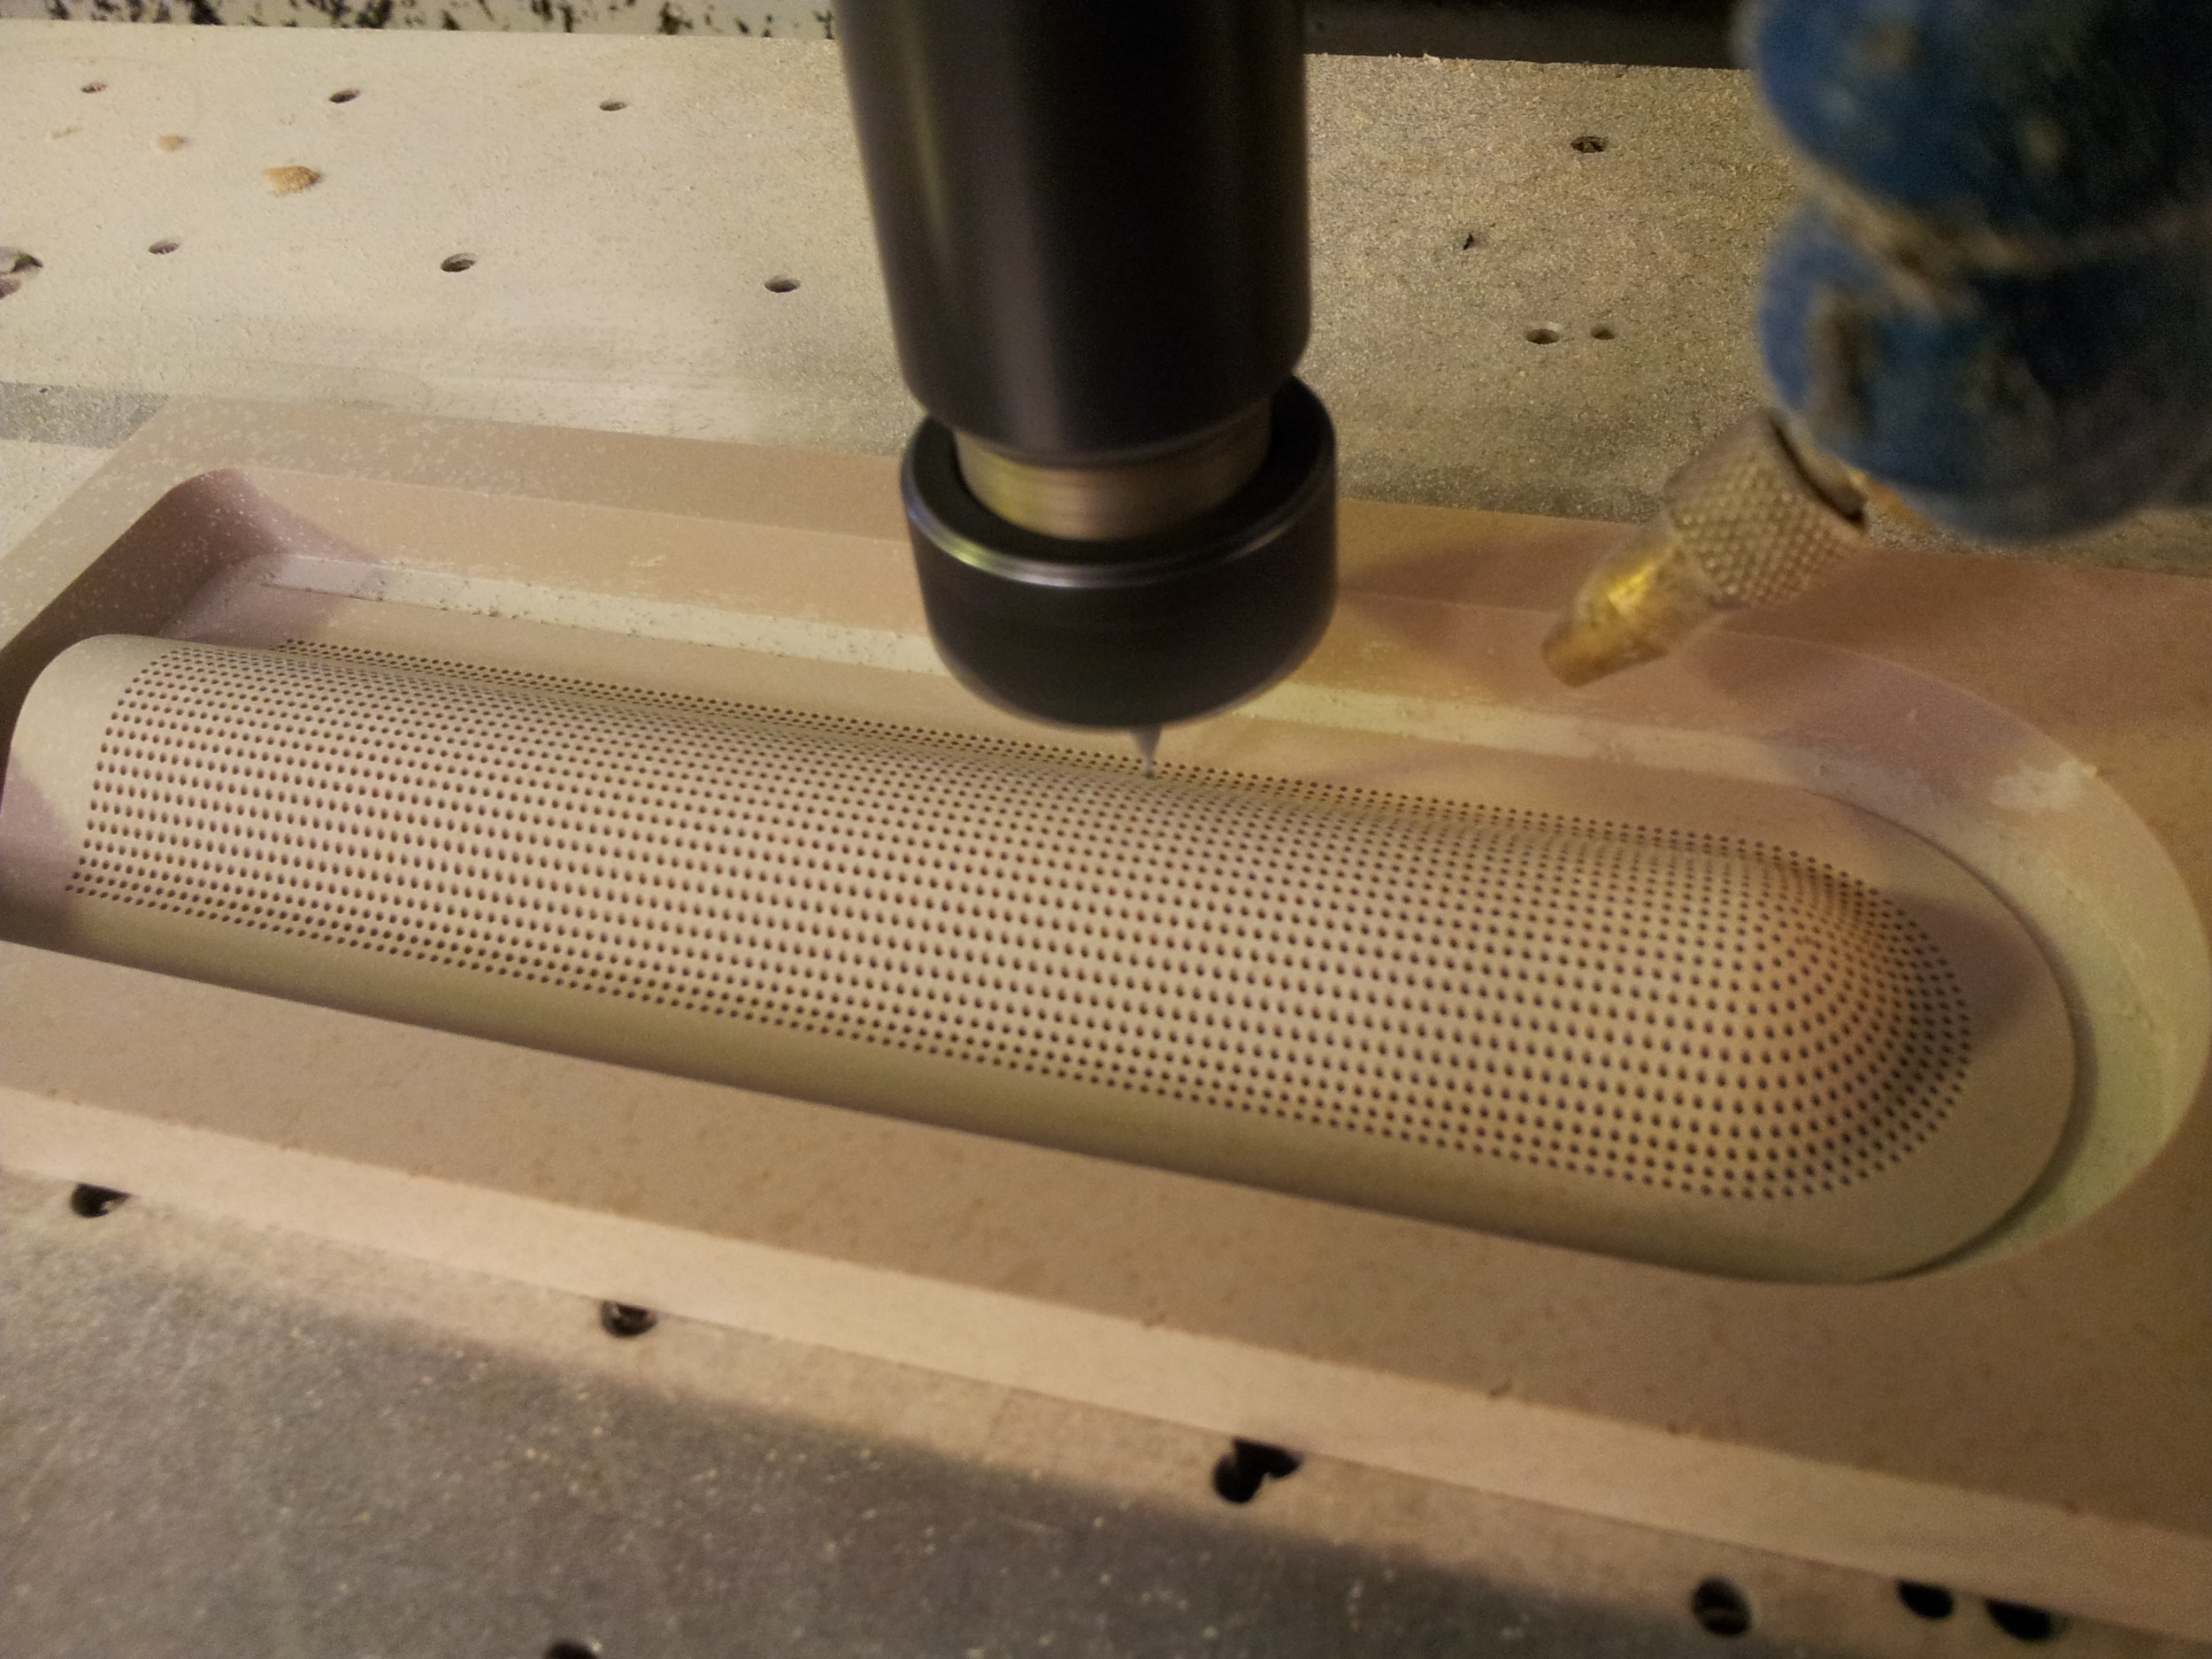
Thermal and Audio required perforations to meet requirements. A new, curved mic bar to address laptop shadowing challenged design to create an undisturbed pattern that looked natural and quiet.
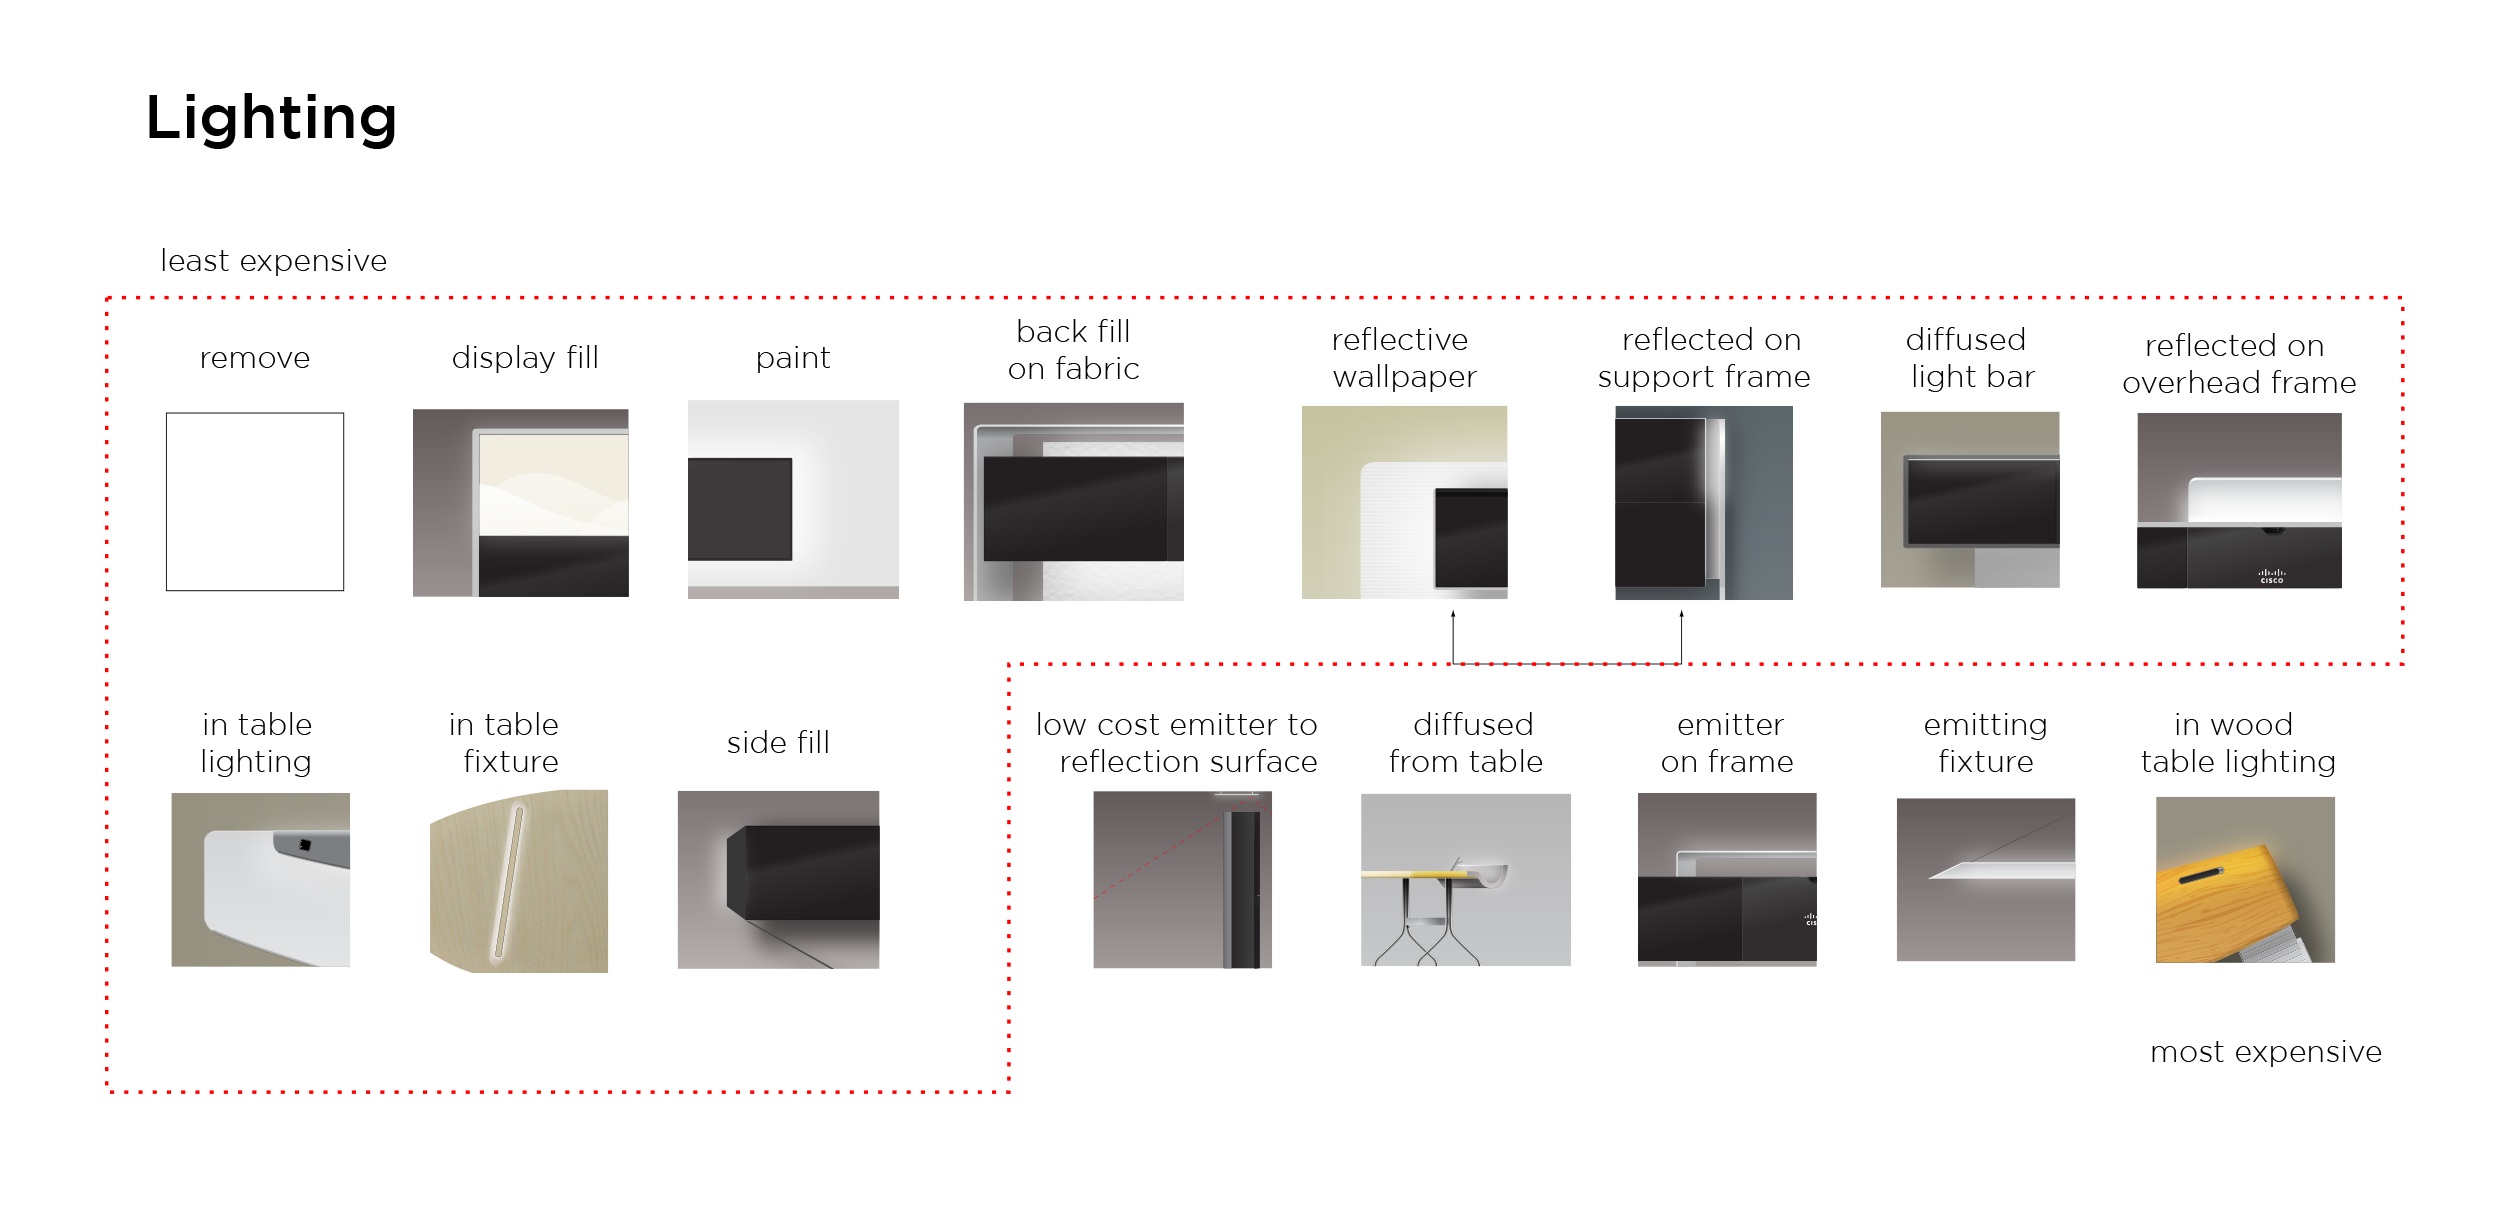
With the light panels, light need to appear under white fabric, while needing diffusion of the appearance of LEDs and speakers. A huge development challenge while addressing luminosity.
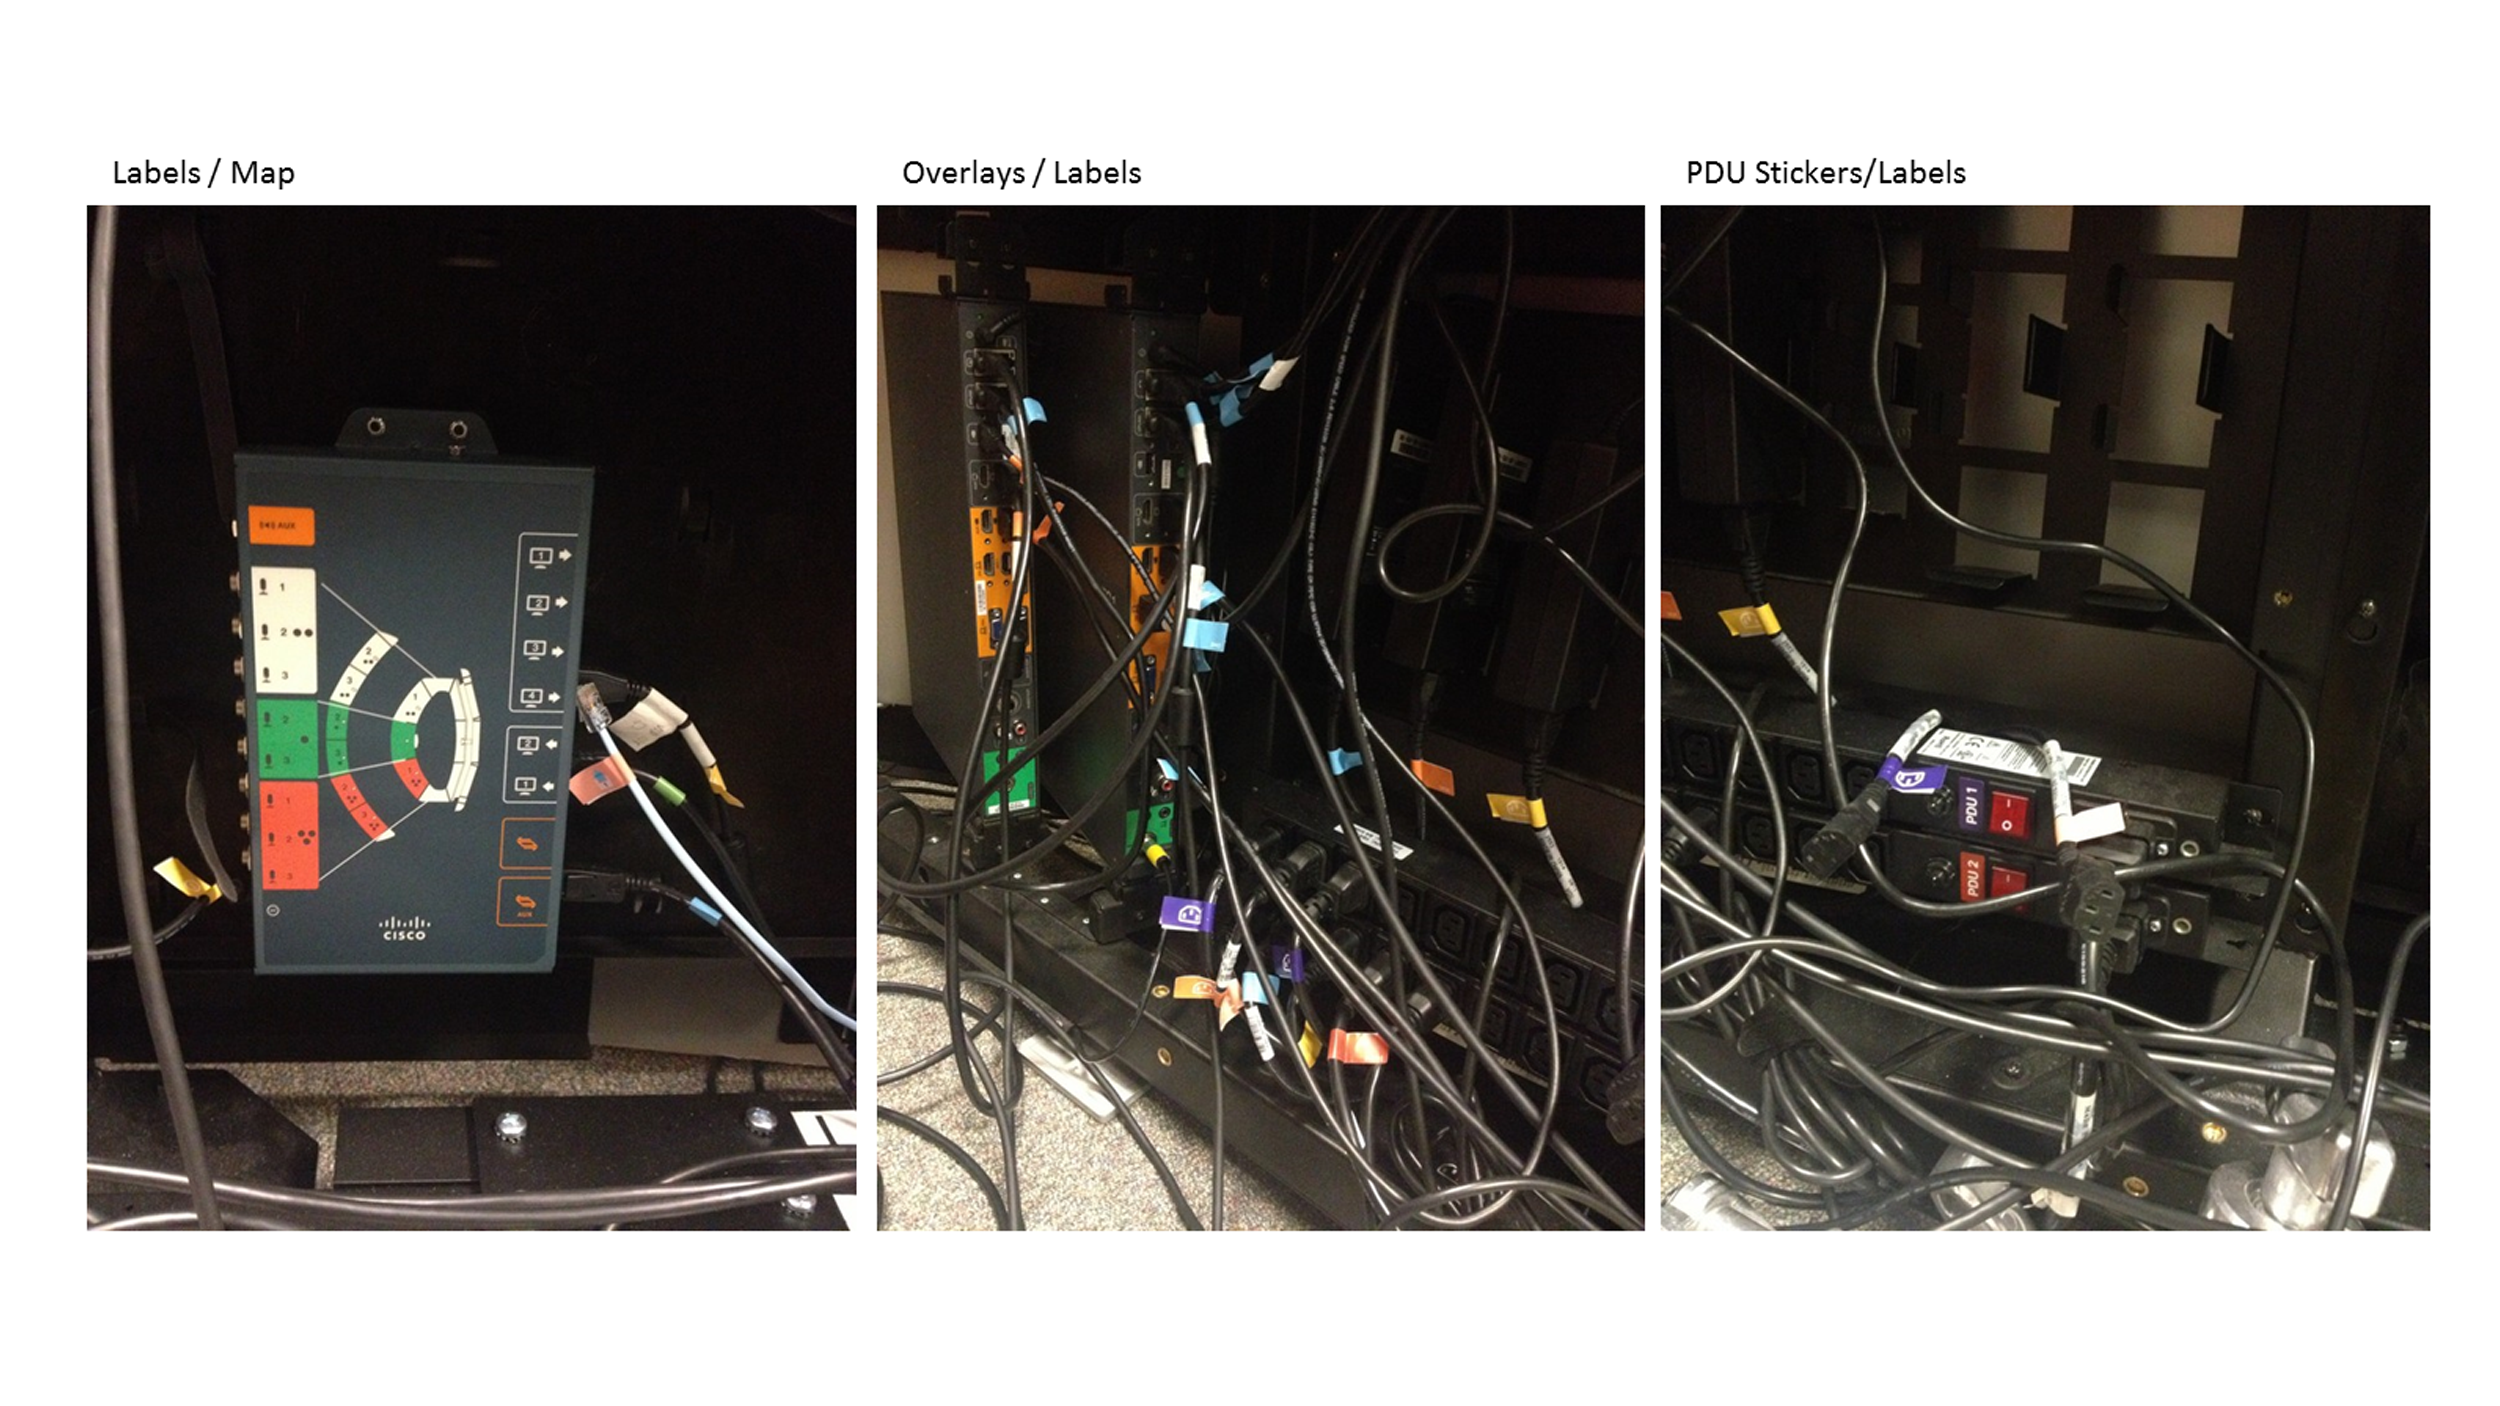
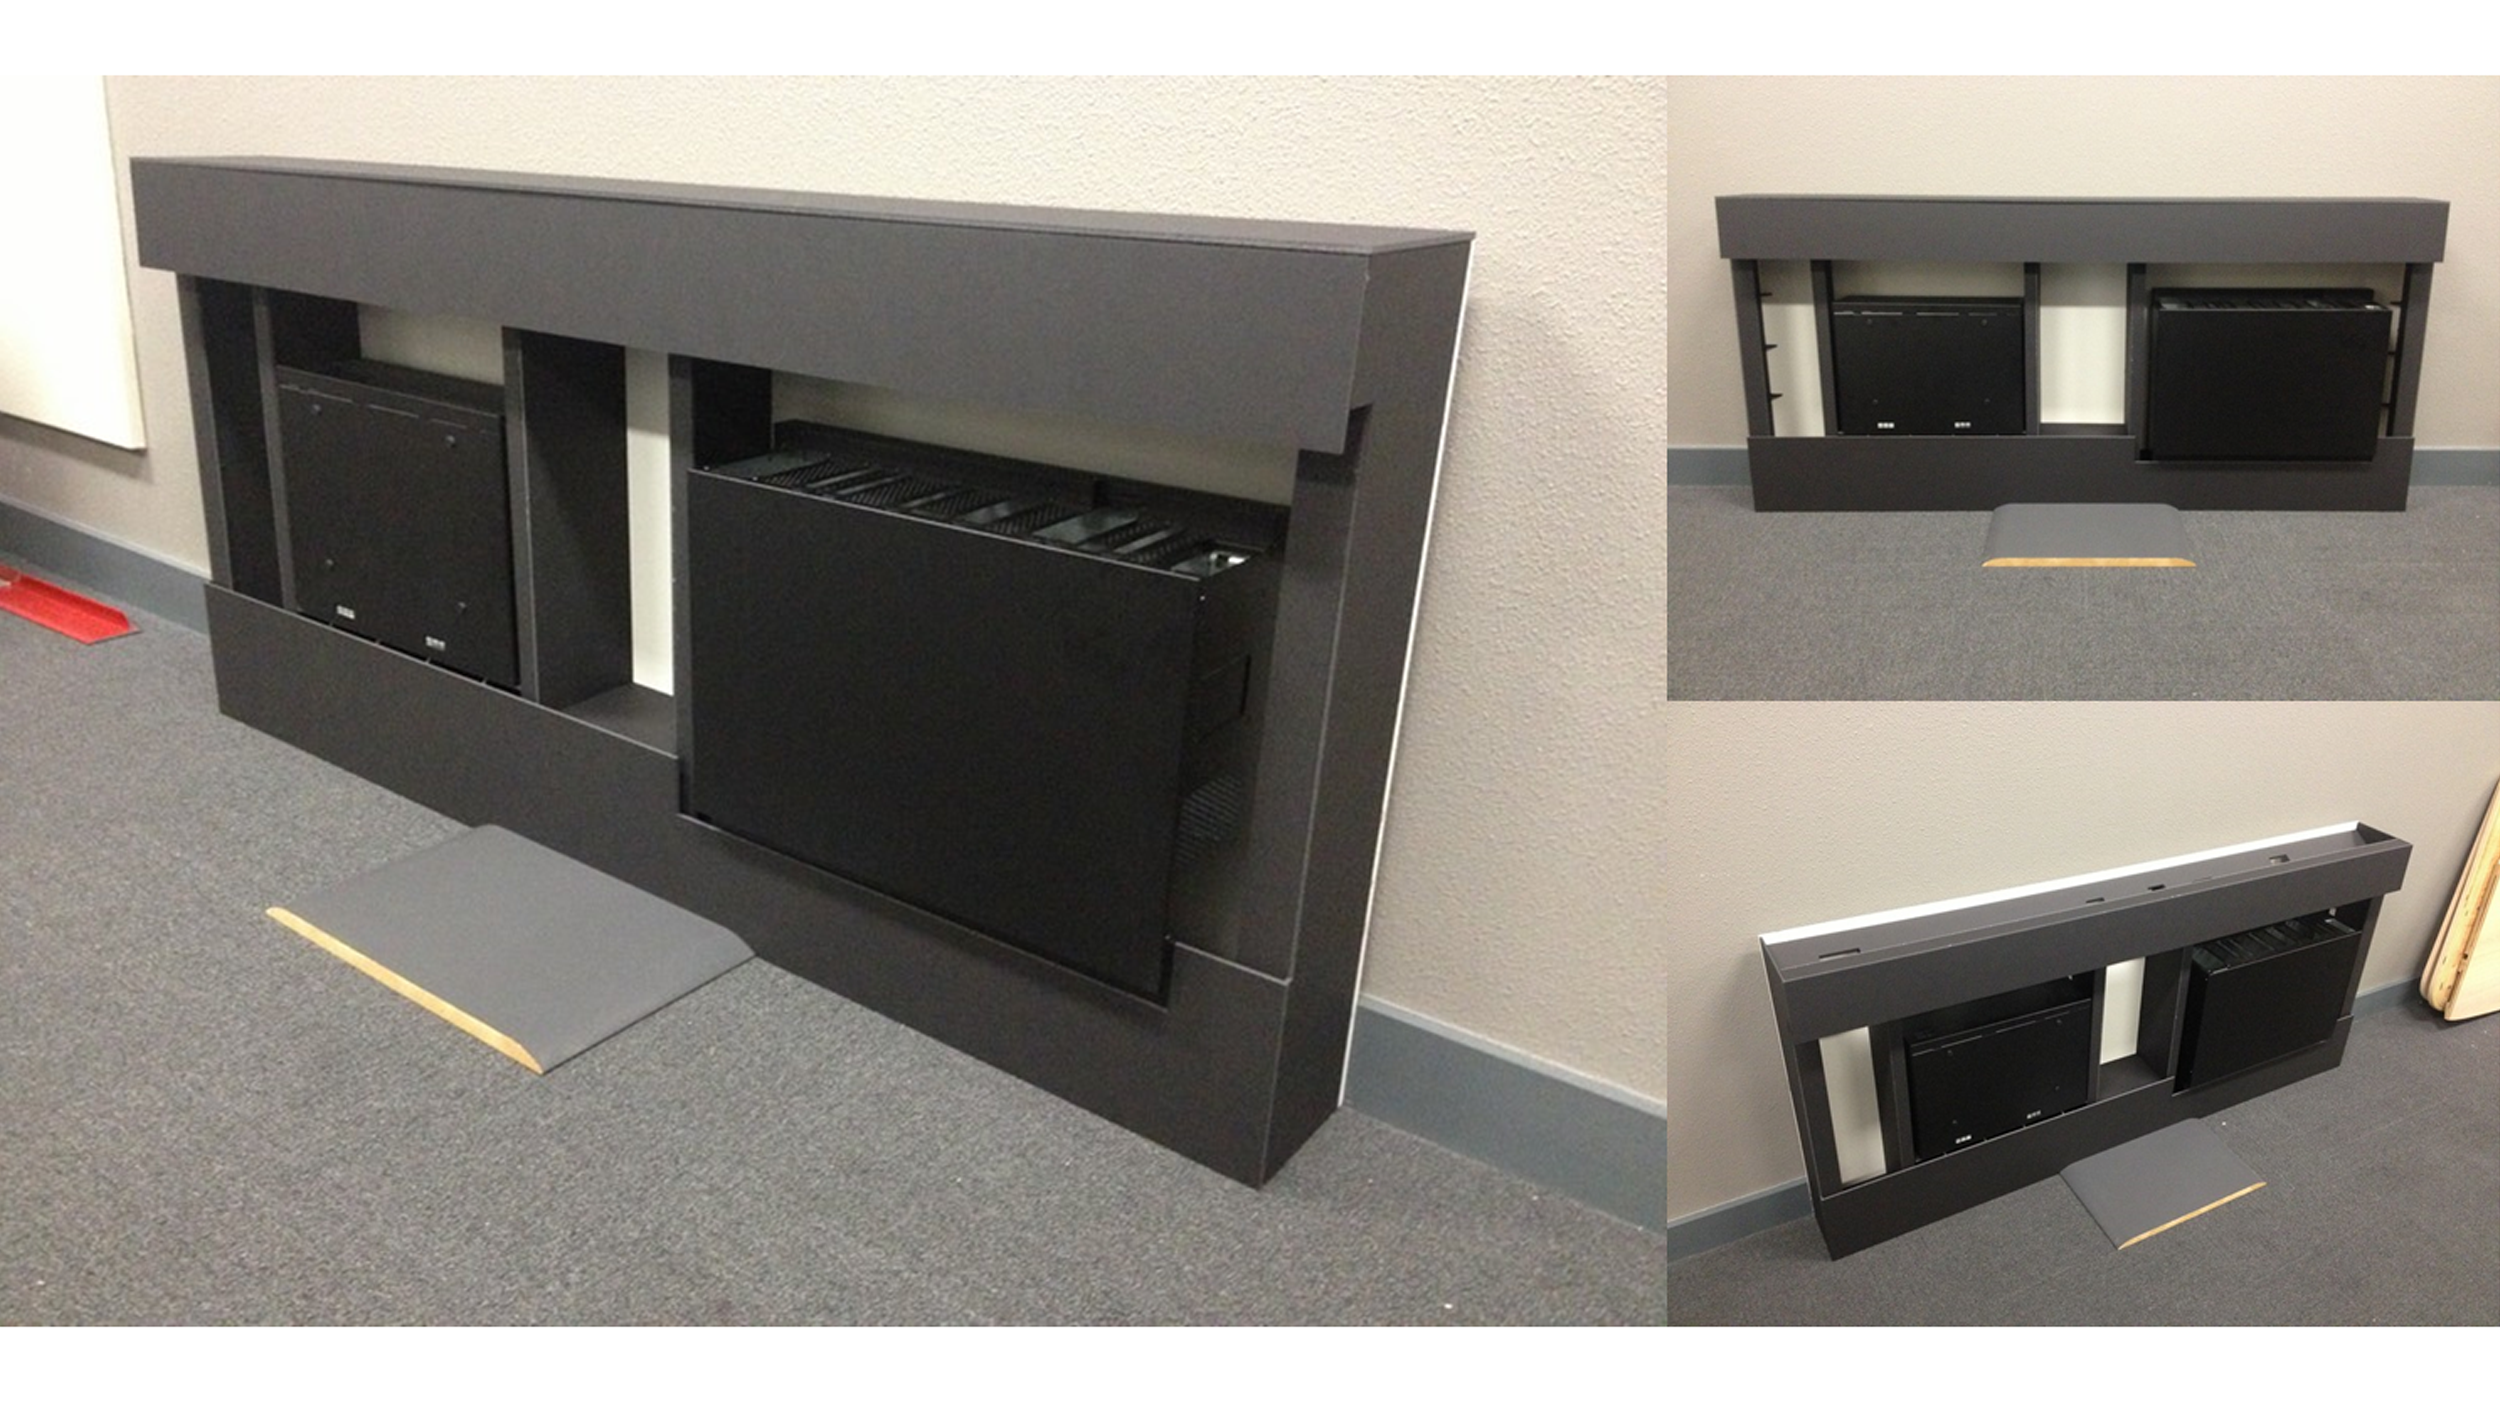
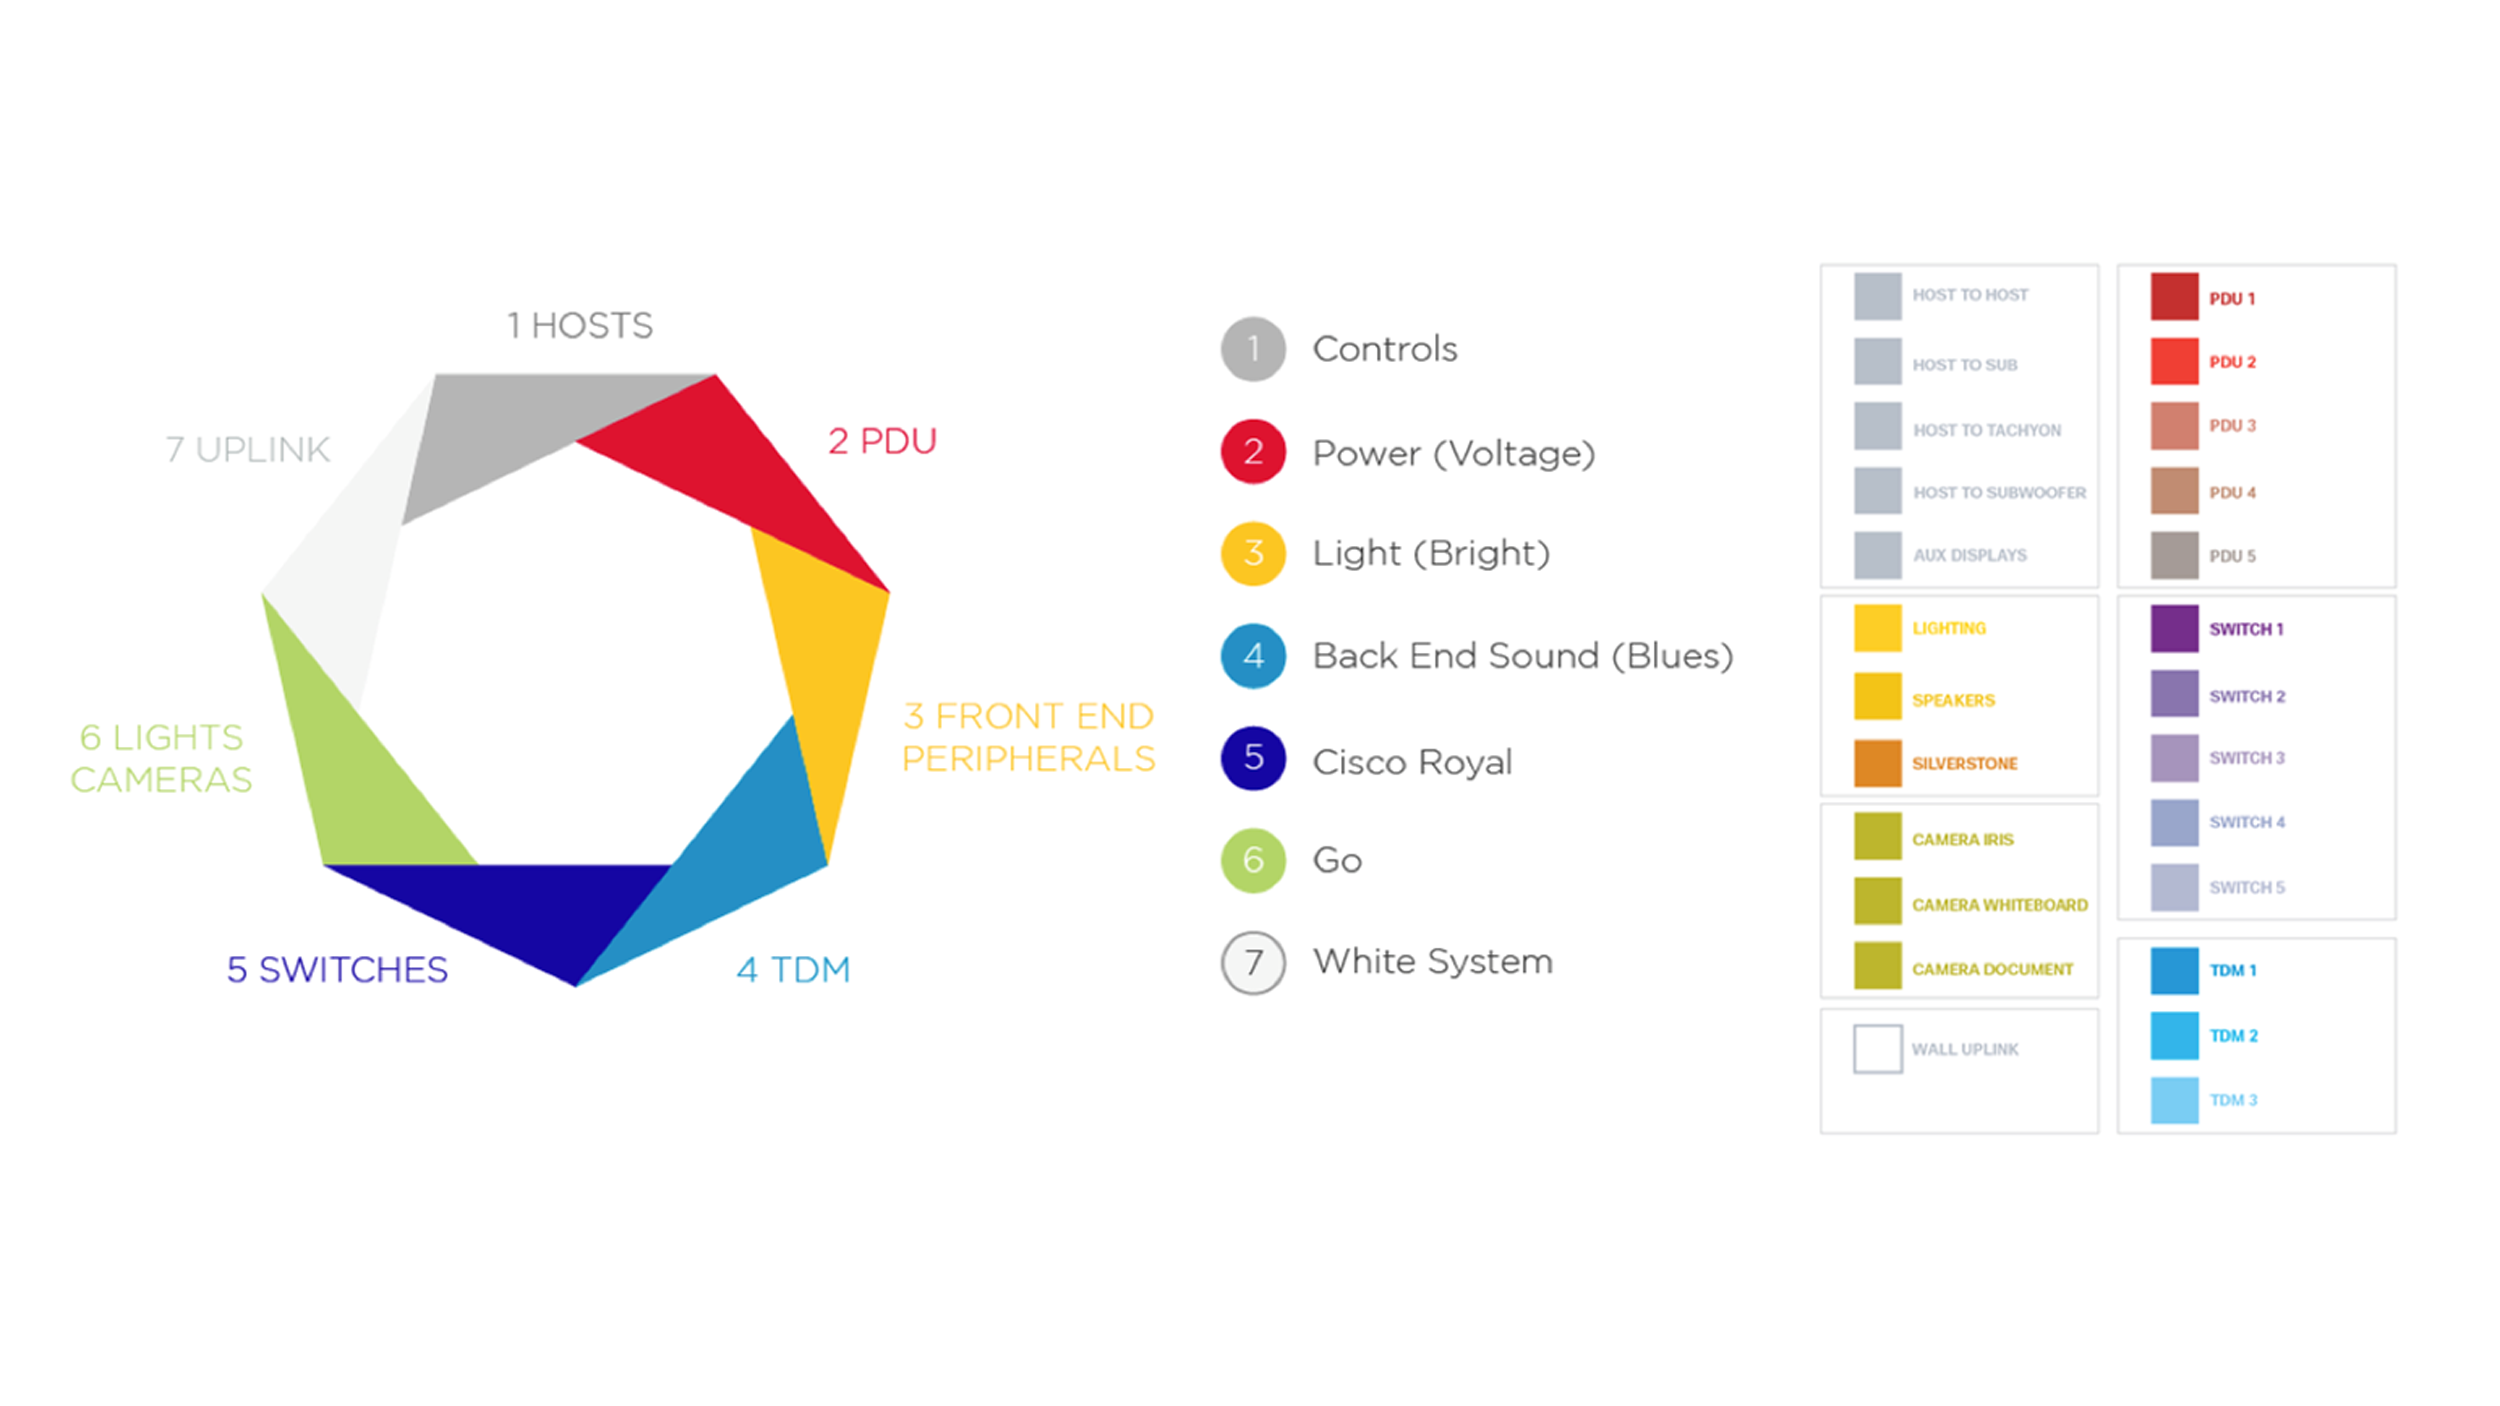
An internal labeling system made assembly easy and reduced time for installers.
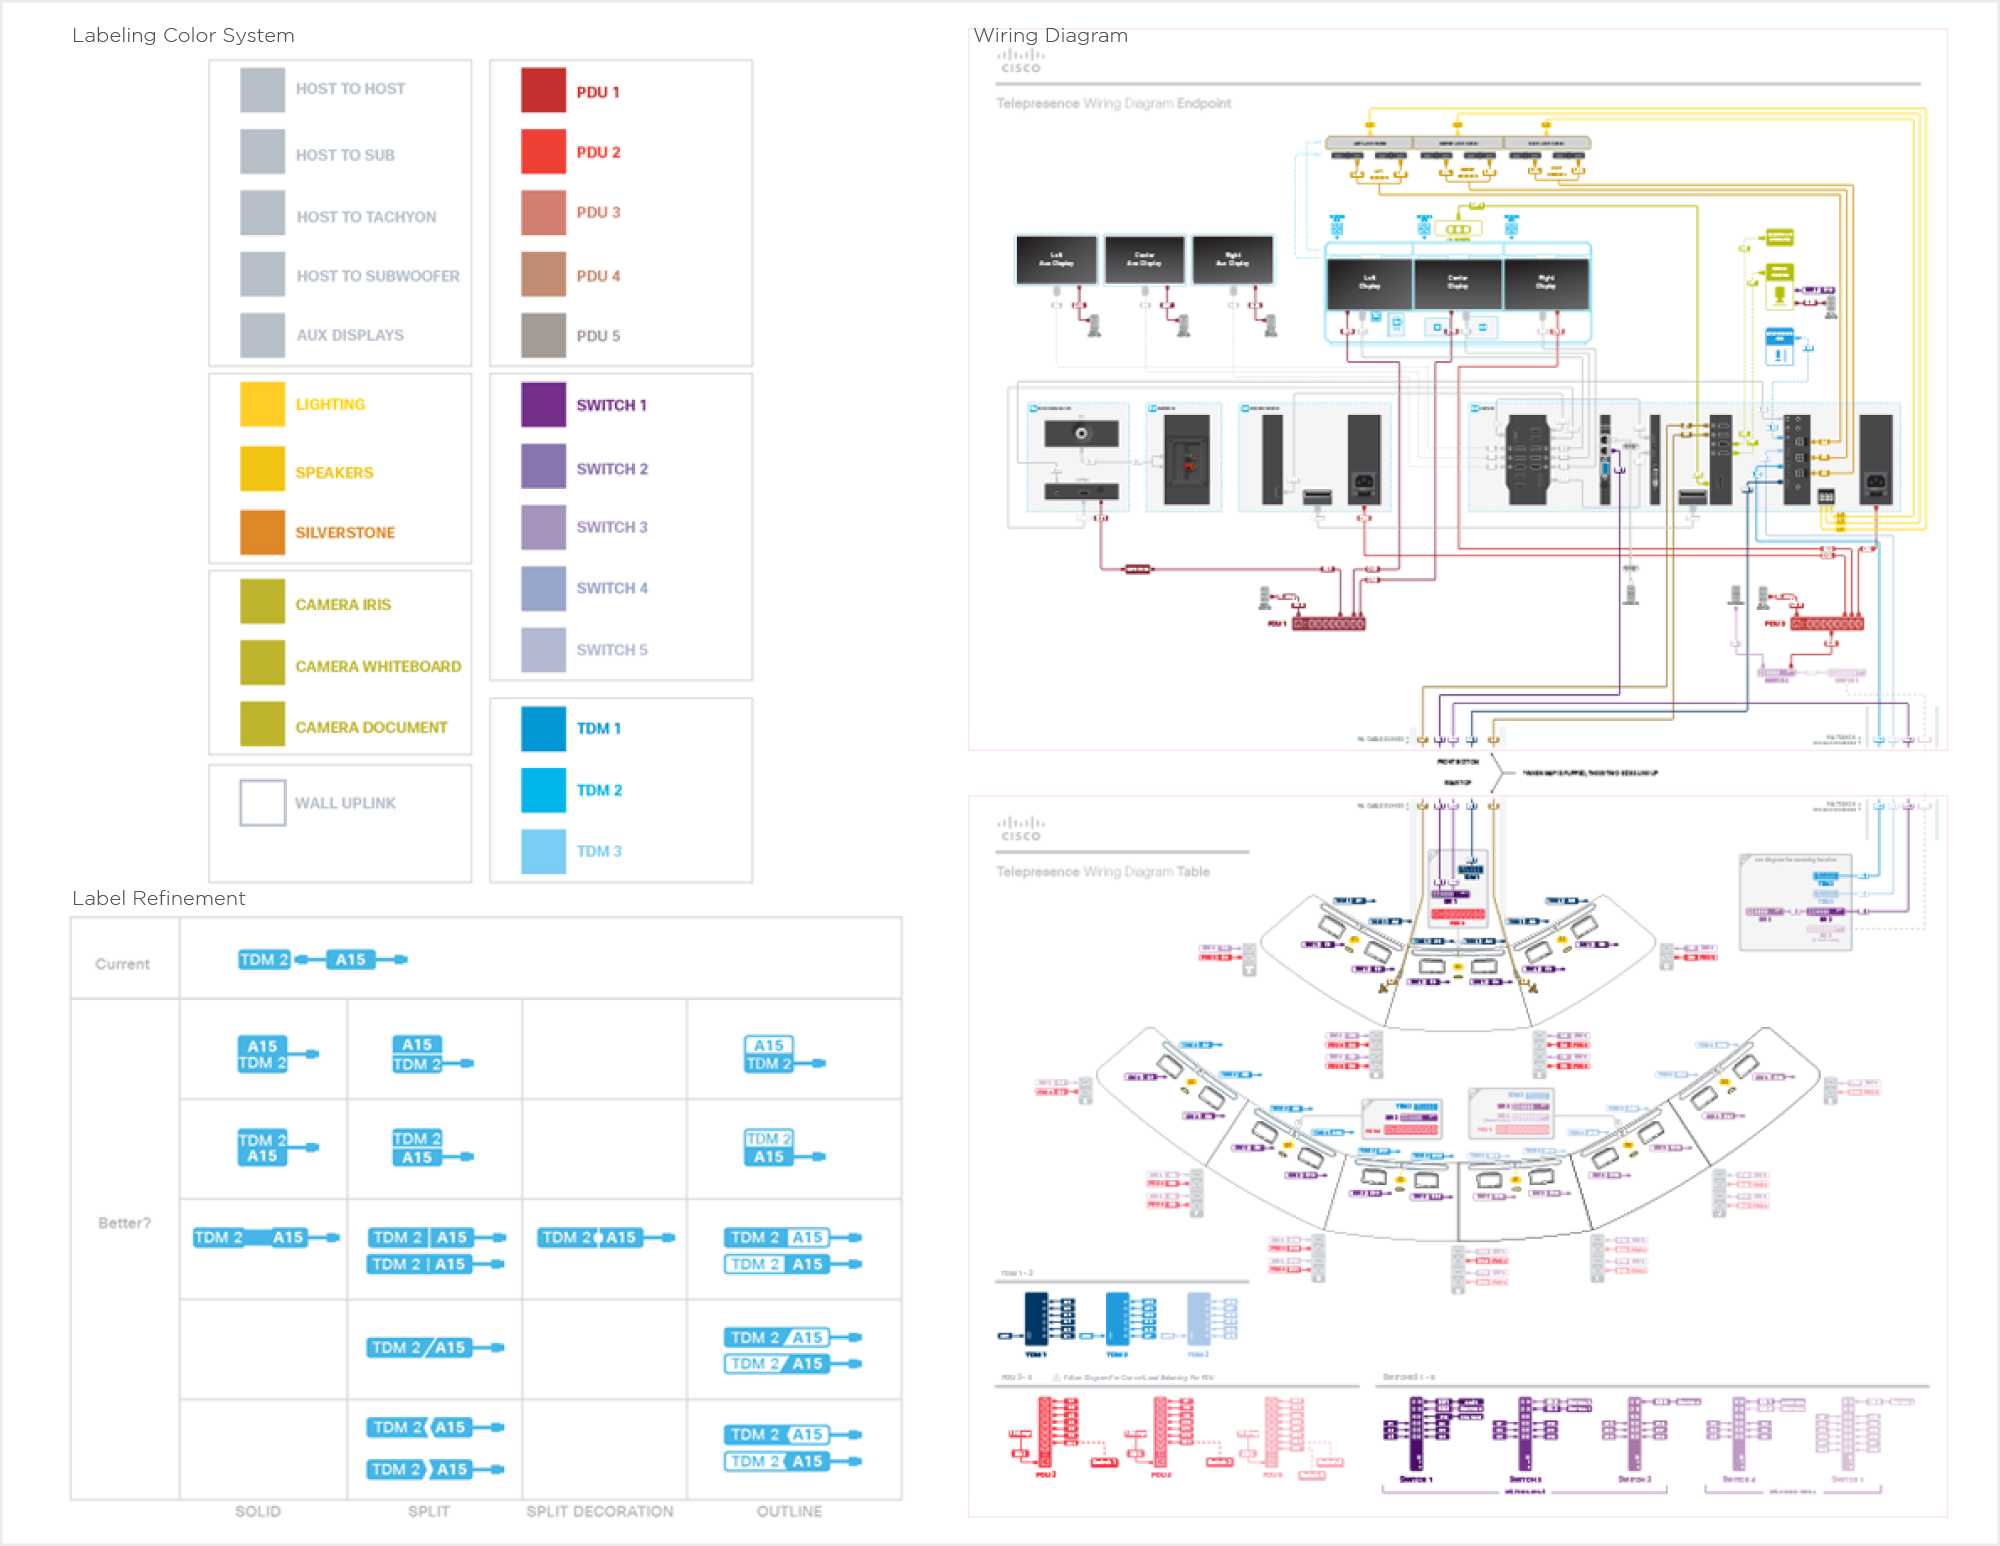
A labeling system indicated attachment locations. Labels were color coded based on a semantic system. Looking back, the hardest part was not creating the design but getting all stake holders convinced of the colors...
A large mylar installation map provided a visual guide for wiring set up. All paths are grouped by component type and colored for easy identification to make connecting clear and easy even in the dark.
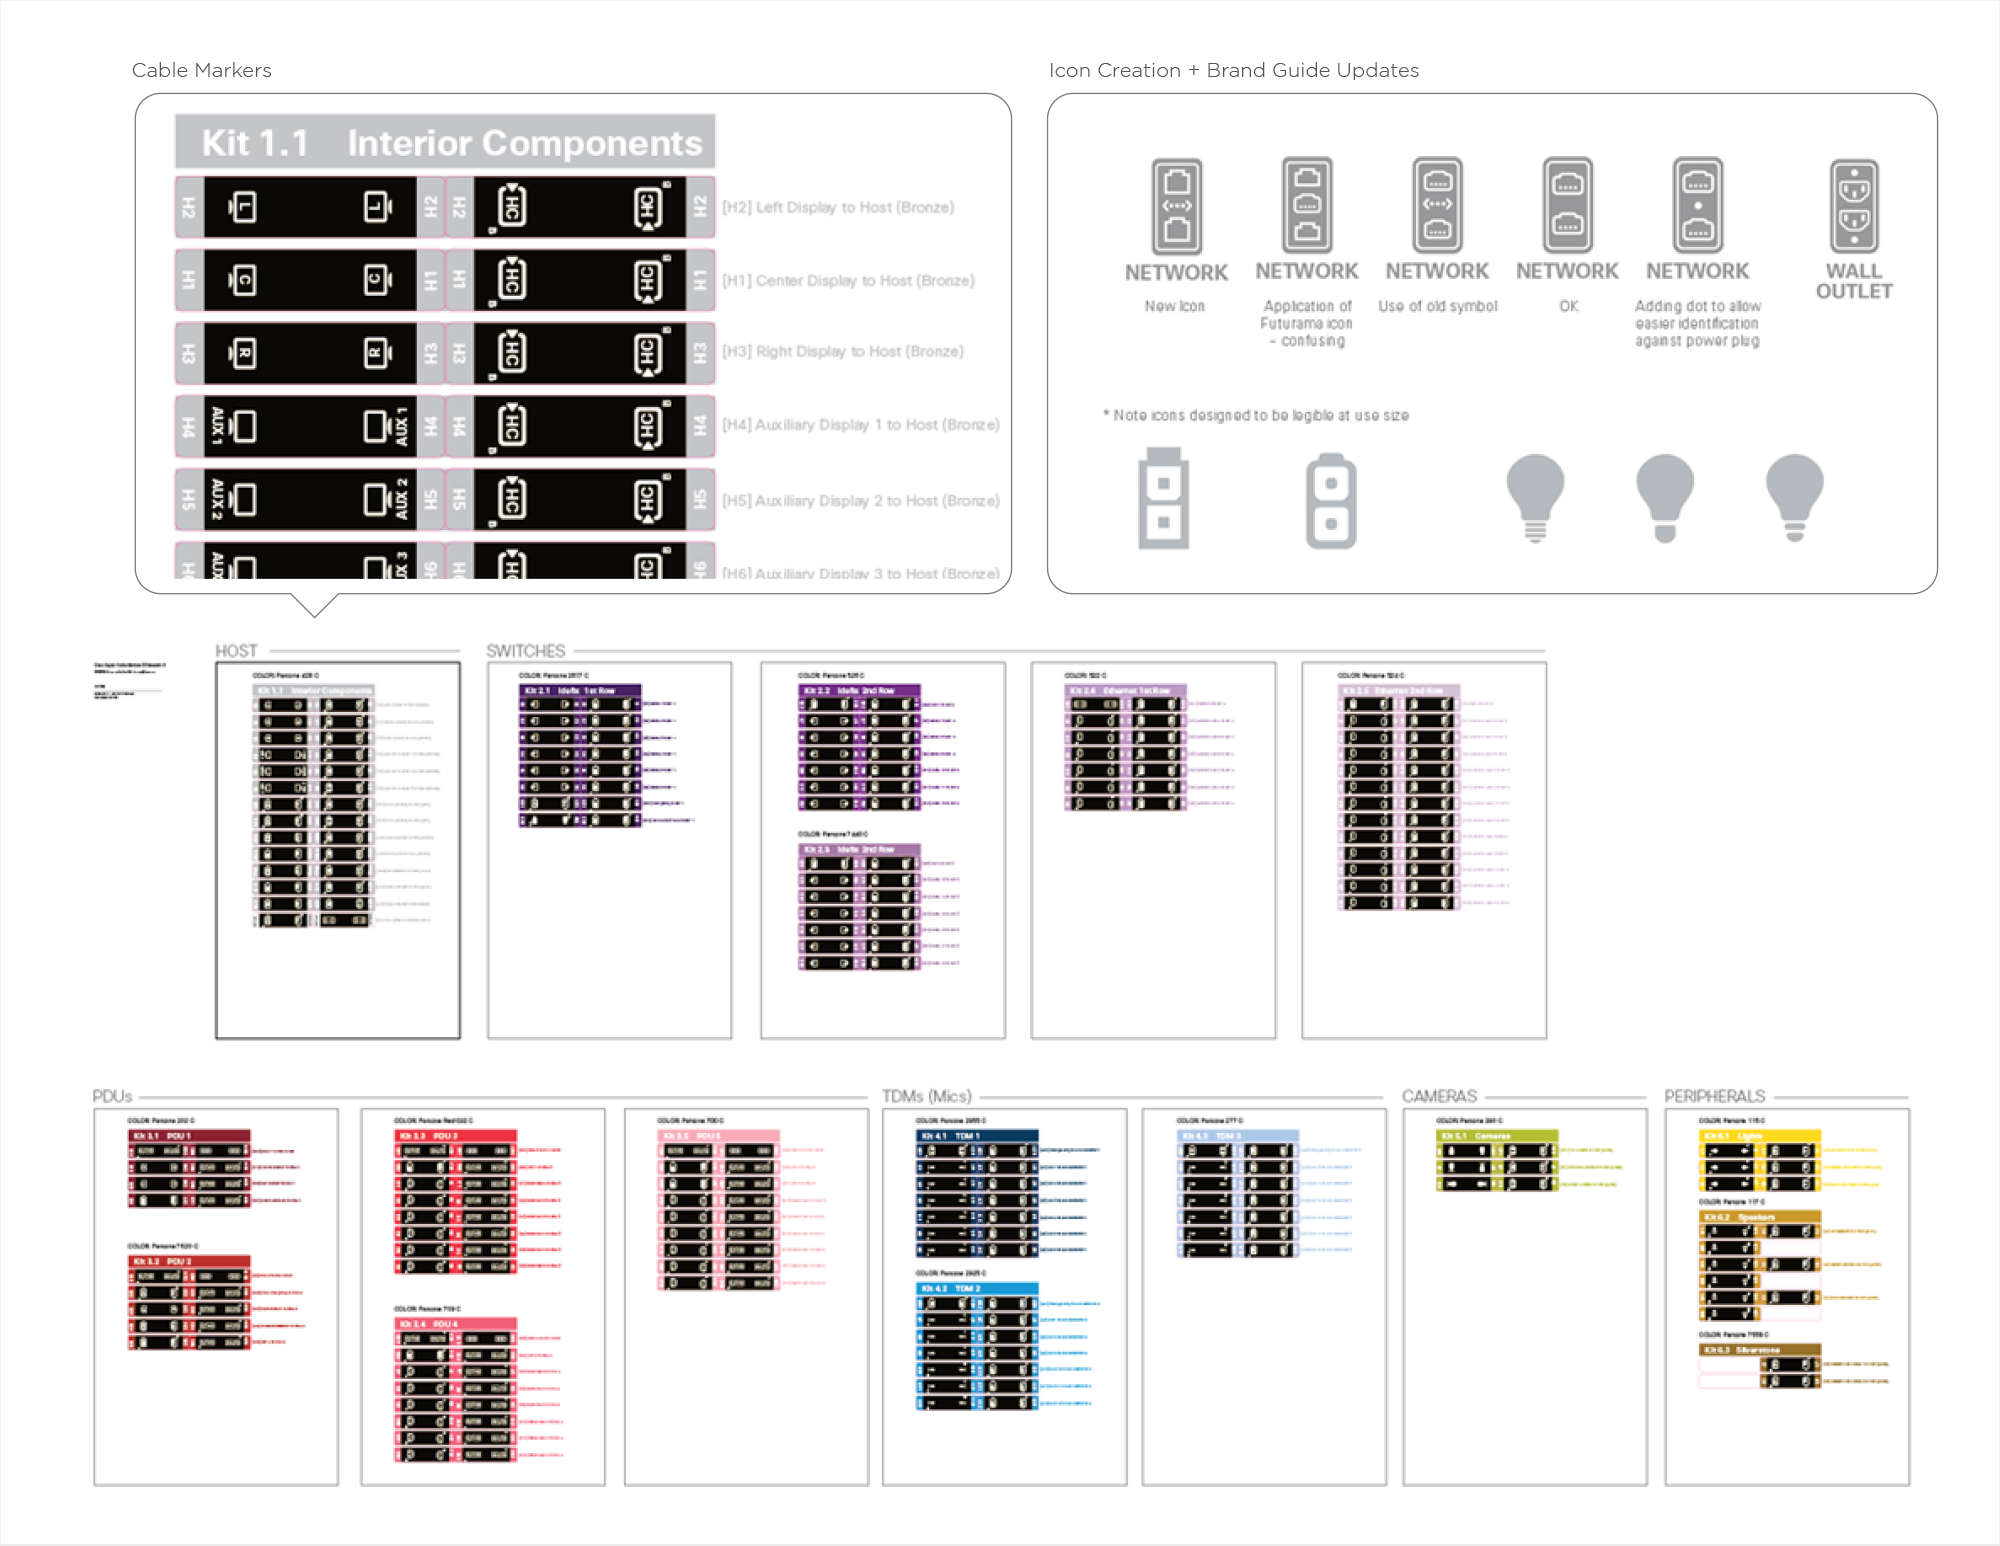
Custom icons were created to allow installers to match component connectors while directional labels on either end of cables made for quick and clear assembly.
To showcase various room scenarios, we utilized imagery, photos, and renders, which required managing talent and assets to ensure that everything was customer-worthy. Our efforts resulted in a final solution that reduced COGs by 50%, shortened installation time from two days to one, and generated the largest YoY increase for Cisco, revitalizing this entire segment.